 International
 Singapore
 Malaysia
 Thailand
 Vietnam
Your shopping cart is empty!
 V2 to V3 for RAK Concentrator")
Migrating TTN (The Things Stack) V2 to V3 for RAK Concentrator
- Hairil Mutalib
- 22 Jul 2022
- 1037
Disclaimer:
This guide is provided for information and as it is. Cytron Technologies will not be responsible for any damage or data lost during the installation process. Do back up your microSD card if you have any concerns.
Hardware:
- Raspberry Pi 3 Model B+
- 12.5W Power Adapter micro B USB cable
- 32GB MakerDisk MicroSD Preloaded with Raspberry Pi OS
- USB microSD card Reader/Writer
- RAK LoRa Gateway HAT for Raspberry Pi - 915 MHz

Since January 2021, The Things Network V2 software has been upgraded to The Things Stack Community Edition. This upgrade comes with a set of brand-new features, out-of-the-box integrations, extended coverage, and improved user experience. The Things Stack Community Edition is one of the distributions of The Things Stack, a third version (V3) of the LoRaWAN Network Server that is developed and actively maintained by The Things Industries.
Note: The Things Network V2 will no longer be actively maintained and all V2 machines will be shut down by the end of 2021. If you have been using The Things Network V2 previously, you will need to migrate your gateways and devices to The Things Stack Community Edition. More information about the announcement can be referred here.
The Things Stack, compared to The Things Network V2, is more scalable, more secure and supports all the latest LoRaWAN developments like the latest LoRaWAN versions 1.1 and 1.0.4. The Things Stack architecture is based on microservices which allows for better distribution of services, better scaling, and interoperability with other LoRaWAN networks. The Things Stack supports all LoRaWAN classes (A, B, C) and multicast device groups, all existing LoRaWAN versions (including v1.0.4 and v1.1), and all regional parameters as defined by the LoRa Alliance. By being standards compliant, The Things Stack supports passive roaming and will support handover roaming in the future. Firmware updates over the air, advanced clustering, and load balancing techniques also come along with this upgrade.
The advanced APIs offer gRPC, HTTP, and MQTT integrations. For debugging purposes, there are API-based event streams that can help you trace issues, monitor device behavior, and get useful alerts. Data Formats used by The Things Stack have a different schema and have much richer metadata support. For storing data, a Storage Integration is also available.
Note: For anyone that is new to LoRa world and just create an account for The Things Stack V3, you can also follow this tutorial. Just skip any steps that are related to TTN V2 and the result will be the same!
I ran the gateway on a Raspberry Pi 3 Model B+ with Debian Bulleyes (release date on 30th October 2021) but it should work on all types of OS versions.
Step 1: The Things Stack V3 Setup
Sign up to register a new account for The Things Stack V3, or you can just log in using your old account (The Things Network V2) here.
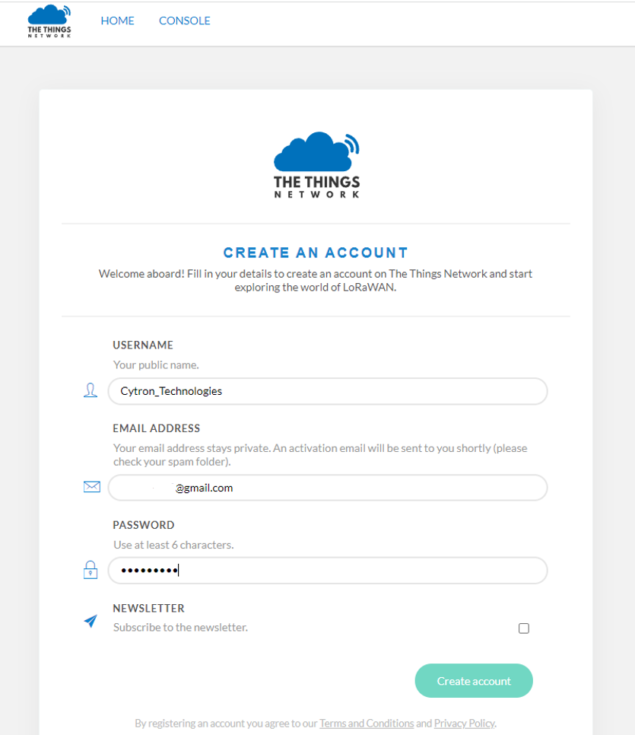
Fill in your Username, Email address, Password, and click create account.
Go to TTN V3 console. Select a cluster based on YOUR region to start adding devices and gateways. In my case, I will choose Australia 1 since I am located in the Asia region.
Register a new gateway and fill in the required information. For the Gateway ID, use the same Gateway ID from your gateway in the TTN V2 to restore it. You can fill in anything for the gateway name and gateway description.
For Gateway EUI, you can get it from your Raspberry Pi MAC address. Since the MAC address has 12 characters and the gateway EUI requires 16 characters, you can add FF FE characters in the middle of the MAC address.
For example, if the MAC address is A1 B2 C3 D4 E5 F6, the gateway EUI should be A1 B2 C3 FF FE D4 E5 F6.

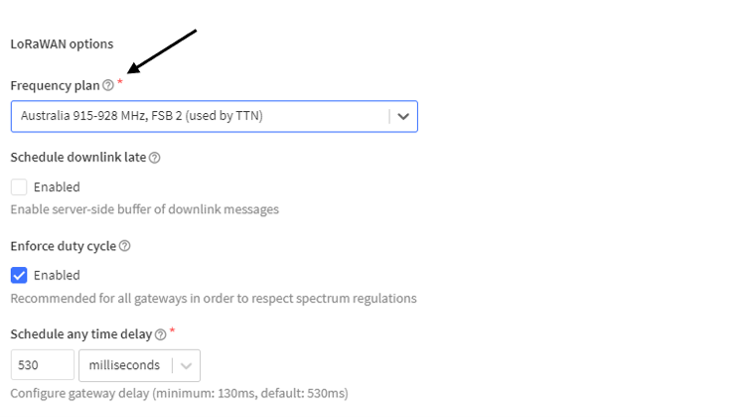
Choose the frequency plan based on YOUR region and click create gateway.
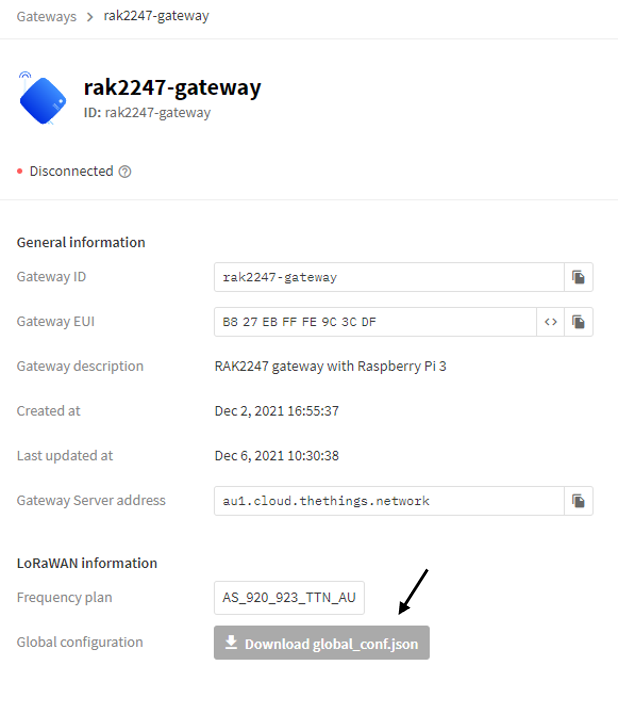
Click on the gateway that you have created and you can see all the details about the gateway.
Download the global_conf.json file. Open it with a text editor. Make sure you download the global_conf.json after you have inserted the Gateway EUI.
Done for the TTS V3 part.
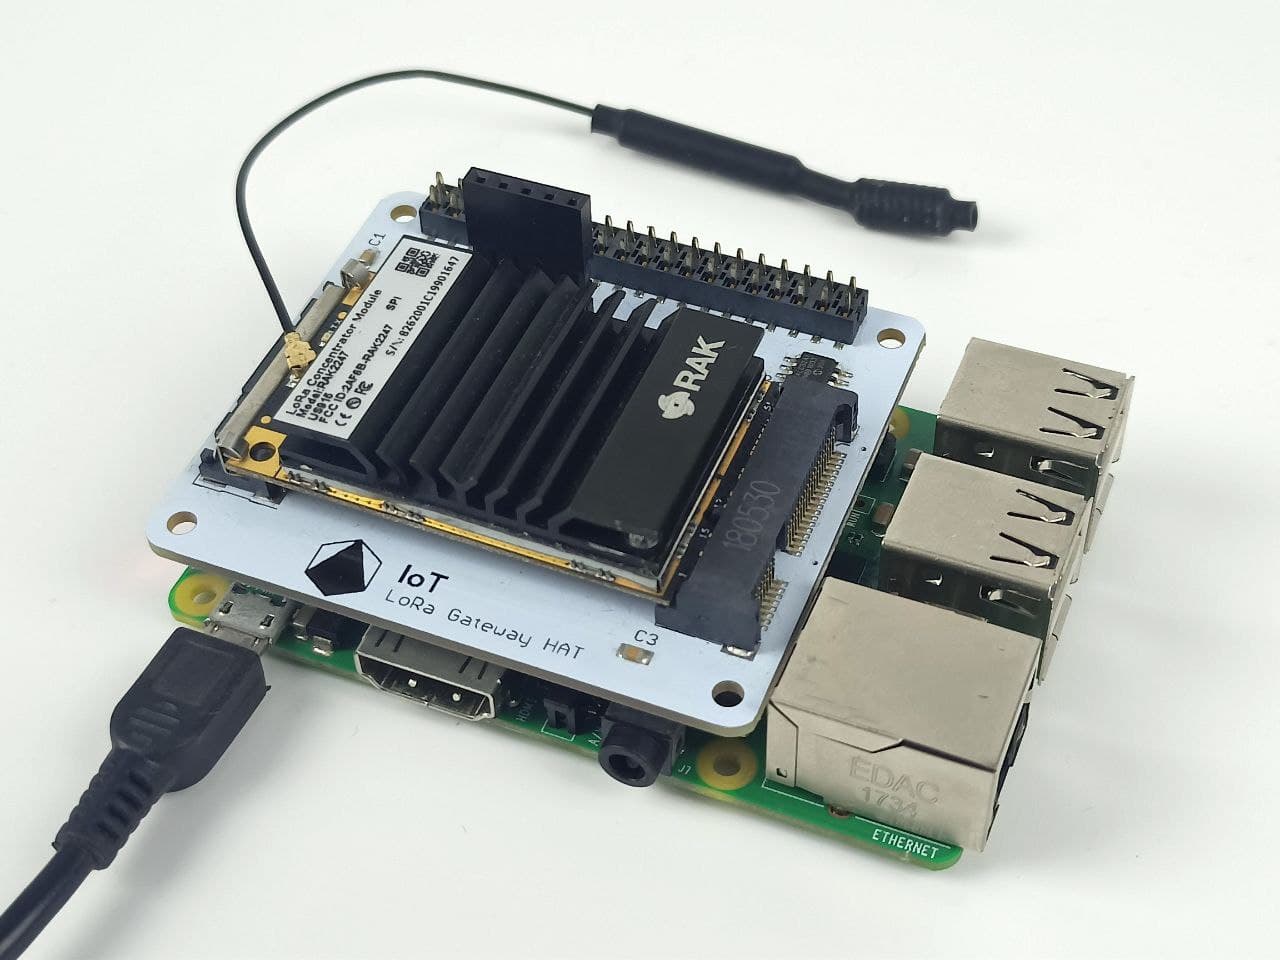
Step 2: Hardware Setup
Attach LoRa Concentrator Module (RAK2247) to the Raspberry Pi board. Recommend using Raspberry Pi 3B or 3B+ as it does not need the powerful processing power of the Raspberry Pi 4B, and of course, Raspberry Pi 4B will generate more heat as it is more powerful. Yet, the setup should be compatible with Raspberry Pi 4B.
ALWAYS remember to attach an antenna to the gateway before powering ON the Raspberry Pi.
Connect Raspberry Pi to Ethernet or WiFi.
Step 3: Installation Procedure
Download and install the latest Raspberry Pi OS into the SD Card.
Insert the SD card into the Raspberry Pi board, attach the mouse, keyboard, and monitor before powering ON the Raspberry Pi.
I used the terminal remotely from my laptop. To do that, enable SSH interface in Preferences > Raspberry Pi Configuration. Then, open the terminal and search for the IP address of your Raspberry Pi. Use this command.
ifconfig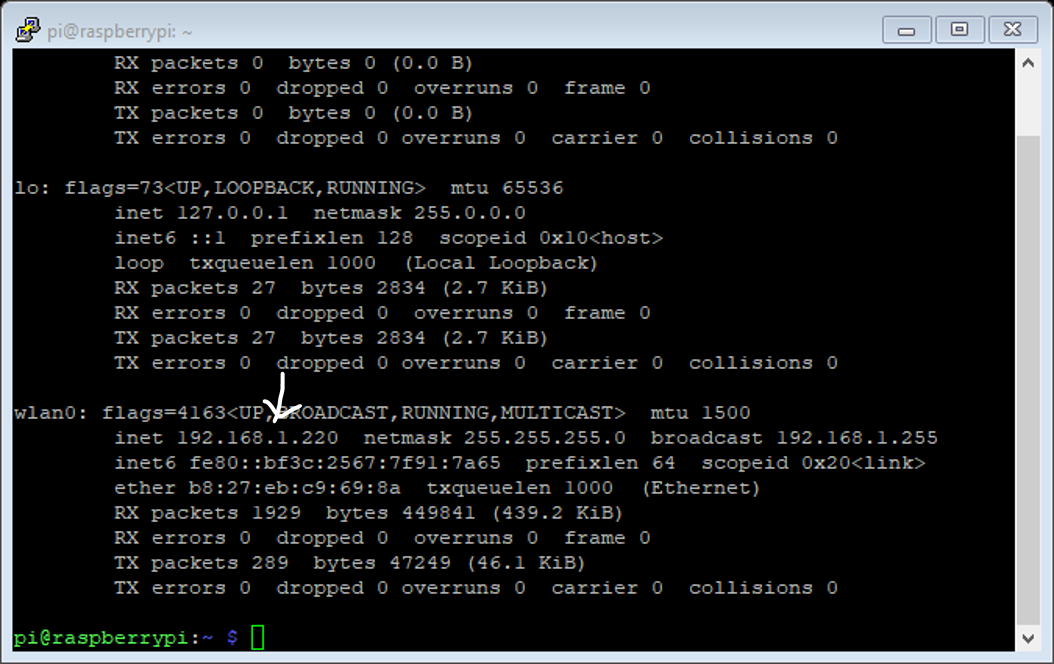
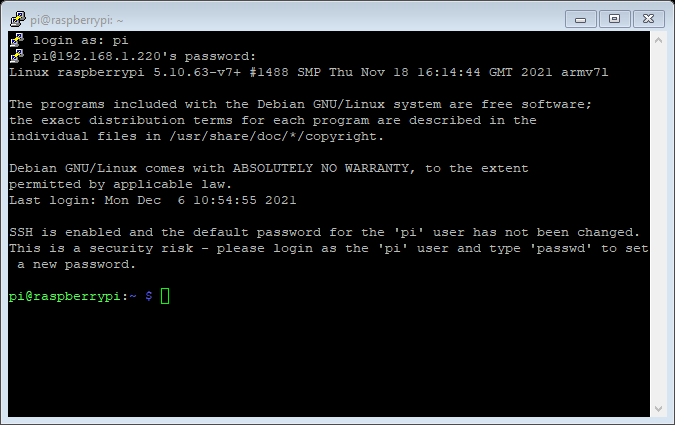
Download PuTTY software. Insert the IP address and you can control the terminal remotely.
Open the terminal and modify the Raspberry Pi configuration using the command below.
$ sudo raspi-config
Choose Interface Options.
Enable SPI and I2C interface. (P4 & P5)
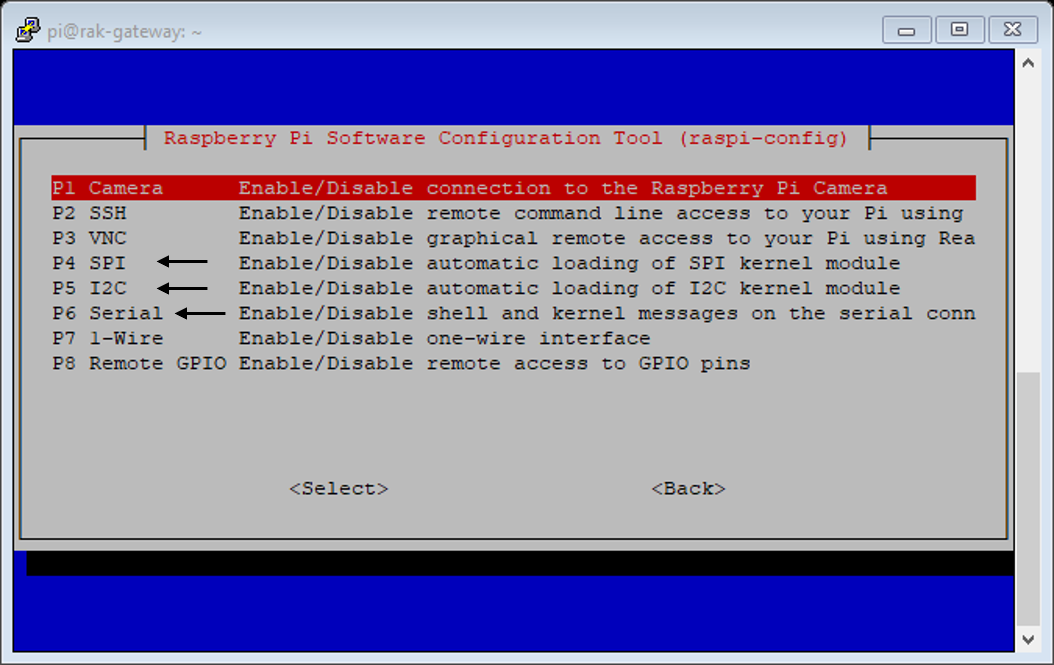
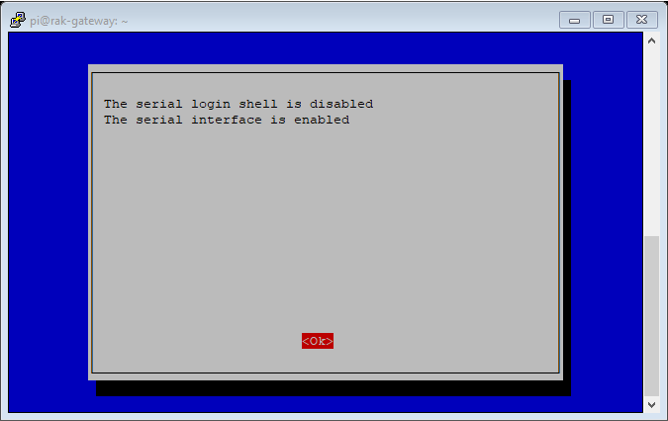
Open Serial (P6), disable login shell over serial, and enable serial port hardware. Then, reboot your Raspberry Pi.
Clone the installer and start the installation.
$ sudo apt update$ sudo apt install git -y$ git clone https://github.com/RAKWireless/rak_common_for_gateway.git ~/rak_common_for_gateway$ cd ~/rak_common_for_gateway$ sudo ./install.sh
Next, you will see some messages as follow.
Please select your gateway model: * 1.RAK2245
* 2.RAK7243/RAK7244 no LTE
* 3.RAK7243/RAK7244 with LTE
* 4.RAK2247(USB)
* 5.RAK2247(SPI)
* 6.RAK2246
* 7.RAK7248 no LTE (RAK2287 SPI + raspberry pi)
* 8.RAK7248 with LTE (RAK2287 SPI + LTE + raspberry pi)
* 9.RAK2287 USB * 10.RAK5146 USB
Please enter 1-10 to select the model:
Please select the corresponding hardware model. In my case, I will choose option number 4 for RAK2247 (USB).
Wait a moment and the installation is complete.
Reboot your gateway and now you can use "sudo gateway-config" to configure your gateway.
Step 4: Modify global_conf.json
Once you log into the terminal, you can check the Gateway EUI using the gateway-version command. Copy the Gateway EUI (if you don't have the Gateway EUI yet) and paste into The Things Stack of your gateway platform.
$ gateway-version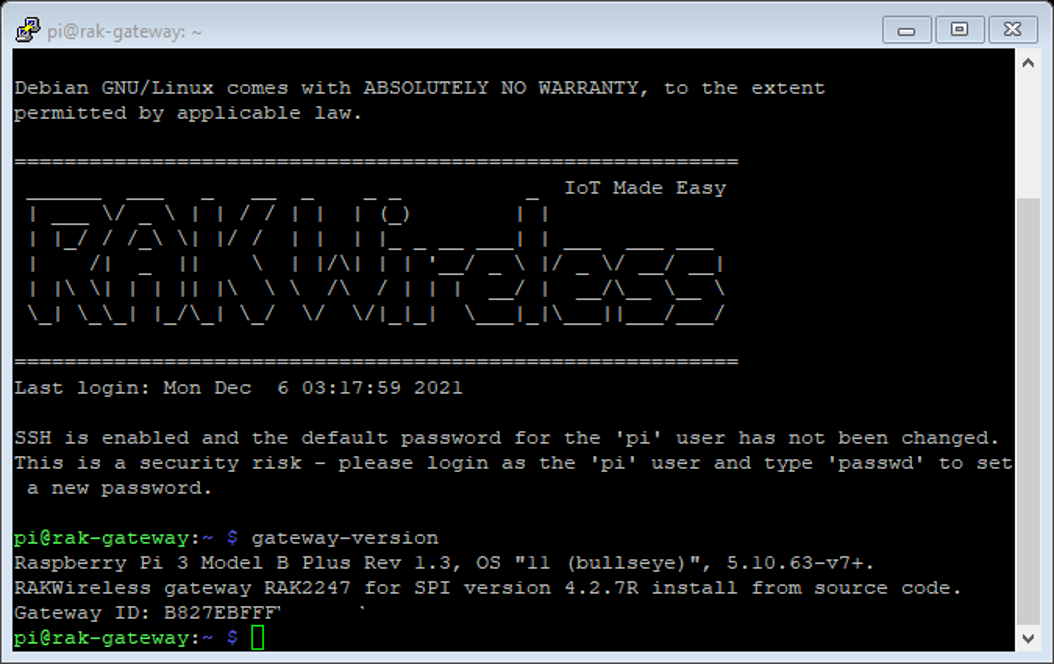
Then, log into the root directory of the gateway and launch the gateway config.
$ ls$ sudo gateway-config
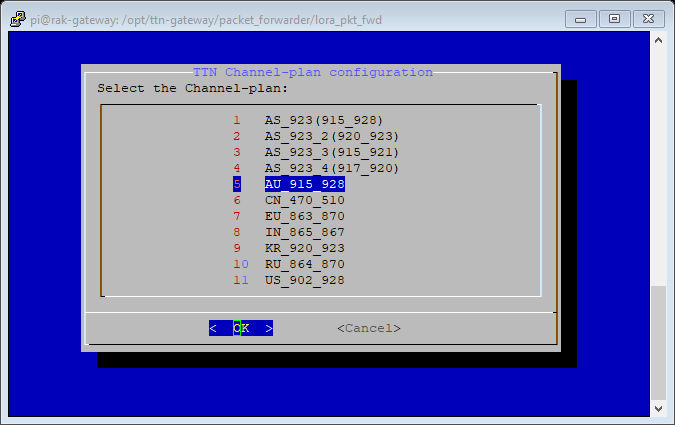
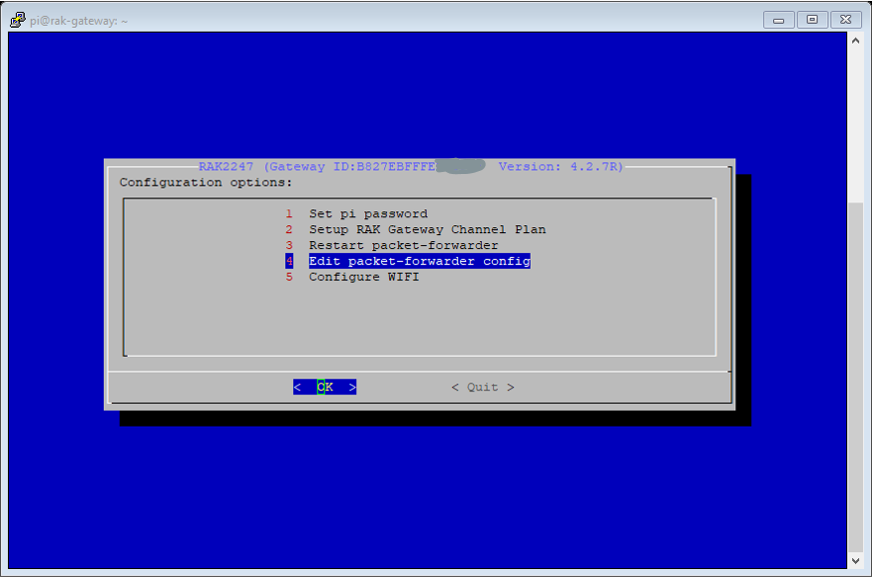
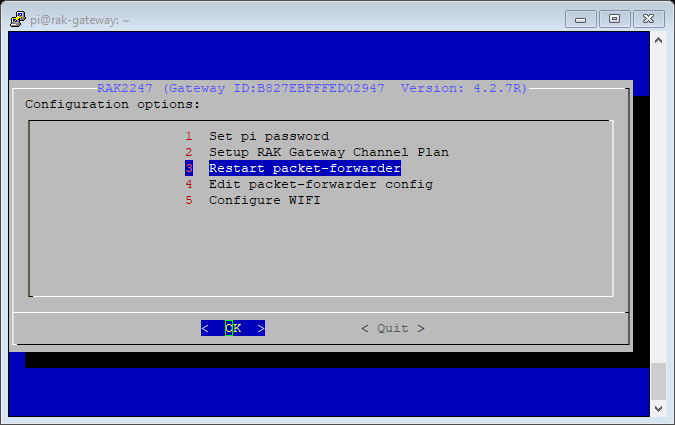
In the gateway-config, choose Setup RAK Gateway Channel Plan.
Then, choose TTN for the Server-plan and you are required to select LoRaWAN frequency based on your region (must be same as the setup in TTN).
Then, choose Edit packet-forwarder config and open the file.
You will need to replace the packet-forwarder config with the global_conf.json file that you downloaded earlier. Before that, you need to back up the older file. Exit (Ctrl+X) the gateway-config interface.
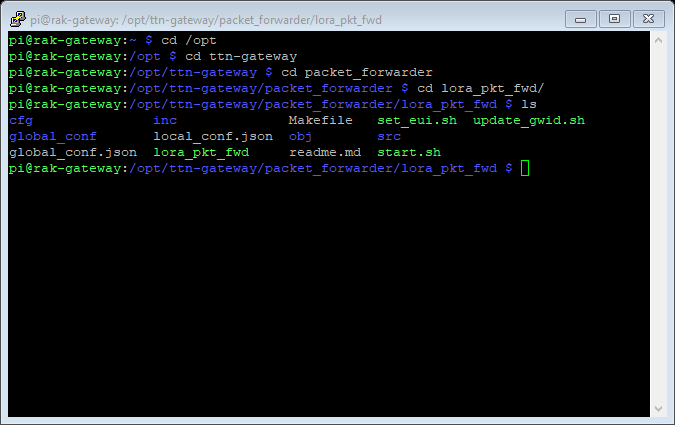
Navigate to the directory by following the commands below.
$ cd /opt$ cd ttn-gateway$ cd packet_forwarder$ cd lora_pkt_fwd/$ ls
Create the backup file and remove the older file.
$ sudo cp global_conf.json global_conf.bak$ sudo rm global_conf.json
Open the gateway-config again.
$ sudo gateway-config
Copy all the content in the global_conf.json file that you have downloaded from The Things Stack and paste into the Edit packet-forwarder config. The Edit packet-forwarder config should be empty before you paste it.
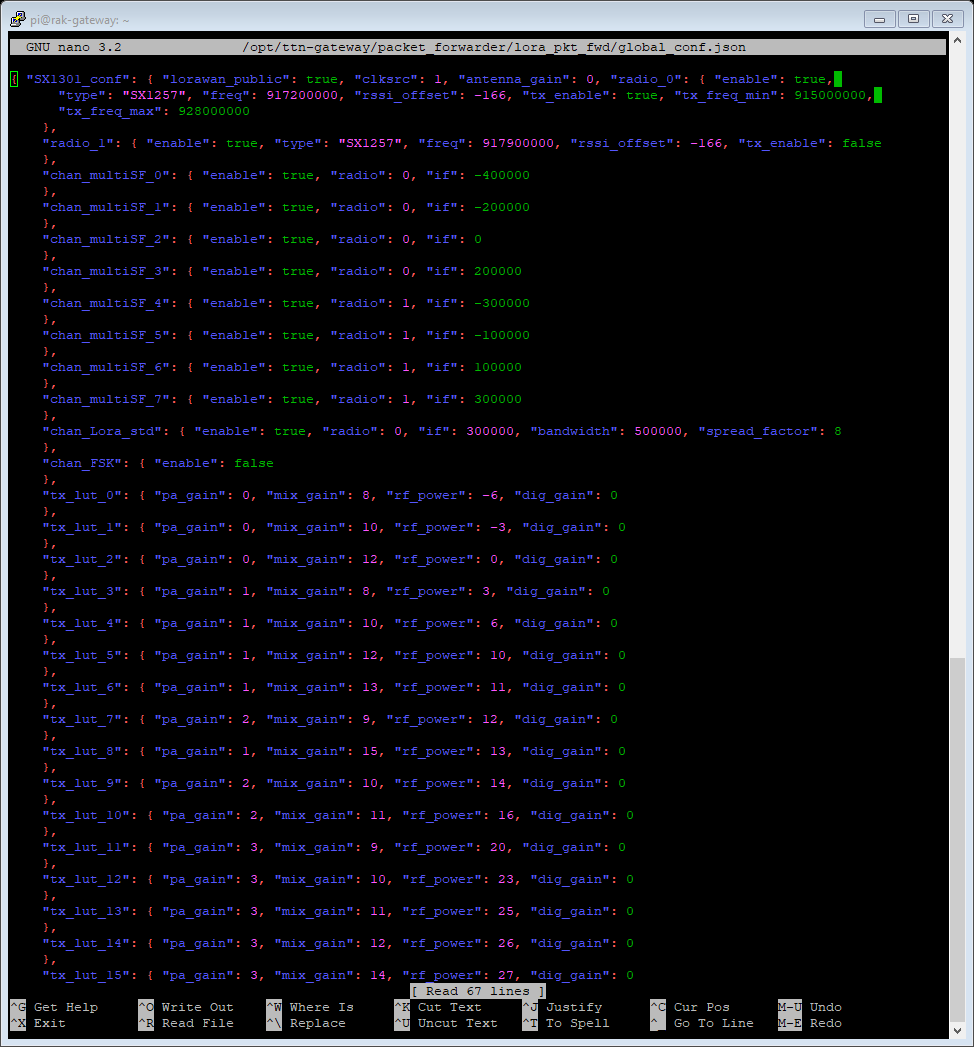
Then, press Ctrl+X to exit, press Y to save, and Enter.
In the gateway-config interface, choose Restart packet-forwarder and quit the terminal.
Open the gateway platform in The Things Stack and you should see an update in the live data. The gateway should be ready to receive any data from the node if the live data displays two lines like these:

To send data to The Things Stack through this gateway, you will need at least one node functioning in your area.
Kindly refer to the next tutorial for End Node device setup and how to display data on The Things Stack V3.
If your gateway still fails to connect to The Things Stack, consider checking the Gateway EUI in the packet forwarder. It should be the same with the Gateway EUI in The Things Stack.
References:
https://www.thethingsnetwork.org/docs/quick-start/
GitHub - RAKWireless/rak_common_for_gateway