 International
 Singapore
 Malaysia
 Thailand
 Vietnam
Your shopping cart is empty!

Measure The LPG Gas Using Maker Nano RP2040 And Gas Sensor MQ-9B
- Hussien Jawhar Sathik
- 13 May 2022
- Tutorial
- 1095
Introduction
In this tutorial it is shown how to measure the LPG gas using the Maker Nano RP2040 and gas sensor MQ-9B. The MQ-9B sensor is the gas sensor module from Seeed Studio. The sensor is useful for gas leakage detection in home or industry. MQ-9B sensor is suitable in detecting LPG, CO, and CH4 gas. Due to the high sensitivity and fast response time, measurement can be taken as soon as possible. Moreover the sensitivity can be adjusted by using the potentiometer.
Video
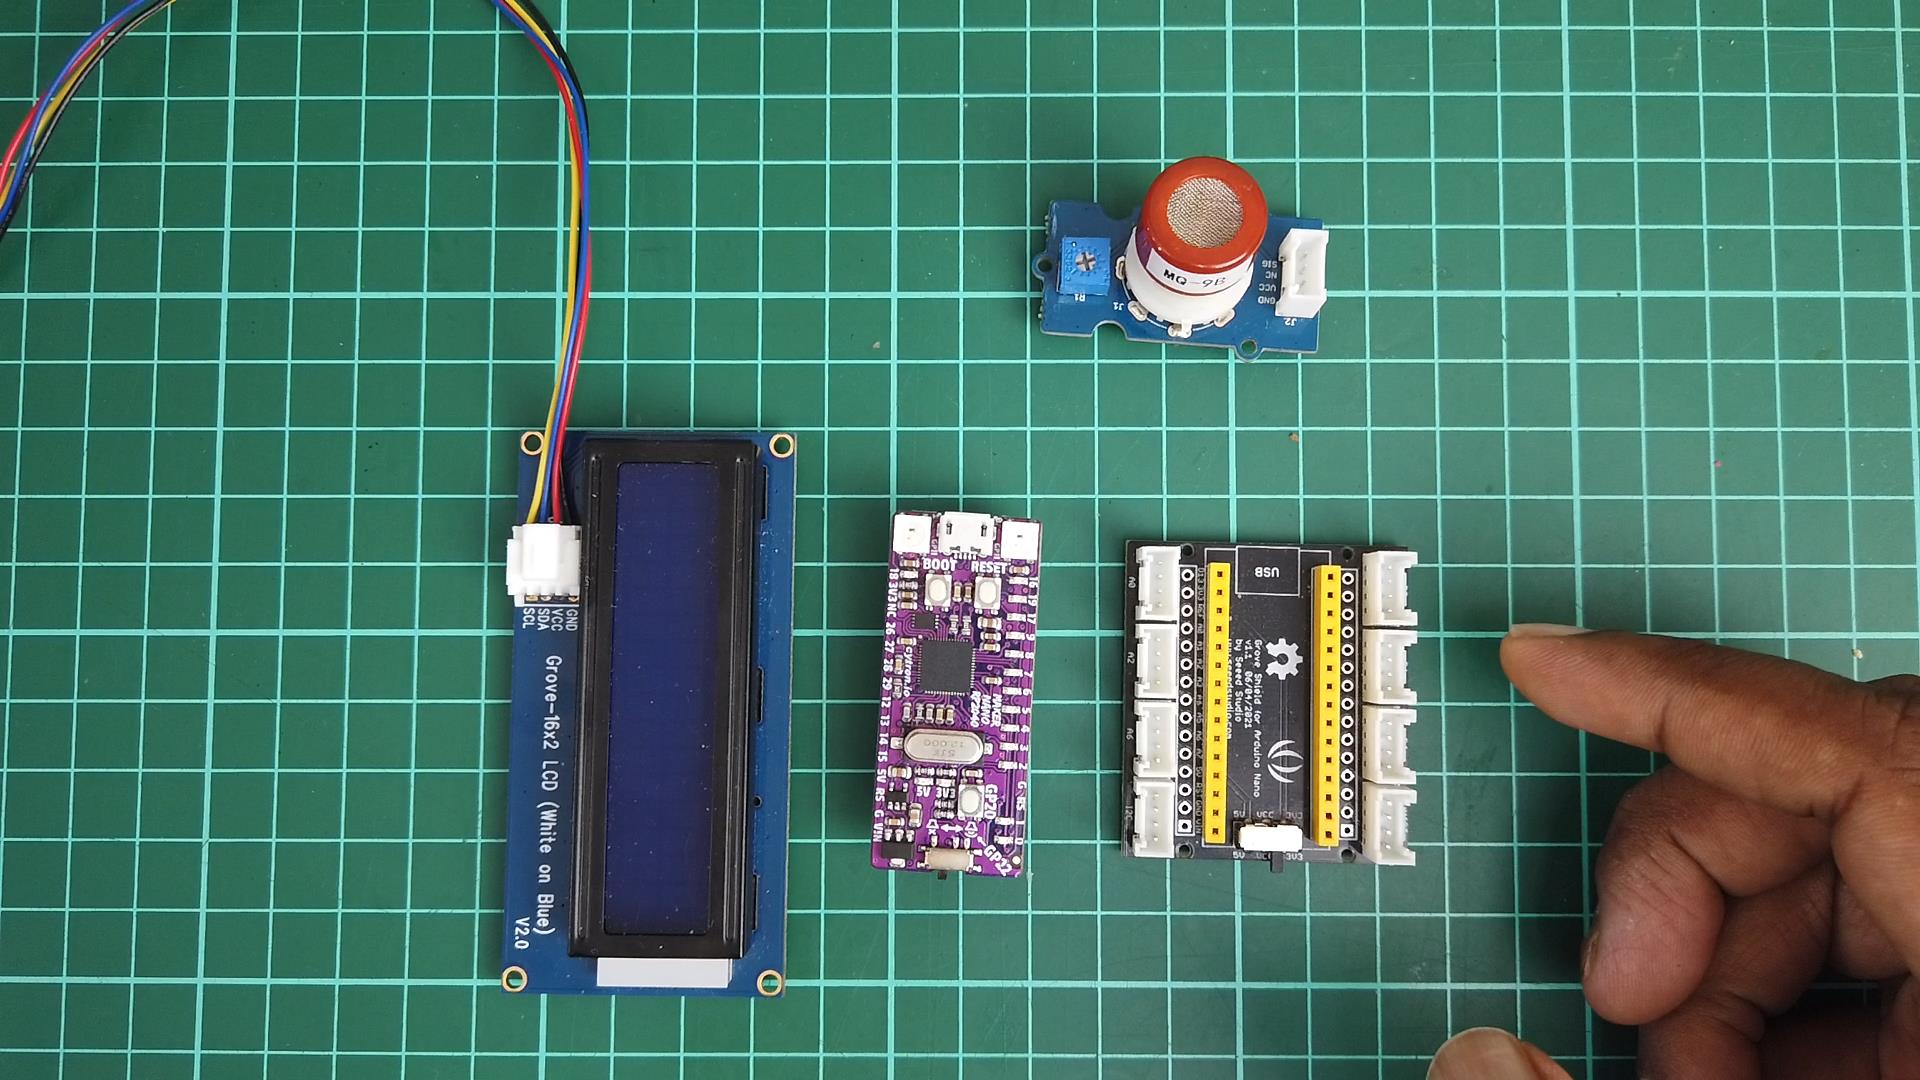
Hardware Preparation
The hardware setup for this tutorial is as shown below
Building The Circuit
- Constructing the circuit is pretty much easy since we are using the grove connector. The connection between the devices are done as per the below figure.
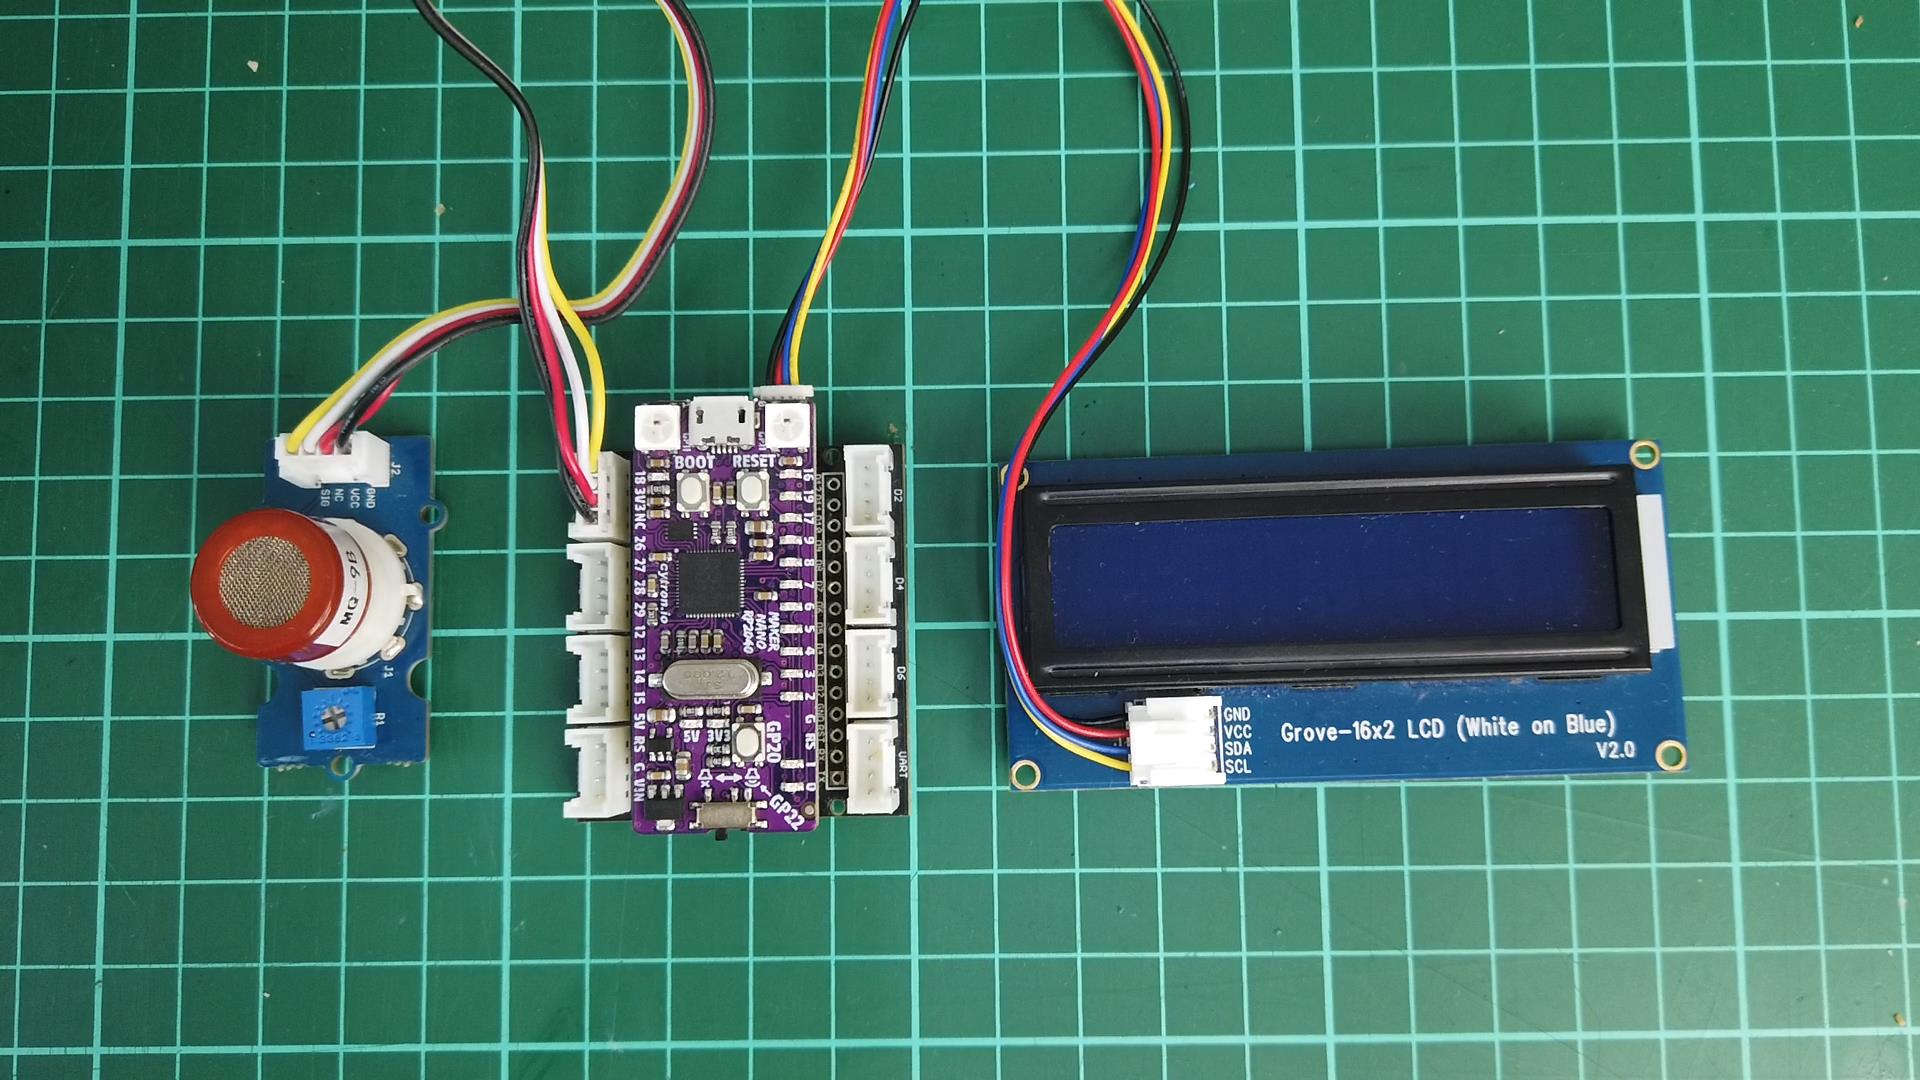
Once the connection are made as per the figure above, we can now start to code.
Code
For the code, we have tried 3 different code. The first code is the basic gas measurement. In this code the output is the raw value of the sensor
#include
#include "rgb_lcd.h"

rgb_lcd lcd;

void setup() {
    Serial.begin(9600);
    lcd.begin(16, 2);
}

void loop() {
    float sensor_volt;
    float sensorValue;

    sensorValue = analogRead(A0);
    sensor_volt = sensorValue/1024*5.0;

    Serial.print("sensor_volt = ");
    Serial.print(sensor_volt);
    Serial.println("V");

    lcd.setCursor(0,0);
    lcd.print("sensor_volt = ");
    lcd.setCursor(0,1);
    lcd.print(sensor_volt);
    lcd.print("V");

    delay(1000);
}
The purpose of the second code is to measure the R0 value which we will need to use in the main code later.
#include
#include "rgb_lcd.h"

rgb_lcd lcd;

void setup() {
    Serial.begin(9600);
    lcd.begin(16, 2);
}

void loop() {
    float sensor_volt;
    float RS_air; //  Get the value of RS via in a clear air
    float R0;  // Get the value of R0 via in LPG
    float sensorValue;

    /*--- Get a average data by testing 100 times ---*/
    for(int x = 0 ; x < 100 ; x++)
    {
        sensorValue = sensorValue + analogRead(A0);
    }
    sensorValue = sensorValue/100.0;
    /*-----------------------------------------------*/

    sensor_volt = sensorValue/1024*5.0;
    RS_air = (5.0-sensor_volt)/sensor_volt; // omit *RL
    R0 = RS_air/9.9; // The ratio of RS/R0 is 9.9 in LPG gas from Graph (Found using WebPlotDigitizer)

    Serial.print("sensor_volt = ");
    Serial.print(sensor_volt);
    Serial.println("V");

    Serial.print("R0 = ");
    Serial.println(R0);
    delay(1000);

    lcd.setCursor(0,0);
    lcd.print("sensor_volt = ");
    lcd.setCursor(0,1);
    lcd.print(sensor_volt);
    lcd.print("V");
    lcd.print("R0 = ");
    lcd.print(R0);

    delay(1000);
}
And finally below is the main code for the gas detection. Please remember to replace the R0 value which was obtained previously.
#include
#include "rgb_lcd.h"
rgb_lcd lcd;
void setup() {
Serial.begin(9600);
lcd.begin(16, 2);
}
void loop() {
float sensor_volt;
float RS_gas; // Get value of RS in a GAS
float ratio; // Get ratio RS_GAS/RS_air
int sensorValue = analogRead(A0);
sensor_volt=(float)sensorValue/1024*5.0;
RS_gas = (5.0-sensor_volt)/sensor_volt; // omit *RL
/*-Replace the name "R0" with the value of R0 in the demo of First Test -*/
ratio = RS_gas/0.66; // ratio = RS/R0
/*-----------------------------------------------------------------------*/
Serial.print("sensor_volt = ");
Serial.println(sensor_volt);
Serial.print("RS_ratio = ");
Serial.println(RS_gas);
Serial.print("Rs/R0 = ");
Serial.println(ratio);
Serial.print("\n\n");
lcd.setCursor(0,0);
lcd.print("RS_ratio = ");
lcd.print(RS_gas);
lcd.setCursor(0,1);
lcd.print("Rs/R0 = ");
lcd.print(ratio);
delay(1000);
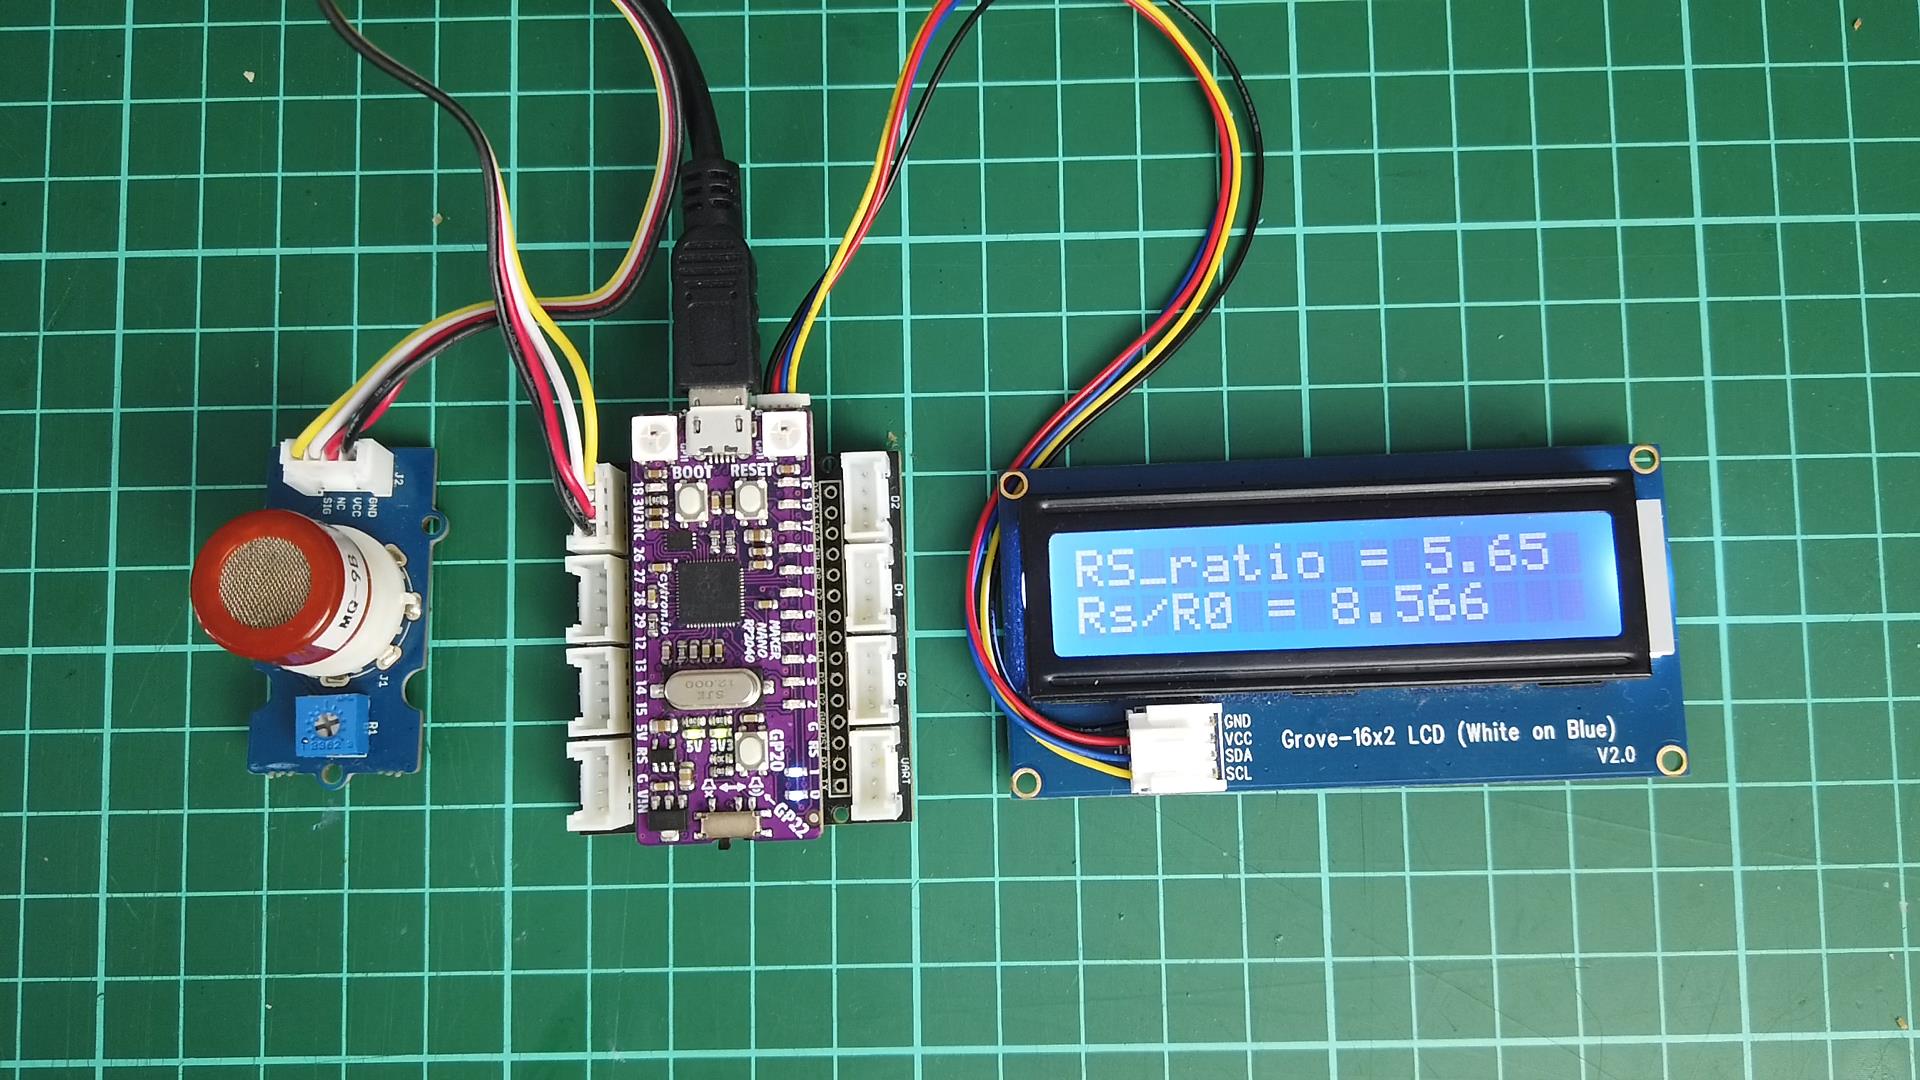
} Outcome
This is the final output
Thank You
Thanks for reading this tutorial. If you have any technical inquiries, please post at Cytron Technical Forum.
"Please be reminded, this tutorial is prepared for you to try and learn.
You are encouraged to improve the code for a better application."