 International
 Singapore
 Malaysia
 Thailand
 Vietnam
Your shopping cart is empty!

Monitor Soil Moisture With Maker Nano RP2040 And Maker Soil Moisture Sensor
- Hussien Jawhar Sathik
- 29 Mar 2022
- Tutorial
- 873
Introduction
Together with this, i have integrated the Grove DHT11, Grove 1602 LCD and 24 ring NeoPixel. All this devices are interfaced together using the Grove Shield for Arduino Nano.
Video
Hardware Preparation
This are the list of items used in this tutorial.

Building The Circuit
- Constructing the circuit is pretty much easy since we are using the grove connector. The connection between the devices are done as per the below figure.
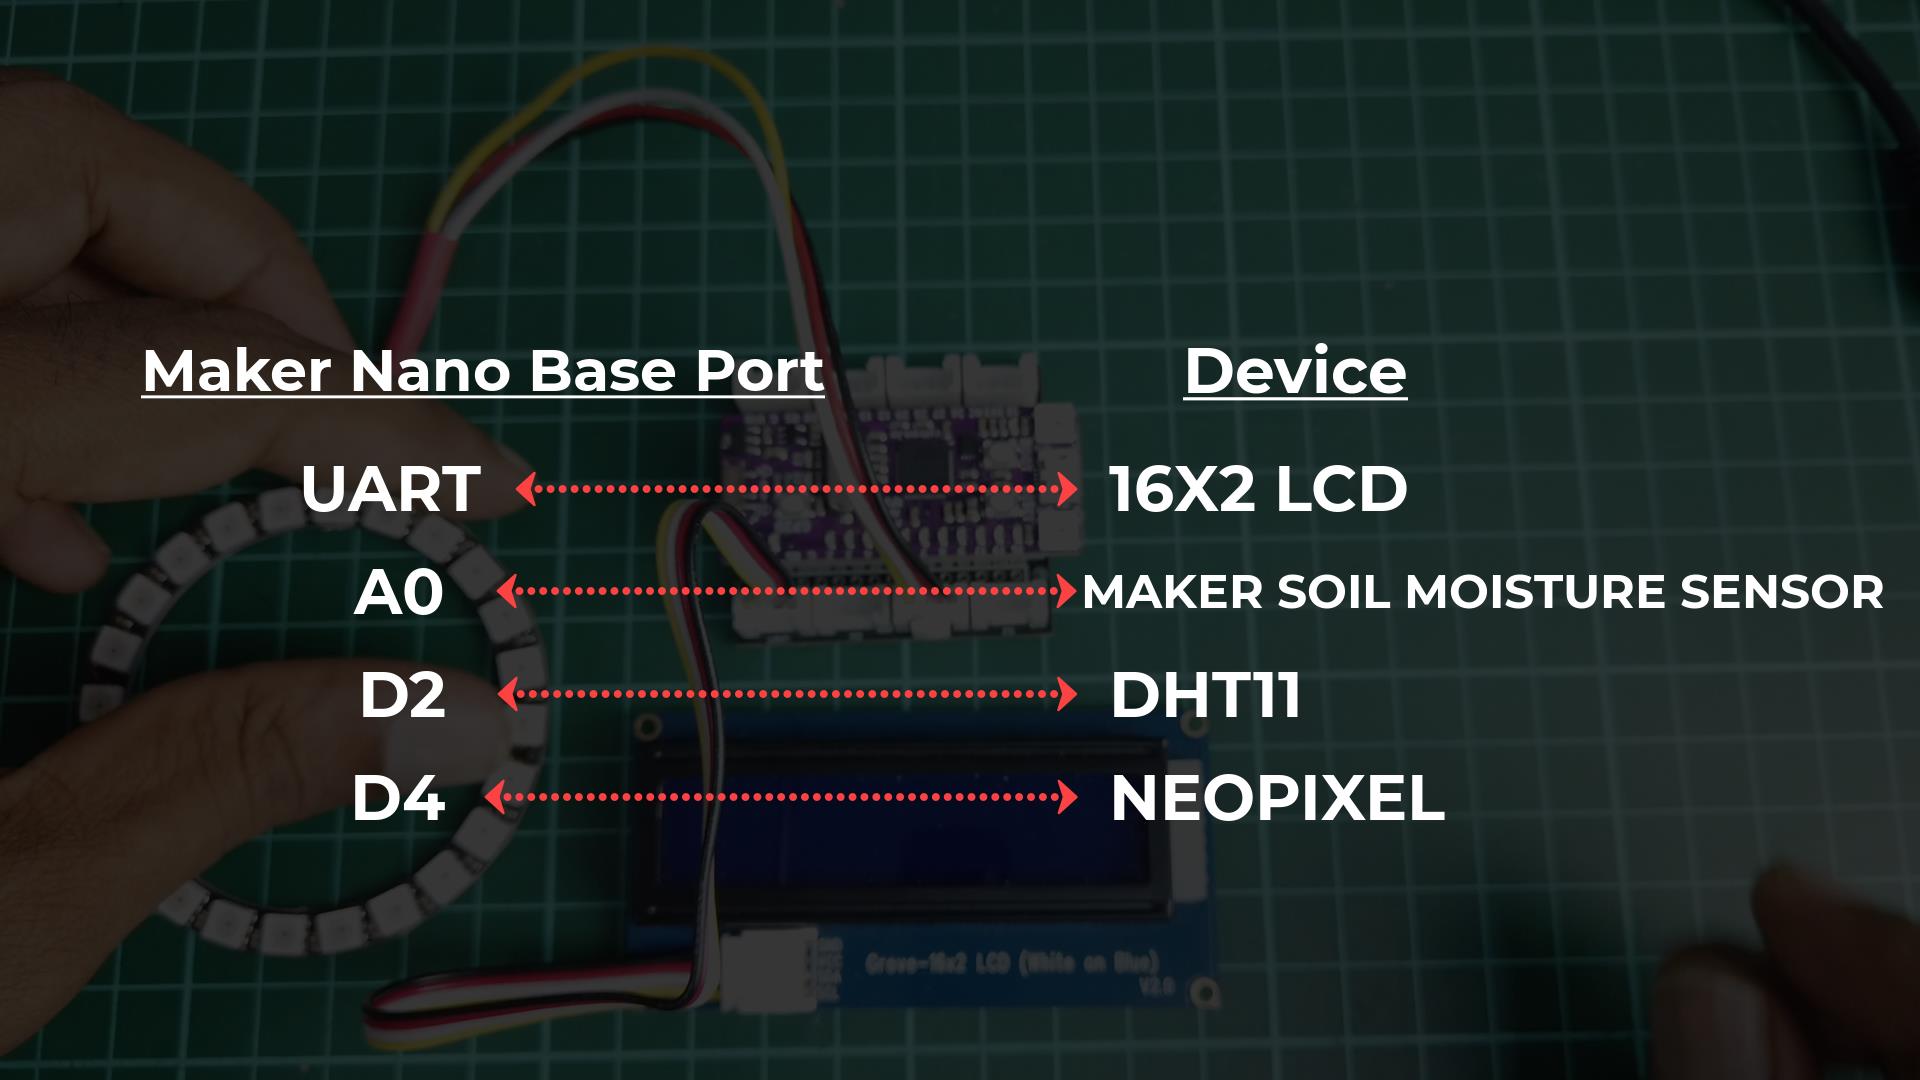
Once the connection are made as per the figure above, we can now start to code.
Code
For the code, since we have used different type of devices, please ensure that all the library has been downloaded prior to running this code.
#include "DHT.h"

#include

#include "rgb_lcd.h"

#include
#define DHTPIN 2     // what digital pin we're connected to

#define DHTTYPE DHT11   // DHT 11

#define LED_COUNT 24

#define LED_PIN 5
DHT dht(DHTPIN, DHTTYPE);

WS2812FX ws2812fx = WS2812FX(LED_COUNT, LED_PIN, NEO_RGB + NEO_KHZ800);
const int analogInPin = A0;
int sensorValue = 0;
rgb_lcd lcd;
void setup() {

  // put your setup code here, to run once:

  Serial.begin(9600);
  dht.begin();

  lcd.begin(16, 2);

  ws2812fx.init();

  ws2812fx.setBrightness(90);

  ws2812fx.setSegment(0, 0, LED_COUNT-1, FX_MODE_FADE, WHITE, 2000, false);

  ws2812fx.start();
}
void loop() {

  // put your main code here, to run repeatedly:

  delay(1000);

  sensorValue = analogRead(analogInPin);

  float h = dht.readHumidity();

  float t = dht.readTemperature();
  lcd.setCursor(0, 0);

  lcd.print("Soil Sensor:");

  lcd.setCursor(12, 0);

  lcd.print(sensorValue);

  lcd.setCursor(0, 1);

  lcd.print("T:");

  lcd.print(t);

  lcd.setCursor(9, 1);

  lcd.print("H:");

  lcd.print(h);
ws2812fx.service();
    if(sensorValue > 650){

    ws2812fx.setSegment(0, 0, LED_COUNT-1, FX_MODE_FADE, GREEN, 100, false);


    }
     if(sensorValue <650 && sensorValue >554){

    ws2812fx.setSegment(0, 0, LED_COUNT-1, FX_MODE_FADE, RED, 100, false);


    }
     if(sensorValue <554){

    ws2812fx.setSegment(0, 0, LED_COUNT-1, FX_MODE_FADE, BLUE, 100, false);


    }
}
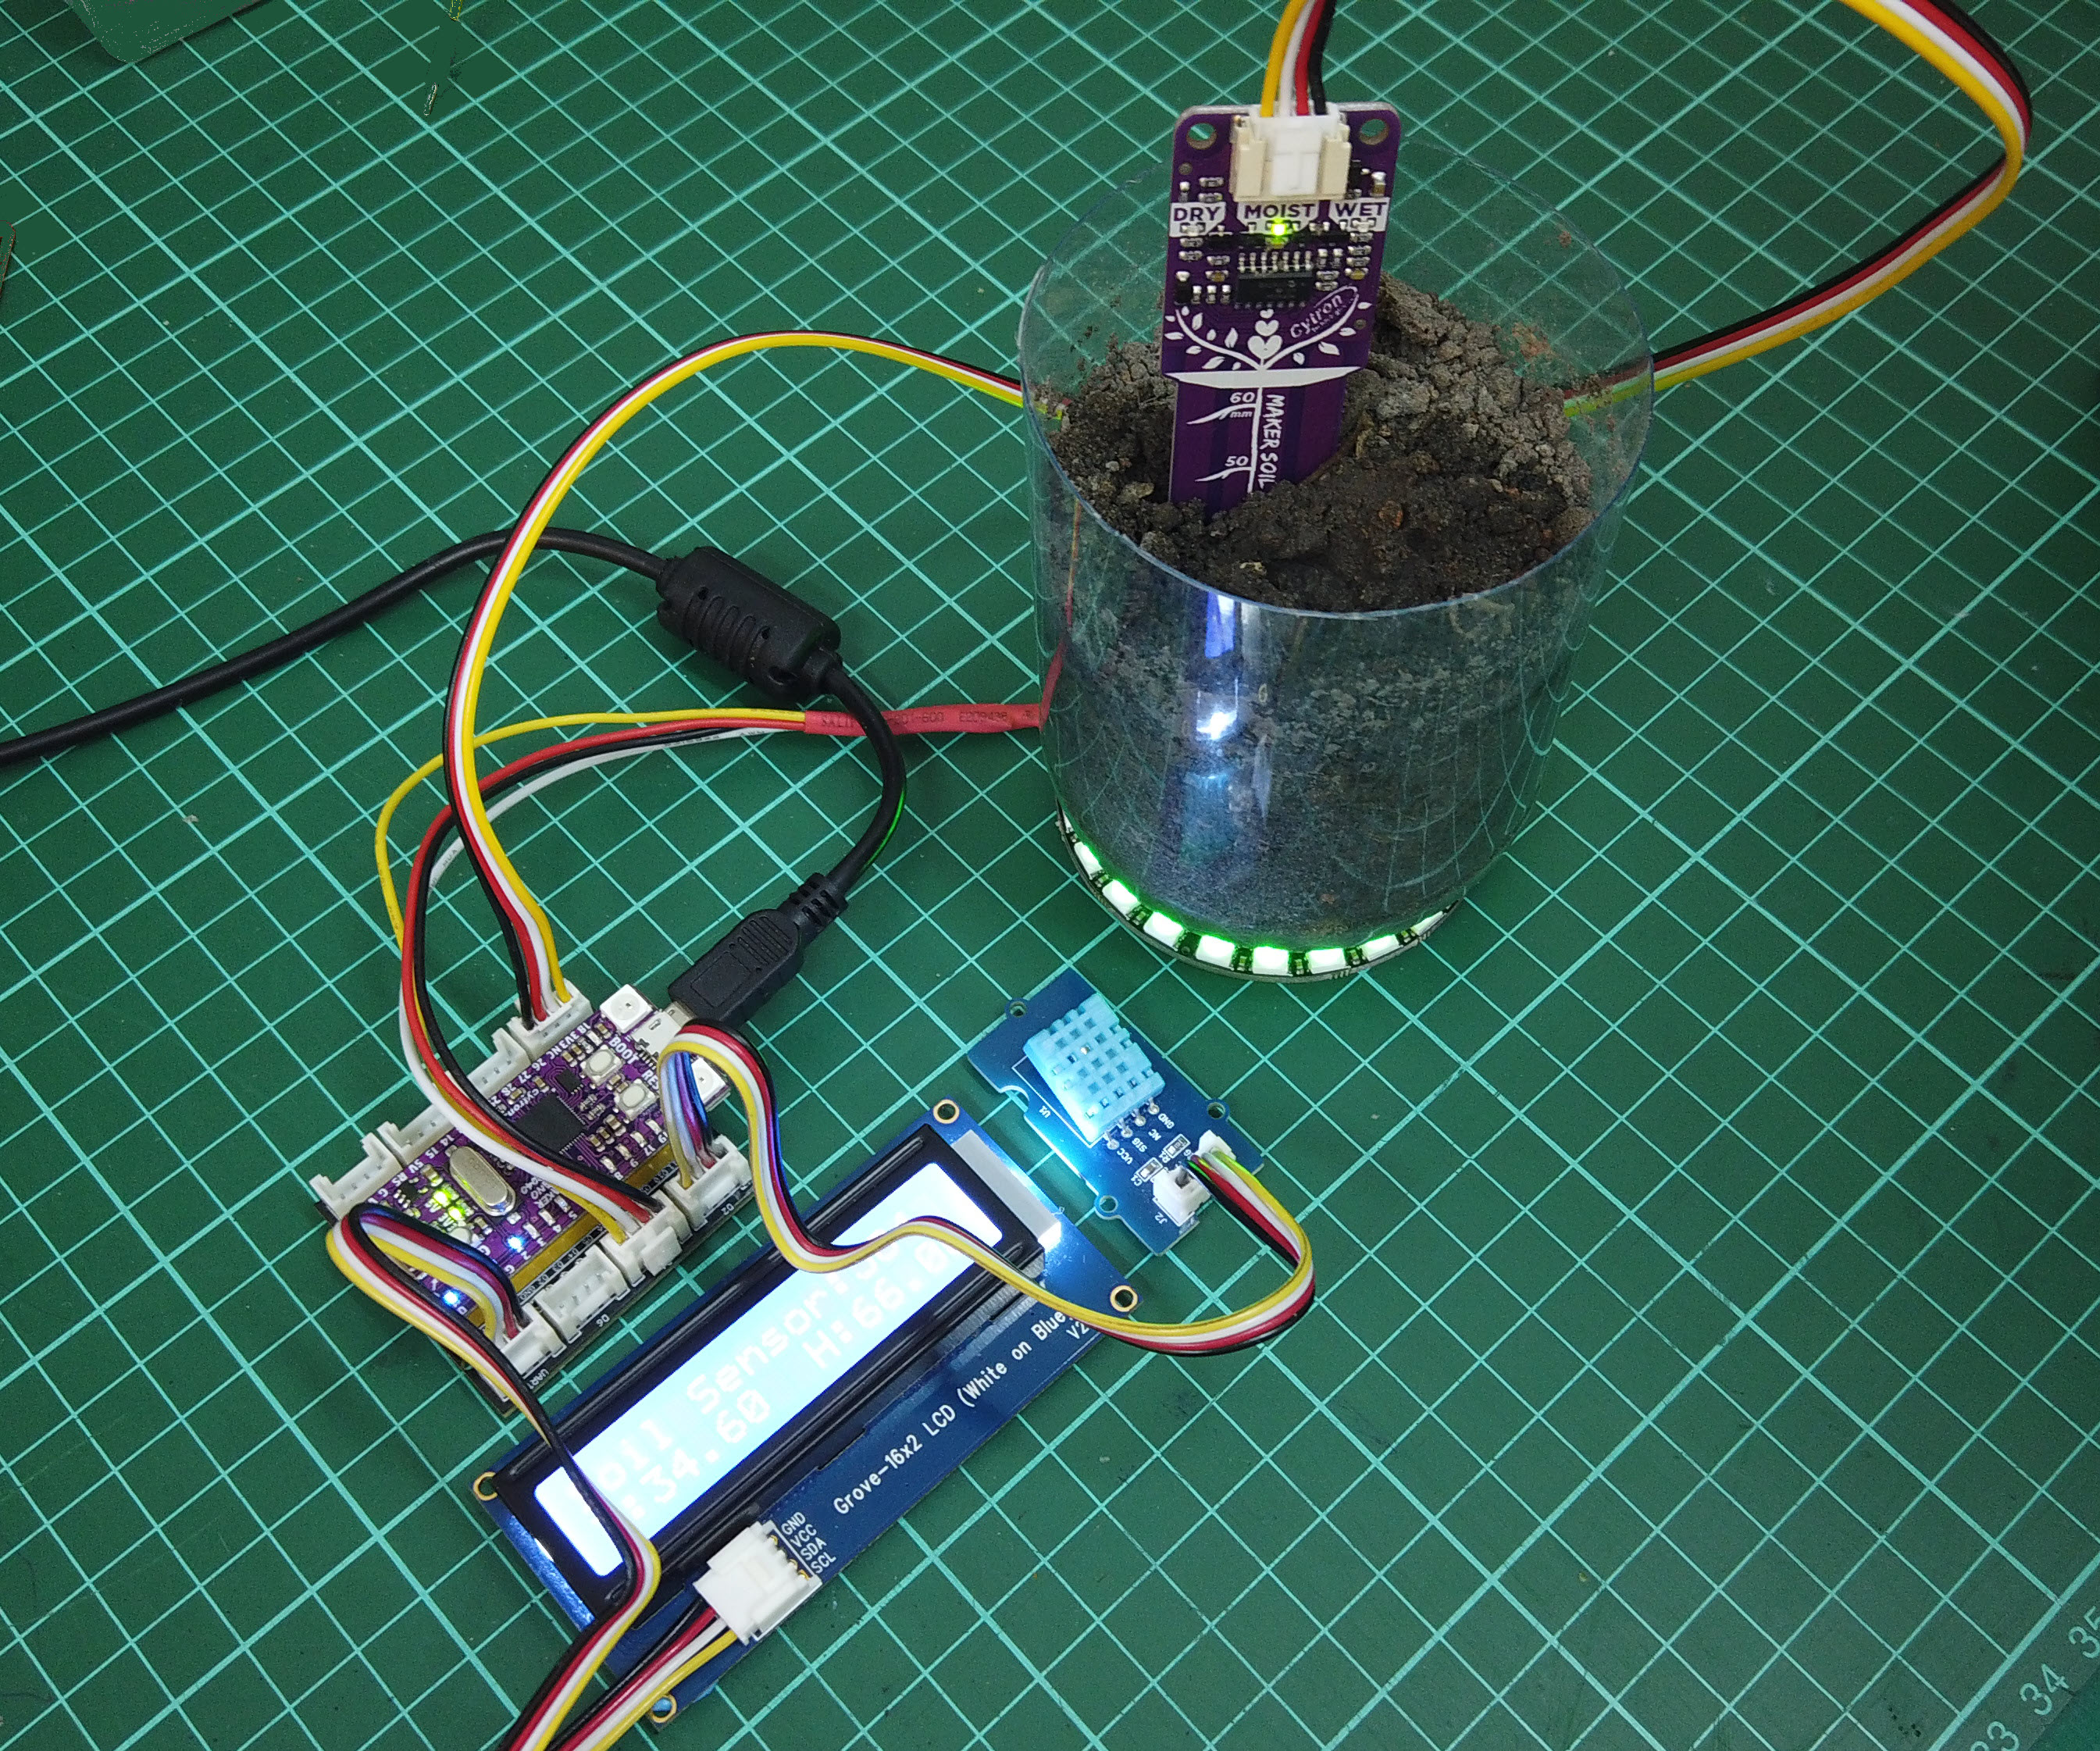
Outcome
Thank You
Thanks for reading this tutorial. If you have any technical inquiries, please post at Cytron Technical Forum.
"Please be reminded, this tutorial is prepared for you to try and learn.
You are encouraged to improve the code for a better application."