 International
 Singapore
 Malaysia
 Thailand
 Vietnam
Your shopping cart is empty!

VNC with NVIDIA Jetson Nano 2GB & B01
- Chun Boon Jian
- 20 Jan 2022
- 2484
Introduction
We can remotely control the desktop of the NVIDIA Jetson Nano device from another device using Virtual Network Computing (VNC). In this tutorial, NVIDIA Jetson Nano 2GB will be used but the steps for NVIDIA Jetson Nano B01 are actually the same as NVIDIA Jetson Nano 2GB. A camera module will be used to check the functionality of VNC on controlling the Jetson Nano's desktop from other device.
Note: The Official NVIDIA Jetson Nano 2GB is already EOL and is discontinued but the steps for NVIDIA Jetson Nano B01 are actually the same as NVIDIA Jetson Nano 2GB.
Hardware
Steps
1. Download Vino (VNC server) on a Jetson Nano device.
$ sudo apt update $ sudo apt install vino2. Create a new directory.
$ mkdir -p ~/.config/autostart $ cp /usr/share/applications/vino-server.desktop ~/.config/autostart3. Configure the VNC server.
$ gsettings set org.gnome.Vino prompt-enabled false $ gsettings set org.gnome.Vino require-encryption false4. Set a password
$ gsettings set org.gnome.Vino authentication-methods "['vnc']" $ gsettings set org.gnome.Vino vnc-password $(echo -n 'thepassword'|base64)** The default password to access the VNC server is ‘thepassword’. You can replace any password that you want within the quotation marks (‘ ’).
For example, if the desired password is abc123, then the command will be:
$ gsettings set org.gnome.Vino vnc-password $(echo -n 'abc123'|base64) 5. Restart the Jetson Nano device.
$ sudo reboot6. Download VNC Viewer on the device that you use to control the Jetson Nano device.
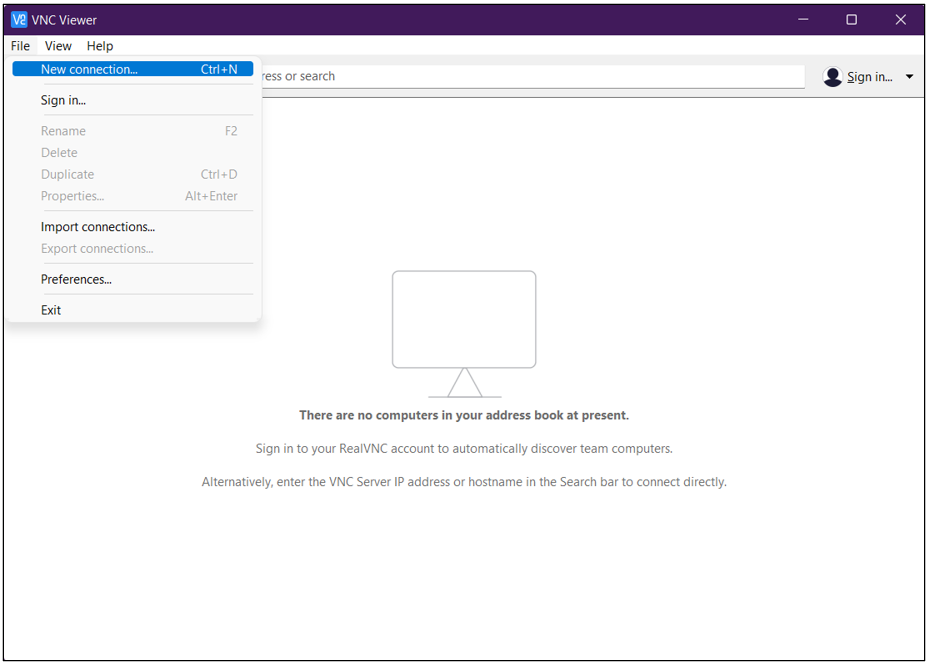
7. On the VNC Viewer, go to File -> New connection… -> General.
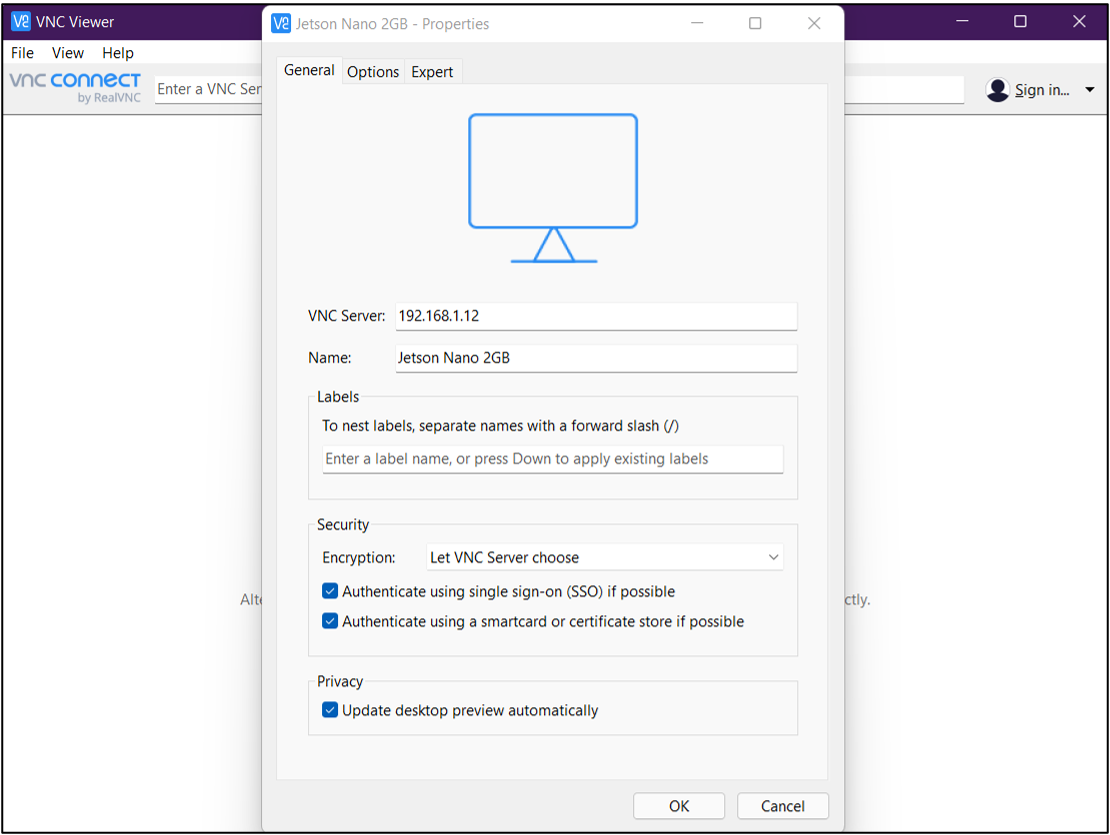
8. Enter the IP address of your Jetson Nano device at VNC Server and any name you desire as an identifier at Name.
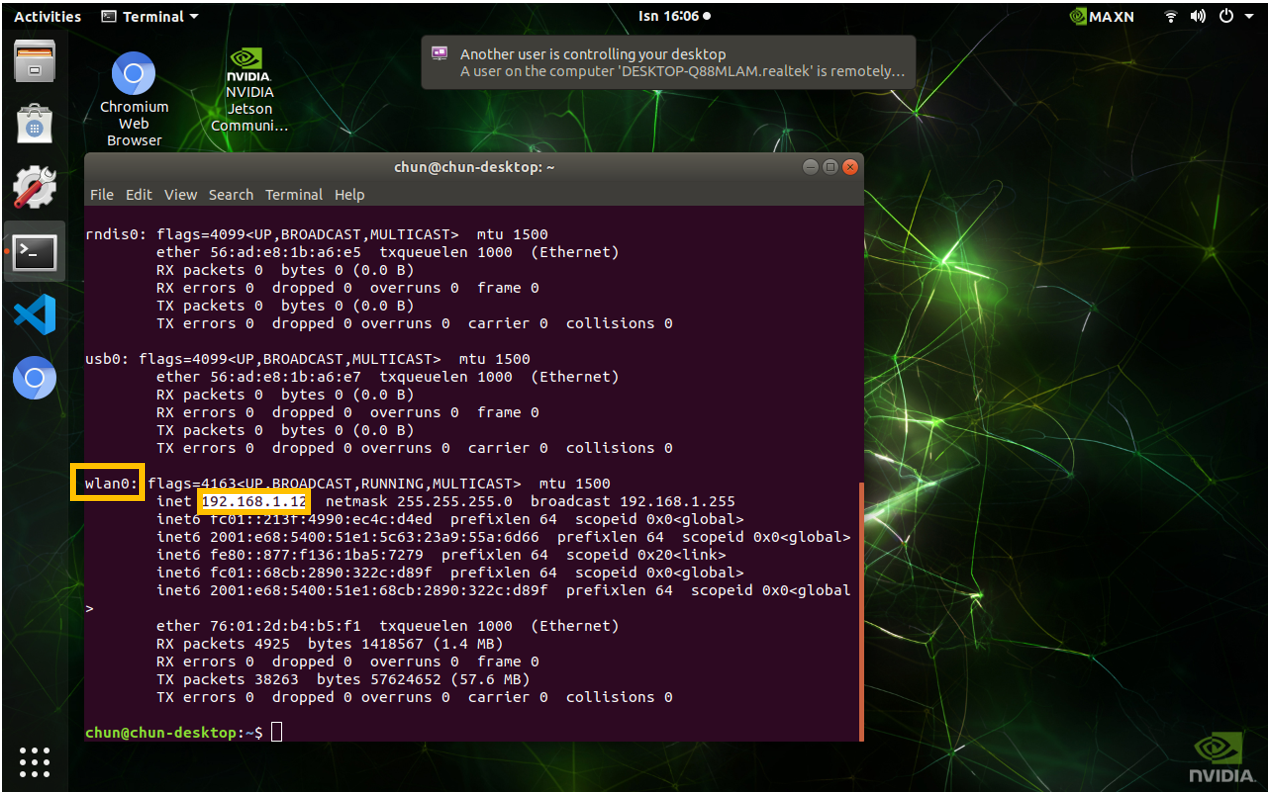
** To find the IP address, enter the command on the Terminal of the Jetson Nano device:
$ ifconfigTo search for the IP address from the output is based on different Internet connection on the Jetson Nano device where:
- eth0 is for wired Ethernet
- wlan0 for WiFi
- l4tbr0 for the USB device mode Ethernet connection
The Internet connection for the Jetson Nano device used for this tutorial is WiFi. Hence, at the wlan0, the IP address is the four sets of numbers after the text “inet”.
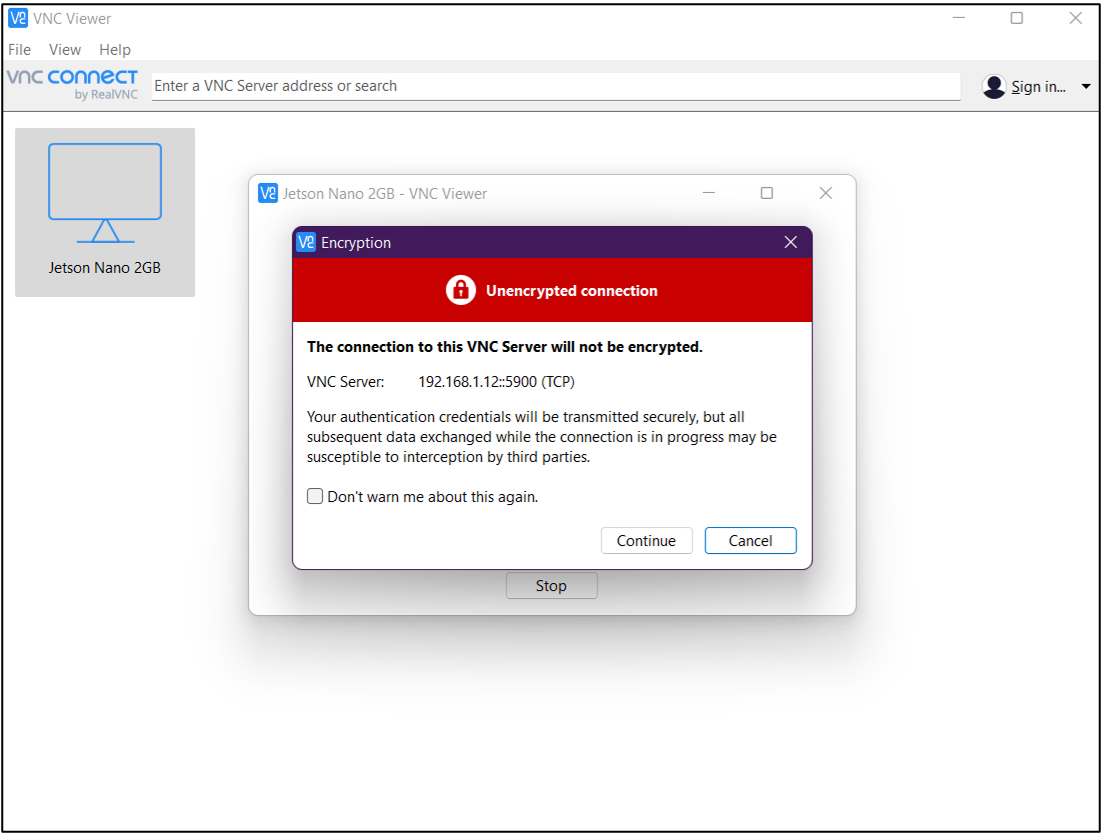
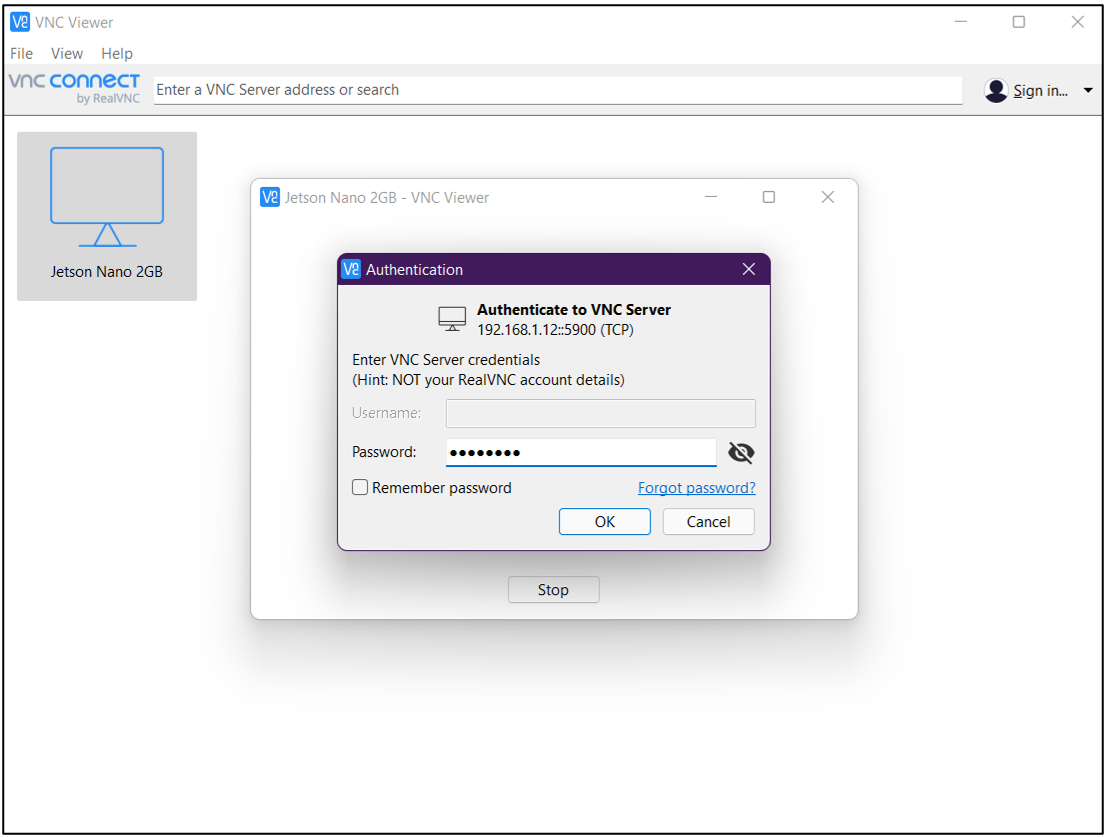
9. After the new connection is created, double click it and a prompt box will appear, click “Continue” and enter the password that you set at the Step 4.
10. Click “Ok” and your device is connected with the Jetson Nano device and you should be able to control the Jetson Nano’s screen on your device.
11. To test whether your device able to remotely control the Jetson Nano, open Terminal and enter the following command line on the VNC Viewer to open the camera module:
$ gst-launch-1.0 nvarguscamerasrc sensor_id=0 ! 'video/x-raw(memory:NVMM),width=720, height=480, framerate=21/1, format=NV12' ! nvvidconv flip-method=0 ! 'video/x-raw,width=720, height=480' ! nvvidconv ! nvegltransform ! nveglglessink -eYou should be able to see both devices have the same output.
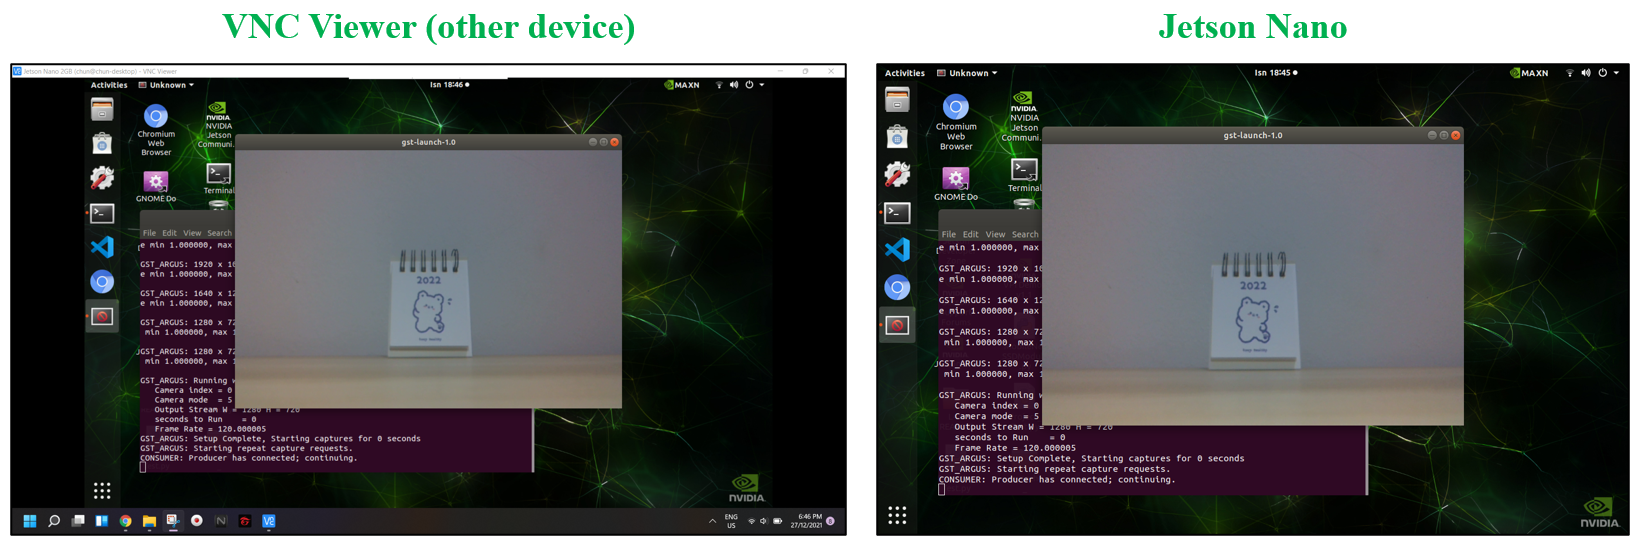
**I have also tested these steps with NVIDIA Jetson Nano B01 and the results are exactly same!
Reference
Setup VNC server on the Jetson developer kit
Thanks for reading this tutorial. If you have any technical inquiries, please post at Cytron Technical Forum.