 International
 Singapore
 Malaysia
 Thailand
 Vietnam
Your shopping cart is empty!

Overclock Raspberry Pi 400 to 2.147GHz for Raspberry Pi OS
Introduction
With the increasing of Raspberry Pi 400 demand, it surely proves that this is the current best choice for many users. It also has a great improvement in terms of hardware and performance compared to the previous Raspberry Pi product. With the default 1.8GHz CPU speed and with a big heat sink embedded in the keyboard, it has a very good thermal performance. You can read this article at Raspberry Pi 400 — The New Personal Keyboard Computer to learn more about Raspberry Pi 400.
According to this article Overclocking the Raspberry Pi 400 — Raspberry Pi Spy (raspberrypi-spy.co.uk), Raspberry Pi 400 can overclock up to 2.2GHz, maximum! This is great news as all previous Raspberry Pi series are not capable of overclocking to this speed. However, in this tutorial, we will just overclock it until 2.147 GHz only due to warranty could void if we push over the limit. Do keep in mind overclock could increase the temperature of the CPU during full load. So in this tutorial, we will learn how to overclock step by step until reaching the optimum CPU speed. Let's go!
NOTE: Overclock CPU generates more heat and therefore the CPU's temperature too.
Hardware
Procedures
This tutorial will show you two ways to overclock the Raspberry Pi 400 where the procedures for both are totally different. However, the syntax and commands are the same. The first method is to access the config.txt from Raspberry Pi OS, then configure it. This method required you to have hardware such as an LCD monitor, a mouse, and HDMI cable as you are setting up like a computer. Then boot the Raspberry Pi 400 up and configure it through the terminal.
The second method is overclock by editing the config.txt in the microSD card from another computer or laptop. With this method, a USB microSD card reader/writer is needed.
Accessing Config.txt Through Terminal
STEP 1: Always Update the Firmware
Before start overclocking, we need to confirm that firmware is updated. Please proceed to STEP 2 if you have done so. Below shows the method to update Raspberry Pi OS.
Open the terminal and enter the following command:
sudo apt update
sudo apt full-upgrade
Then just reboot by clicking logout or by typing this command in the terminal:
sudo rebootSTEP 2: Checking the Default CPU Speed
In order for us to know the CPU speed had changed, first things first we need to know our current CPU speed. It's easy, we just need to write the following command in the terminal. There are two ways to check :
lscpucat /sys/devices/system/cpu/cpu0/cpufreq/scaling_cur_freq
The CPU min MHz stated supposed to be 600.0000 which is 600 MHz while the CPU max MHz stated is the current CPU speed 1800.0000 which is 1800 MHz.
STEP 3: Overclocking
To overclock the Pi 400, we need to access and edit the configuration in config.txt file under core configuration settings.
Open the terminal and enter the command:
sudo nano /boot/config.txt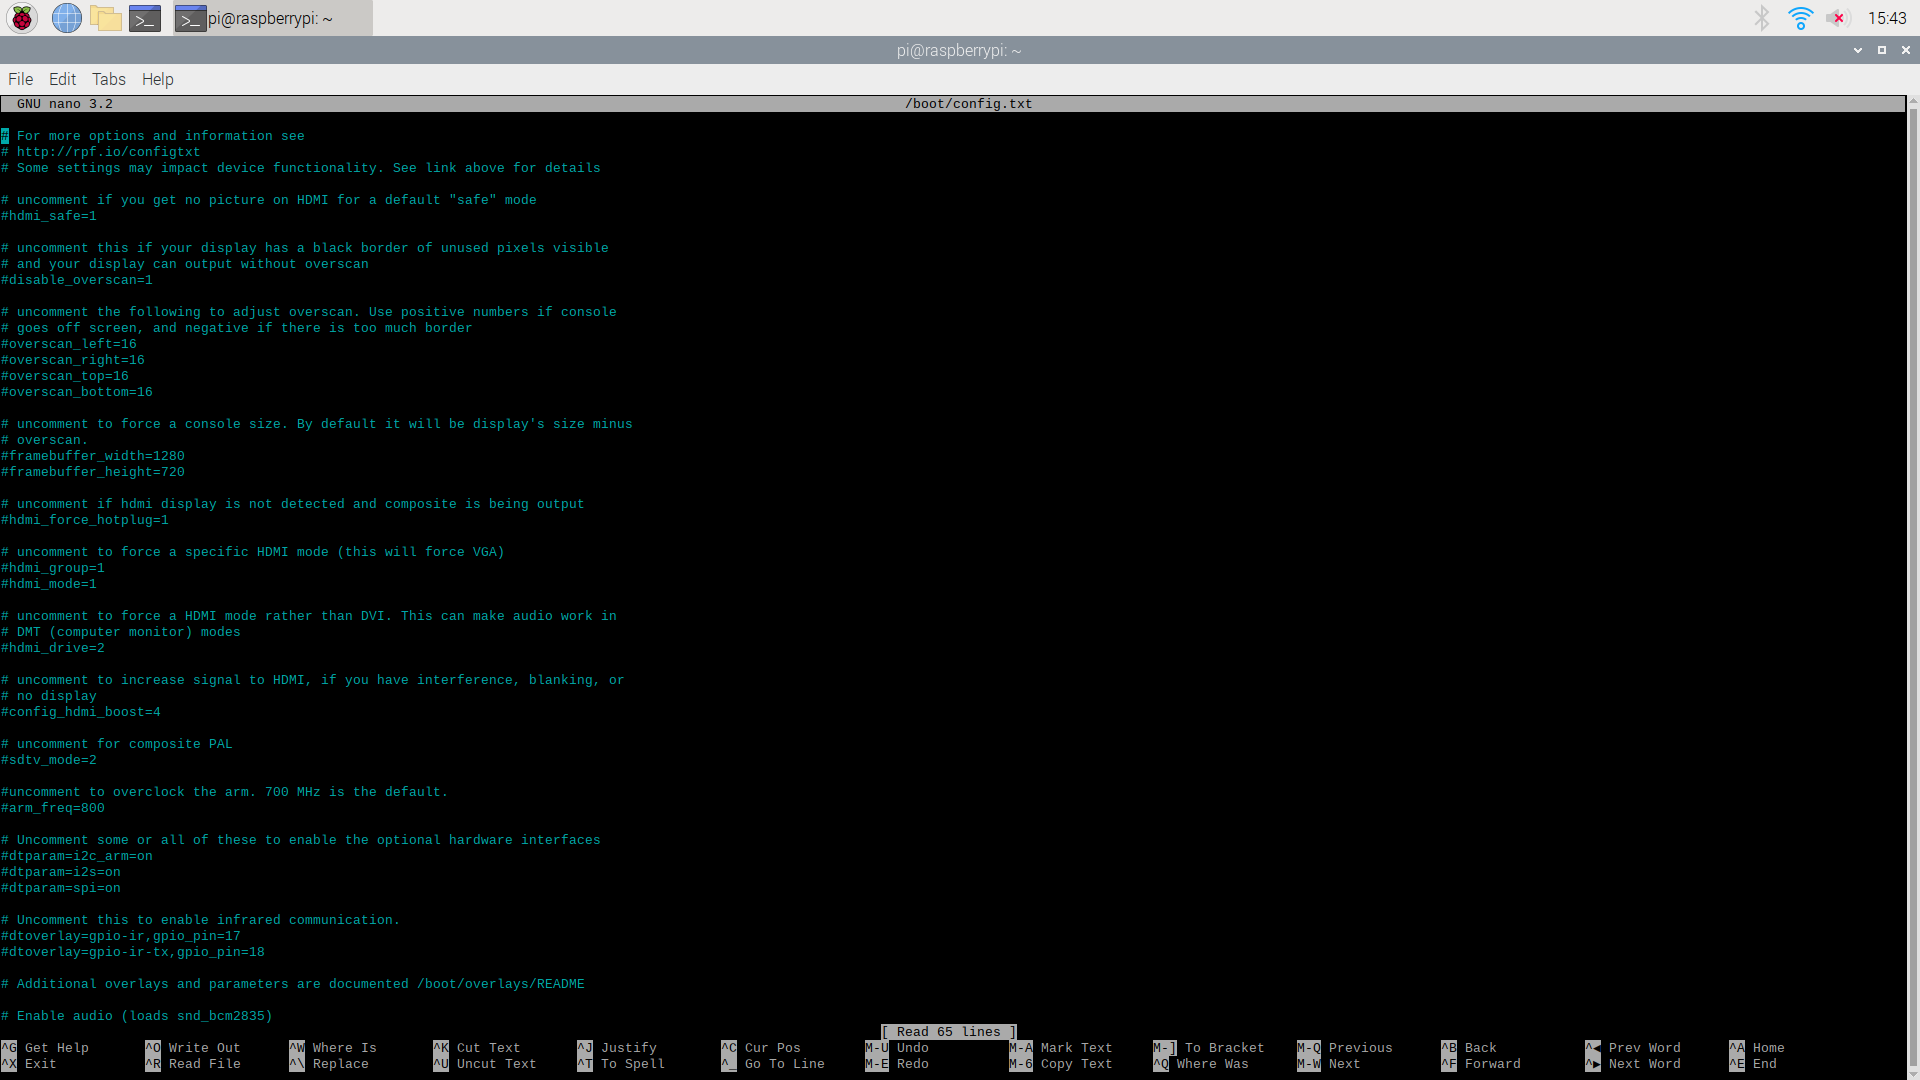
scroll down and search for :
#uncomment to overclock the arm. 700 MHz is the default.
#arm_freq=800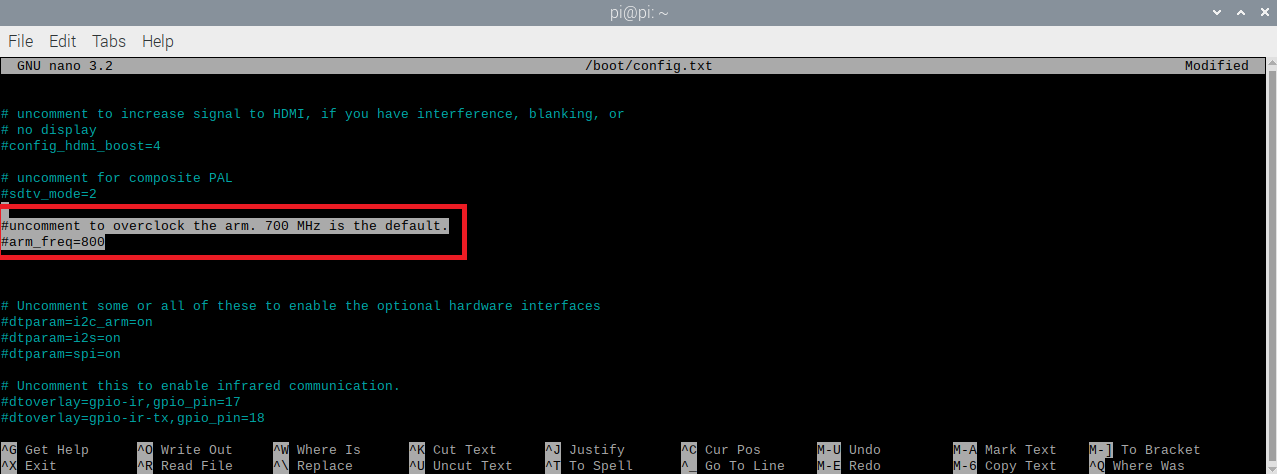
Then change it to :
#uncomment to overclock the arm. 700 MHz is the default.
over_voltage=6
arm_freq=2000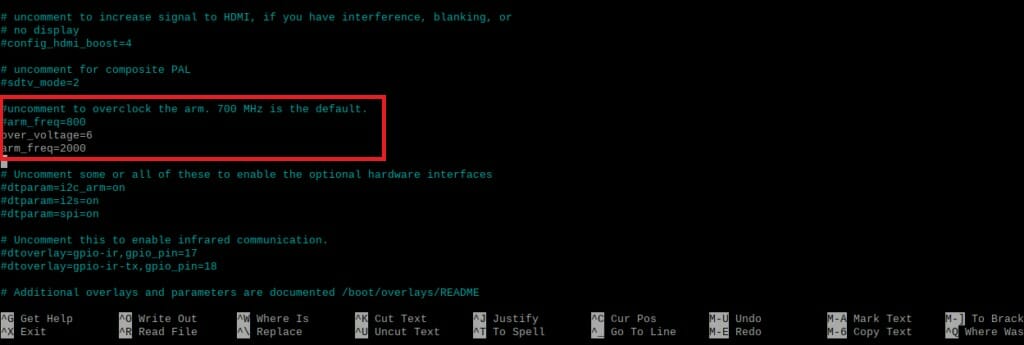
Save the file by pressing CTRL + O then ENTER and use CTRL + X to exit. Now reboot the Pi 400.
When Pi 400 boot up, the max clock speed should have already changed. In order to identify the change just write lscpu or the following command in the terminal. We can see the new configuration CPU speed by live fluctuate :
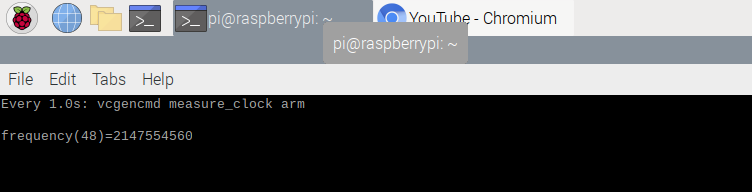
watch -n 1 vcgencmd measure_clock arm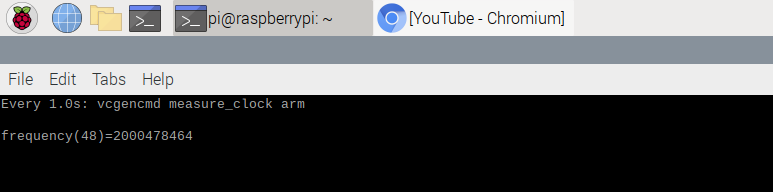
We can see that the speed is maxed to 2000 MHz if there is a high load program running. That how can we surely know that the max clock speed is changed.
STEP 4: More to Go! Up to 2.147GHz
So let increase the speed for 2.147GHz. It's easy ! Just like the previous step, we need to configure the config.txt by replacing and enter the command below:
over_voltage=6
arm_freq=2147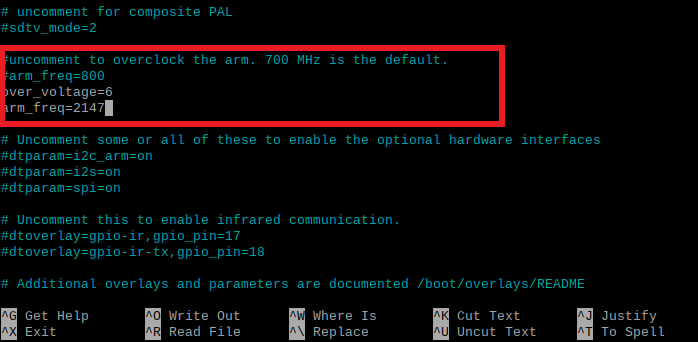
Reboot it and run this command:
watch -n 1 vcgencmd measure_clock arm

lscpu

Accessing Config.txt Through microSD Card
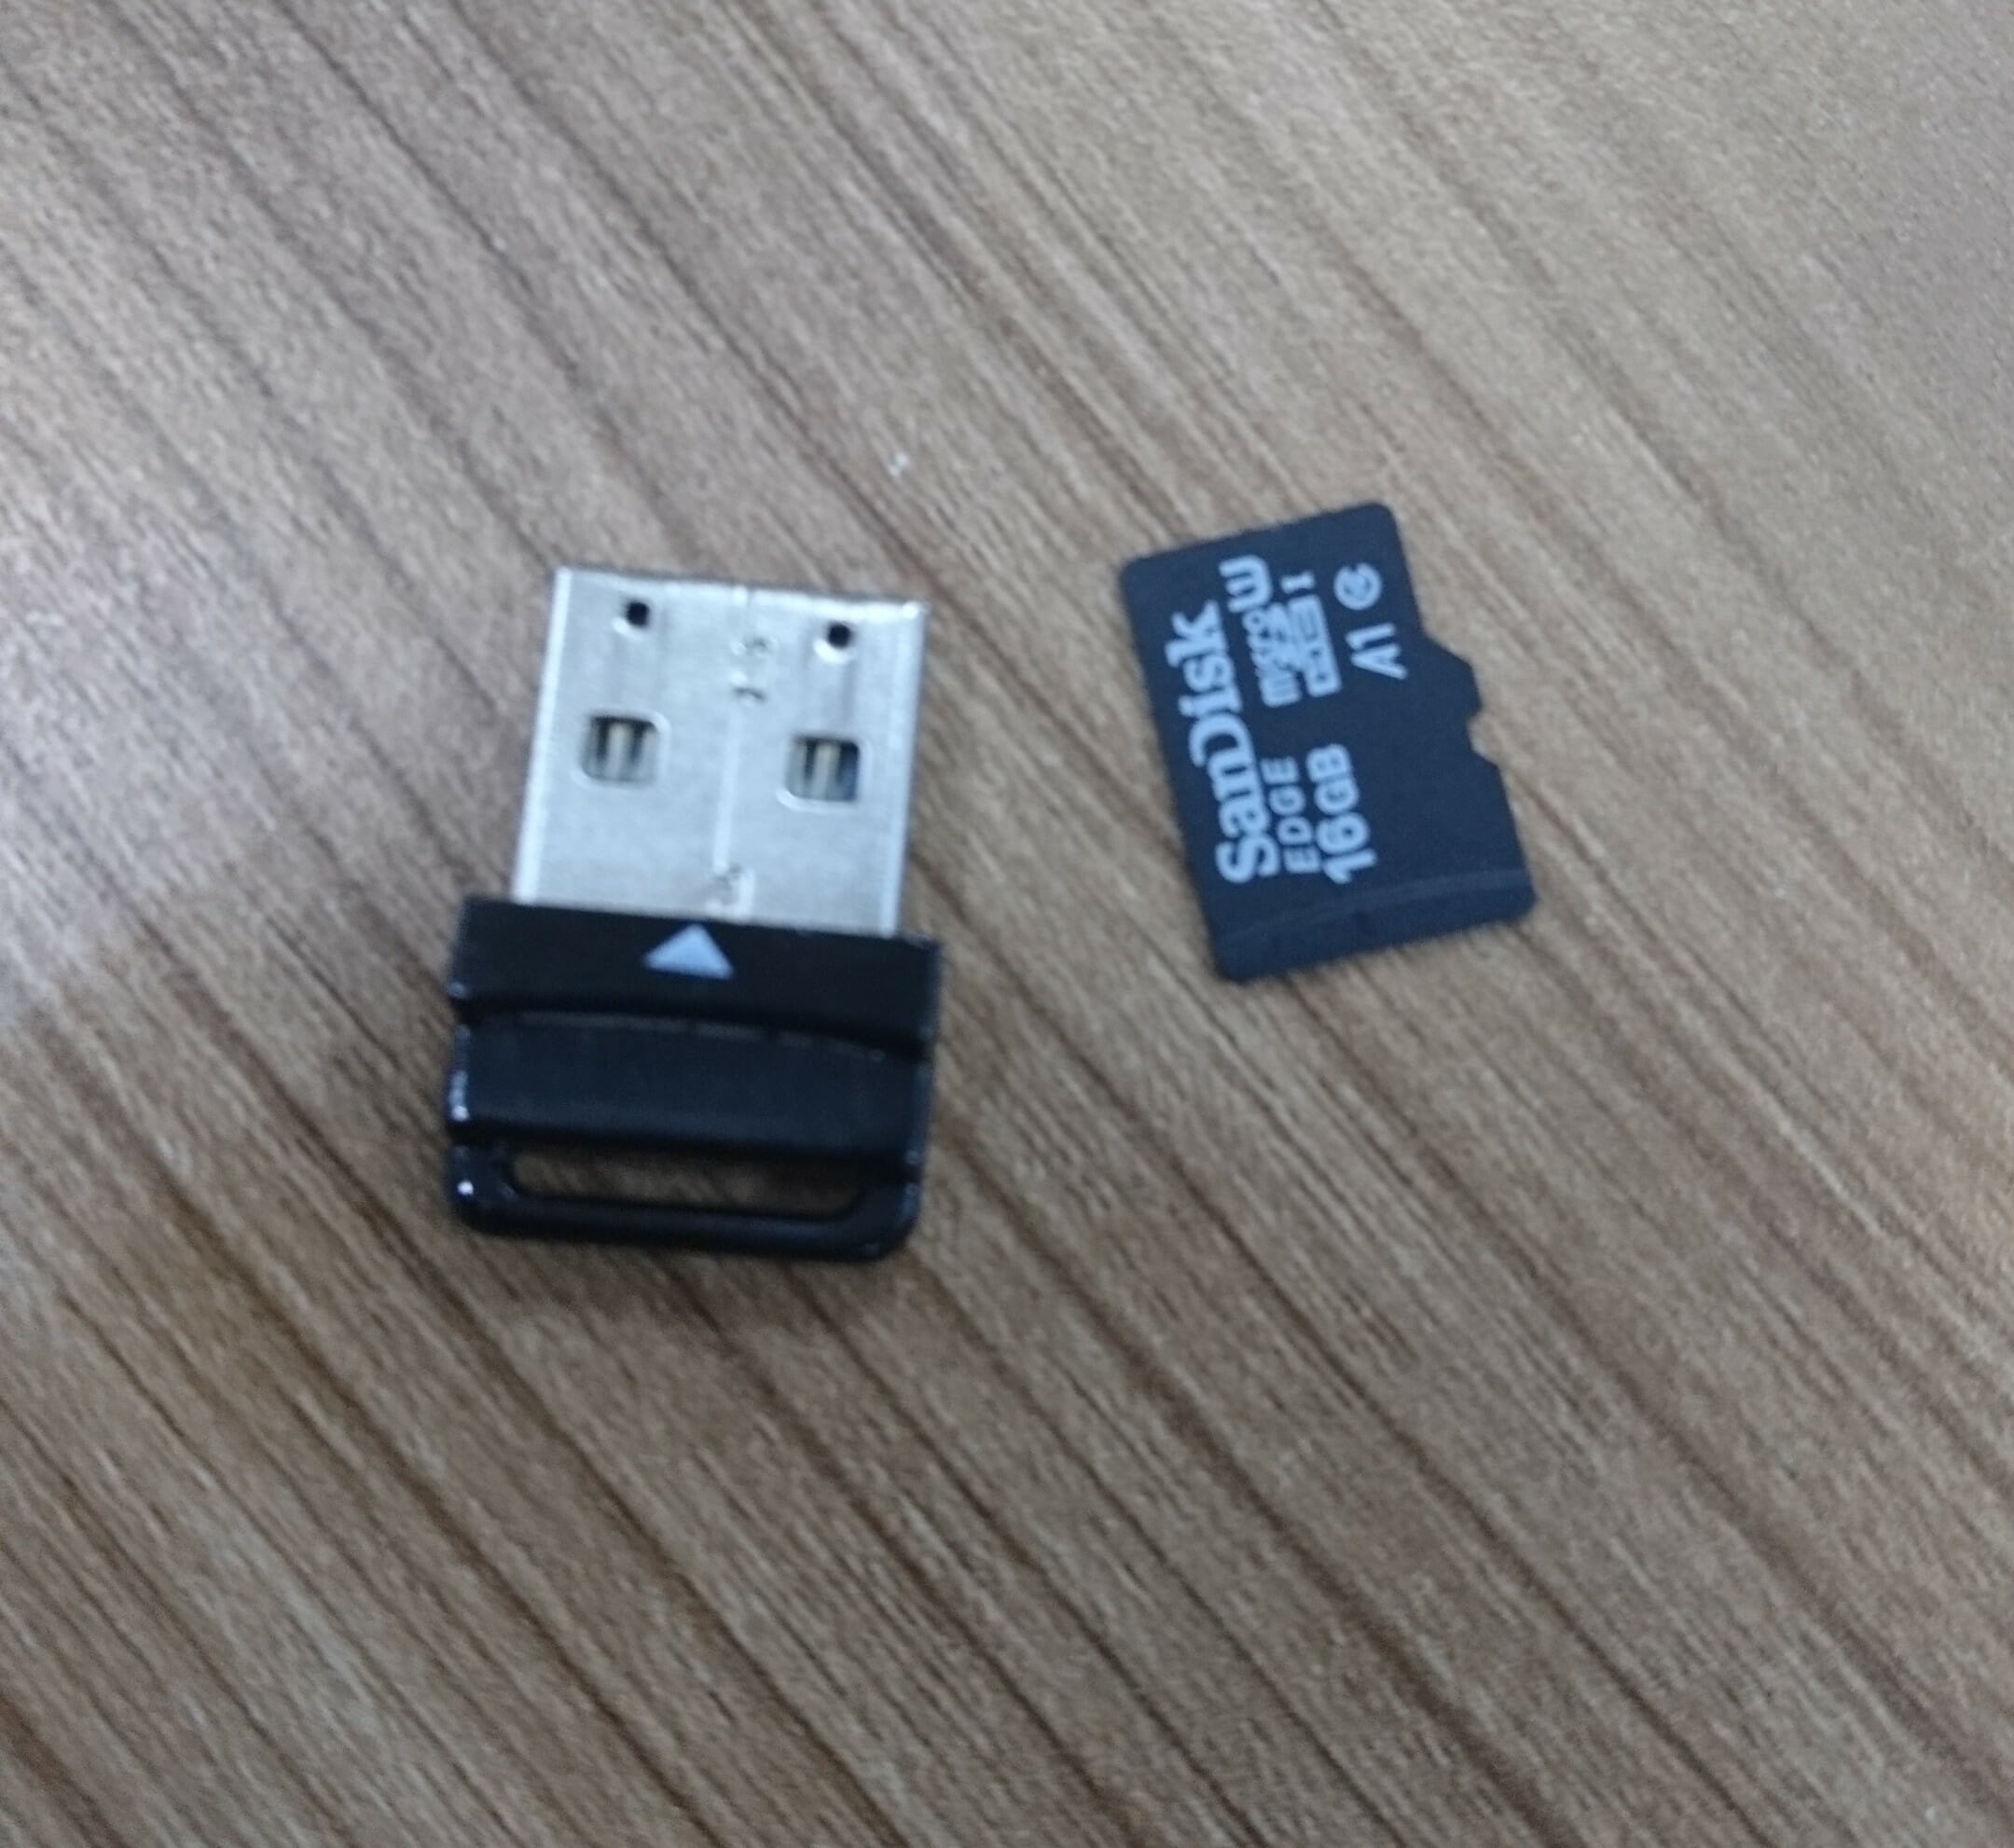
First, we use a microSD card and access the files in it from another laptop computer. I used this type of USB microSD Reader Writer adapter. You may use any reader card as long as you are able to read and write data between your SD and laptop.
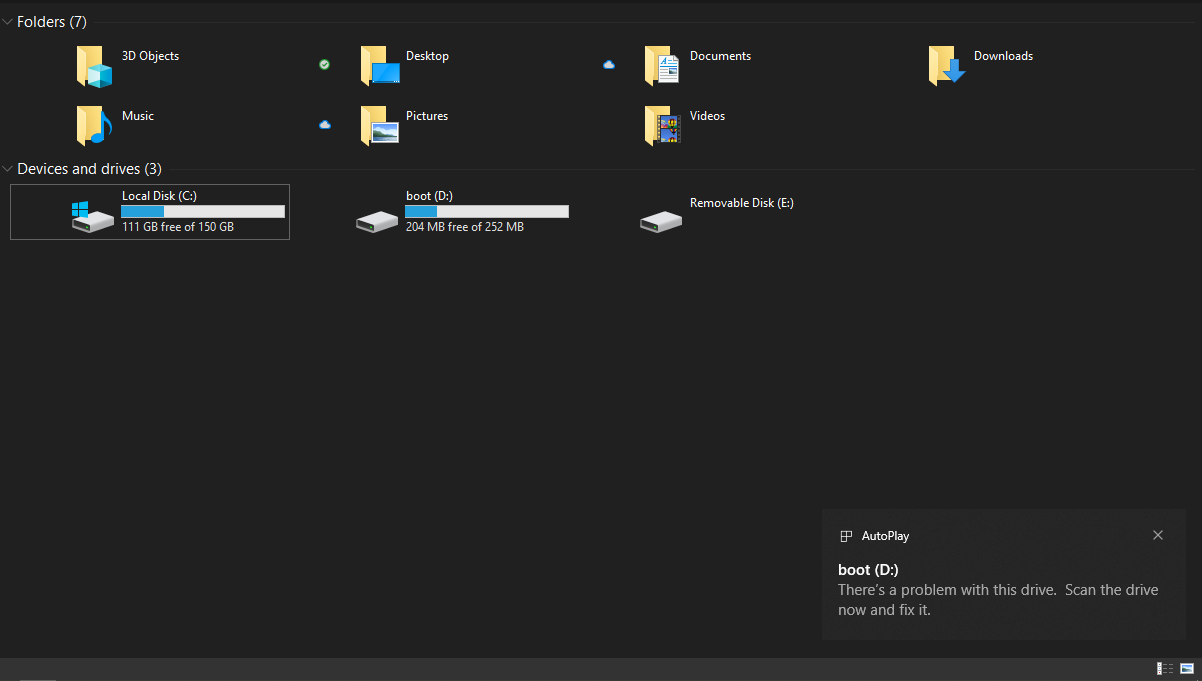
Plug the microSD in the USB adapter onto the laptop and it should be detected as a USB drive. Please DO NOT format the detect drive. Go to My PC to access the file on the microSD card. Enter the 'boot' drive to search the file. The view will look like this.
Note : Always cautious to NOT format the drive due to it will remove the Raspberry Pi OS and your data in it.
Find the config.txt file and open it with Notepad or Text Editor.
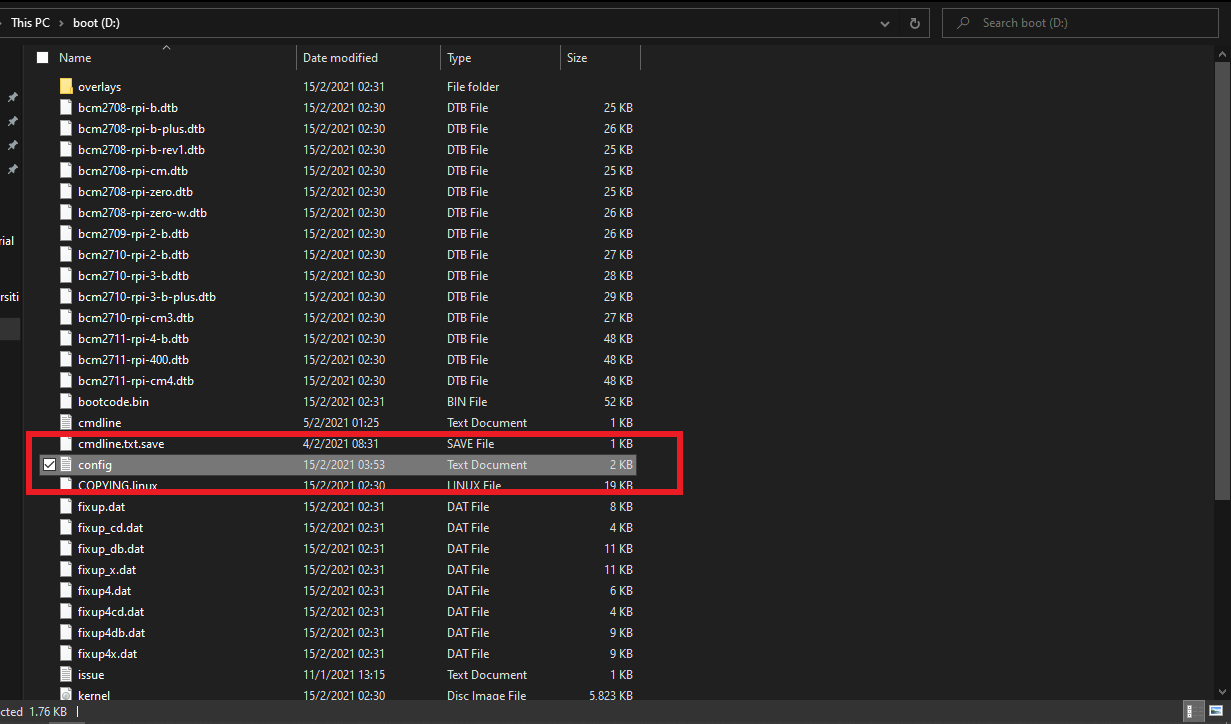
We can see the interface as in this picture. This file contains settings for Raspberry Pi. So we can configure it by changing the setting.
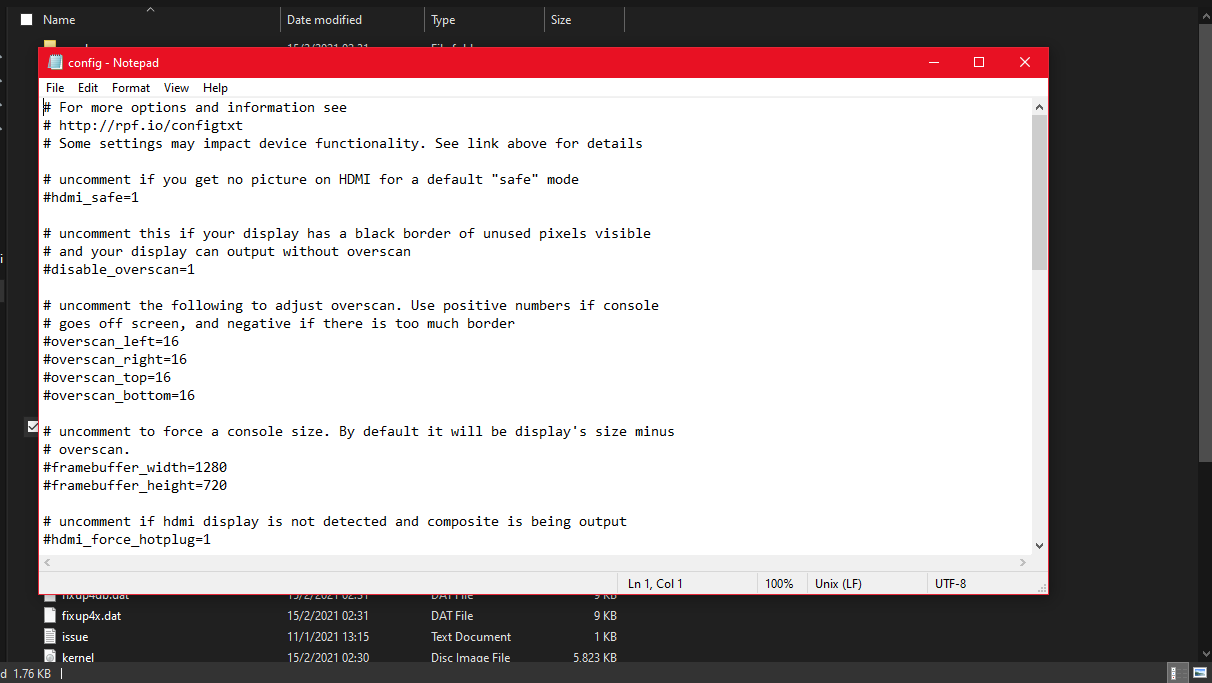
From the file, find these lines as in the picture :
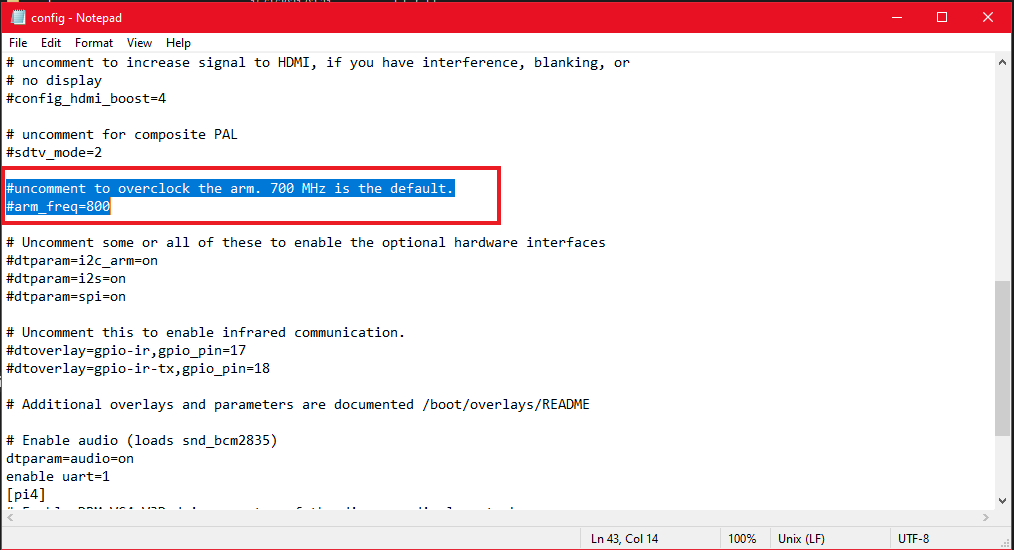
Once you found it, below the line please key in the overclock command in order for the system to set the clock speed of the CPU. The picture shows the command for the 2.147GHz overclocking :
Below show the commands that we can use to write for the CPU clock speed overclocking :
Overclock to 2.0GHz
over_voltage=6
arm_freq=2000
Overclock to 2.147GHz
over_voltage=6
arm_freq=2147
After done, please save the file by pressing CTRL + S, close the file and eject the microSD card.
Next, in order for you to verify if the clock speed changed, insert the microSD card back into Pi 400 then boot up it. Enter the following command to watch the CPU hover in live :
watch -n 1 vcgencmd measure_clock armYou can see the clock speed goes to maximum speed like you set it. If the speed does not hover at maximum, you can open any application or browser in order for the CPU running more. The picture below show the output :
Conclusion
The tutorial that been conducted shows that even we overclock until 2.147 GHz, the temperature still stable and under control. Thanks to giant heatsink design that been applied that make Pi 400 capable of doing any workload and not run under the danger of overheating. Then, the power consumption also not so different between 1.8GHz. The different also around 0.01A. Thus, we can overclock Pi 400 until 2.147GHz. Congratulations! We did it.
References
Raspberry Pi 400 Review: Faster CPU, New Layout, Better Thermals | Tom's Hardware
How To Overclock The Raspberry Pi 400 Up To 2.2GHz! - Raspberry Pi Projects
(1) How To Overclock The Raspberry Pi 400 Up To 2.2GHz! - YouTube
Raspberry Pi 400 - The New Personal Keyboard Computer | Tutorials of Cytron Technologies