 International
 Singapore
 Malaysia
 Thailand
 Vietnam
Your shopping cart is empty!

Overclock Raspberry Pi 4 Model B to 2.0GHz for Raspberry Pi OS
Introduction
With Movement Control Order (MCO) hits us again, forcing the entire world to just online and stay at home. The needs and demands for a computer have increased dramatically.
Raspberry Pi is a Single Board Computer with a mission to enable everyone to involve in digital making. After many revisions of the Raspberry Pi mainboard, the latest Raspberry Pi 4 Model B and Raspberry Pi 400 is now as powerful as an entry-level desktop computer. Raspberry Pi 4 Model B comes with Quad-core 64-bit ARM cores and a variety of RAM sizes.
In the case you want to get better performance, you can actually overclock the default clock of 1.5GHz, up to a maximum of 2.147GHz. So in this tutorial, we will learn and do some customization to the Raspberry Pi in order to overclock the speed of the CPU.
Note: Higher clock speed will generate more heat during full load, so there should be a good cooling mechanism to keep the Raspberry Pi 4 Model B cool.
Hardware
Procedures
In this tutorial will show you two ways to overclock the Pi 4 Model B which the method procedures are totally different. However, the syntax and command still same. The first method is need to access nano boot, then configure it. This method required you to use hardware such as monitor, mouse, keyboard and cables where you need to open the Raspberry Pi and configure it through terminal. Second method is overclock by editing the configuration in SD card with laptop. With this method we do not need to setup the hardware for Pi. We just need a laptop and configure it through text file. However both methods is just an option. You may choose either method that could ease you.
Overclocking Through Nano Boot
STEP 1: Update Firmware
In order to reach the overclocking capabilities on the Pi 4, always update the OS to the latest version. Below shows how we can update Pi 4 to the latest firmware.
Open the serial terminal and enter the following commands:
sudo apt update sudo apt full-upgrade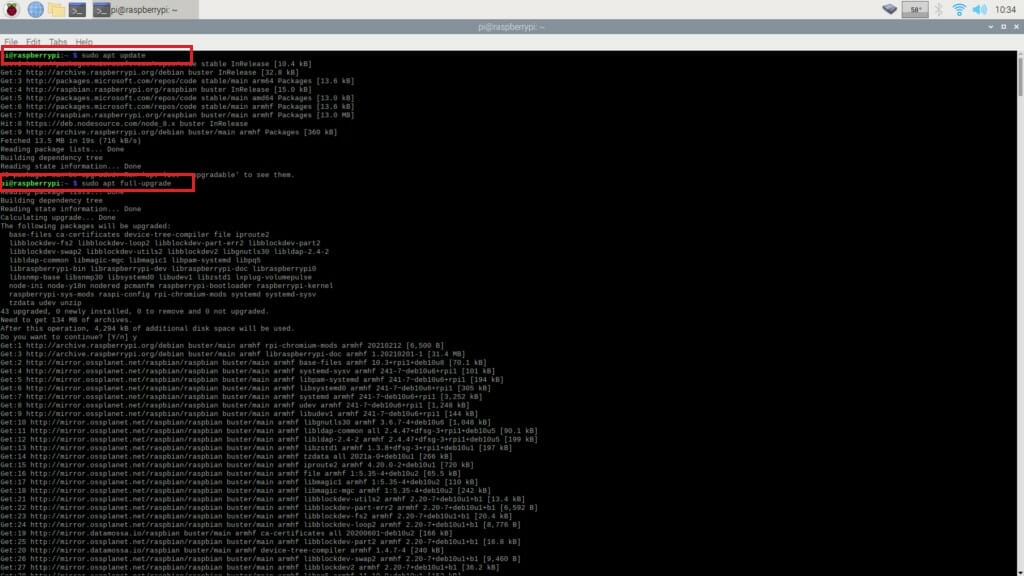
Then just reboot by clicking logout or write the command in terminal:
sudo rebootSTEP 2: Checking the Default CPU Speed
Before overclocking the CPU, is always good to check the default clock speed in order to see the changeable value. We can do so by typing the command in the terminal. There are two ways to check :
lscpuor
cat /sys/devices/system/cpu/cpu0/cpufreq/scaling_cur_freq
The CPU min MHz is 600.0000 while CPU max MHz is the current CPU speed which is 1500.0000 MHz or 1.5GHz.
STEP 3: Overclocking
To overclock the Pi 4, we will need to access the
config.txtfile under core configuration settings.
Open the terminal and enter the command:
sudo nano /boot/config.txtScroll down and search for:
#uncomment to overclock the arm. 700 MHz is the default. #arm_freq=800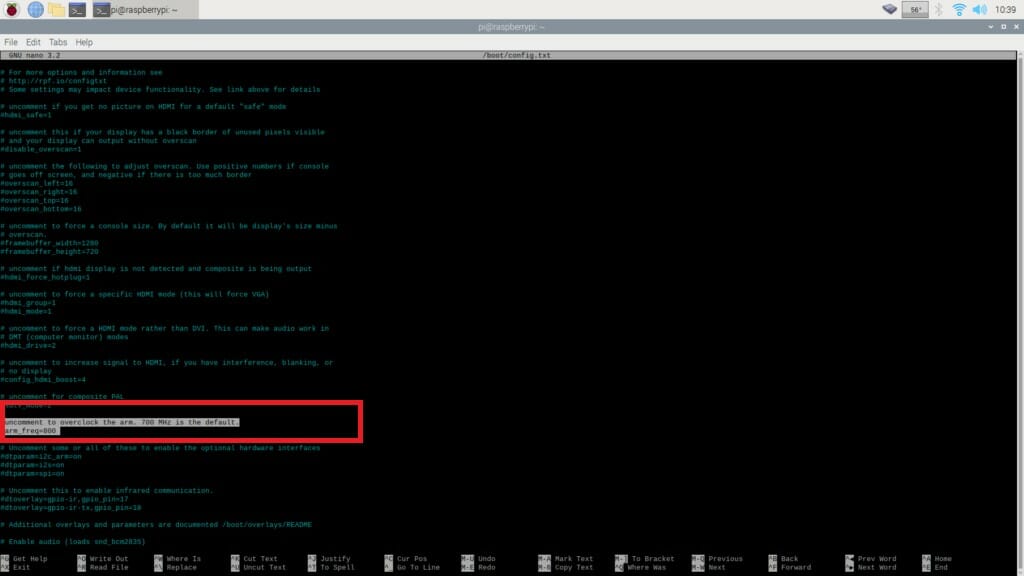
Then change the settings to :
#uncomment to overclock the arm. 700 MHz is the default. over_voltage=2 arm_freq=1750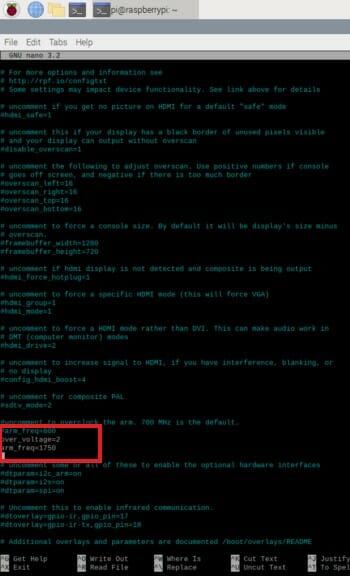
Save the file by press
CTRL + Othen
ENTERand use
CTRL + Xto exit. Now reboot your Pi 4.
When Pi 4 boots up, we can see our new CPU speed by live watch or
lscpu. To watch live we can use this command:
watch -n 1 vcgencmd measure_clock arm
You can see the speed will max up to 1750 MHz by overloading it with full load by doing high load stuffs such as browsing or watching YouTube. That is one of the ways to check the maximum CPU clock speed.
STEP 4: Overclocking More, to 2.0GHz
How about we have little excitement by overclocking the Pi 4 to 2.0GHz! Just like the previous step, we just need to edit the
config.txtby entering the command as below:
over_voltage=6 arm_freq=2000
Save the config.txt and Reboot Pi and an run this code :
watch -n 1 vcgencmd measure_clock arm lscpuSTEP 5: Overclocking to the Max-2.147GHz
To overclock Pi 4 to 2.147GHz max clock speed, needed for us to boost the
gpu_freqby editing the
config.txtfile. It's easy, just by entering this command and we are done:
over_voltage=6 arm_freq=2147 gpu_freq=750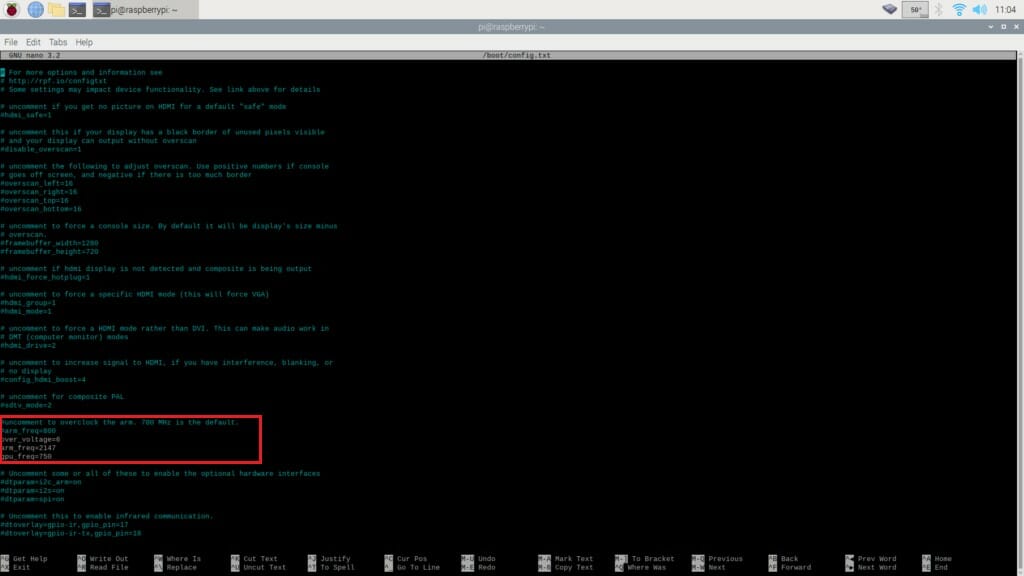
Again, save the config.txt and exit by pressing
CTRL+O, ENTERand
CTRL+X. Reboot the Pi 4 and we should see that the maximum CPU speed is changed to 2.147GHz.
Note: Raspberry Pi will generate more heat if it is running at a higher clock speed, as it is more powerful. So a good heat dissipation heatsink (passive cooling) or fan (active cooling) should be installed. In the case where the CPU temperature reaches 80°C, the kernel will be throttled and the CPU clock speed will be reduced automatically.
Overclocking Through SD Card
Firstly, we use SD card with SD adapter to connect with laptop. I used this type of adapter which is SD to USB type. You may use any adapter as long as you able to transfer receive data between your SD and laptop.

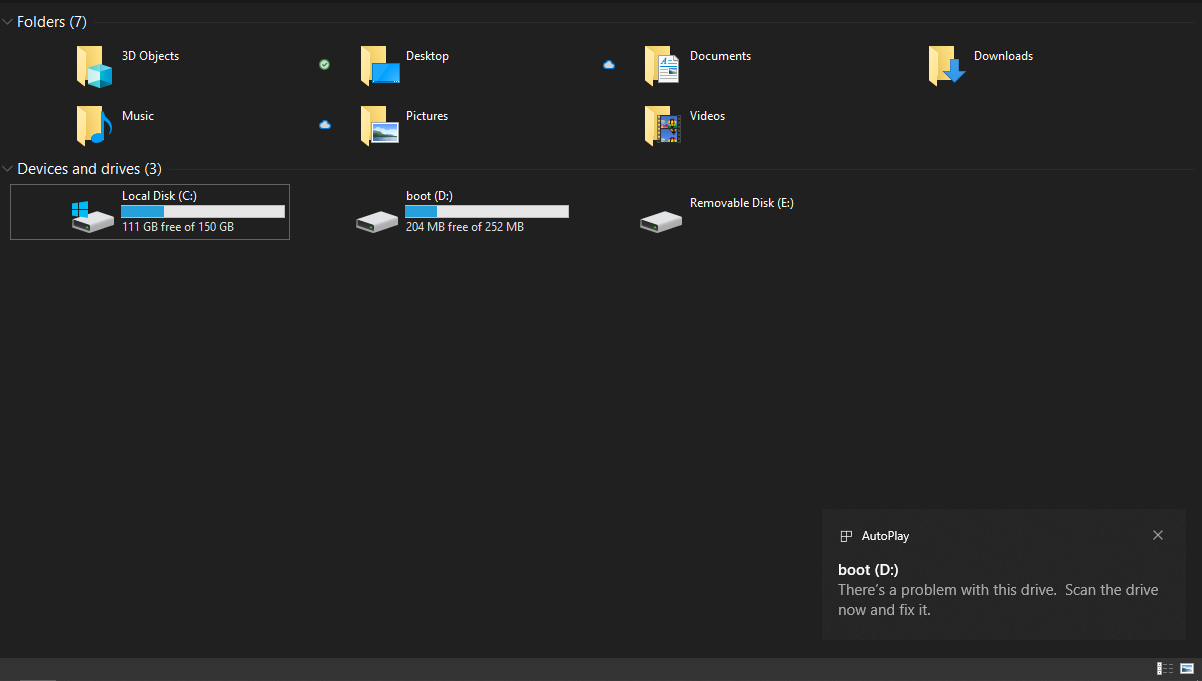
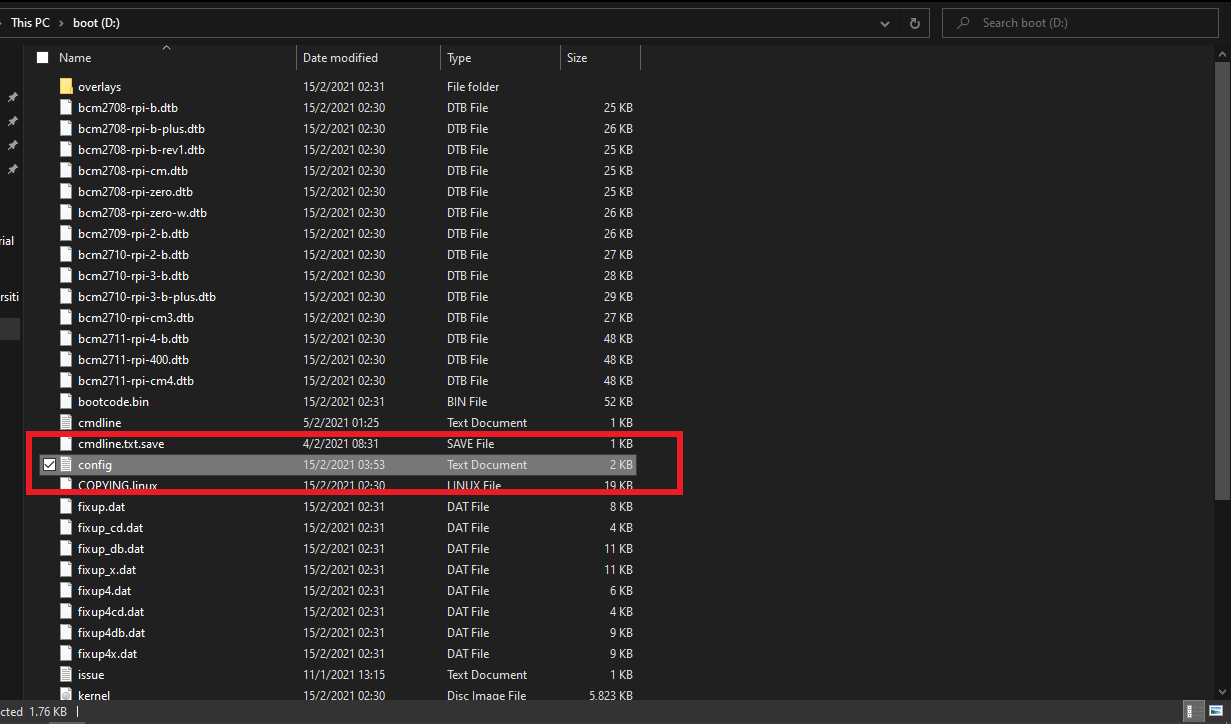
Plug the SD on to the laptop and it will detect. Go to My PC to access the file in the SD card. Enter the 'D drive' to search the file. The view will look like this.
Find the config.txt file and open it with notepad.
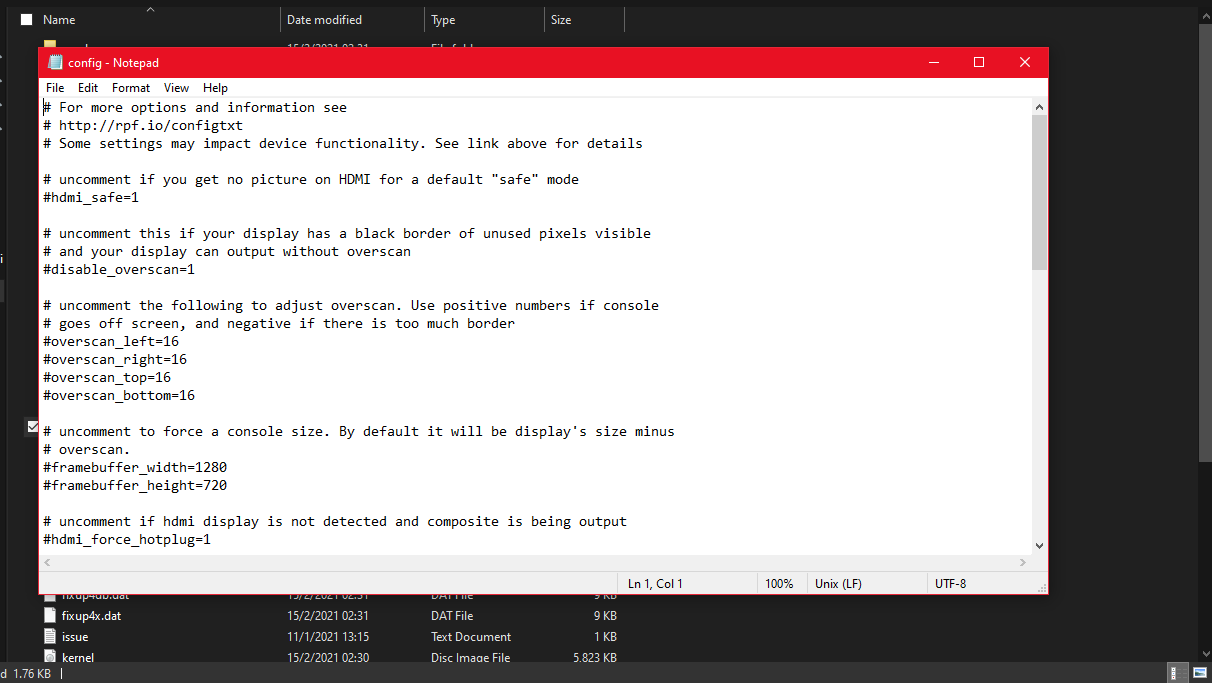
We can see the interface as in this picture. The text is a setting for Raspberry Pi. So we can configure it by changing the setting.
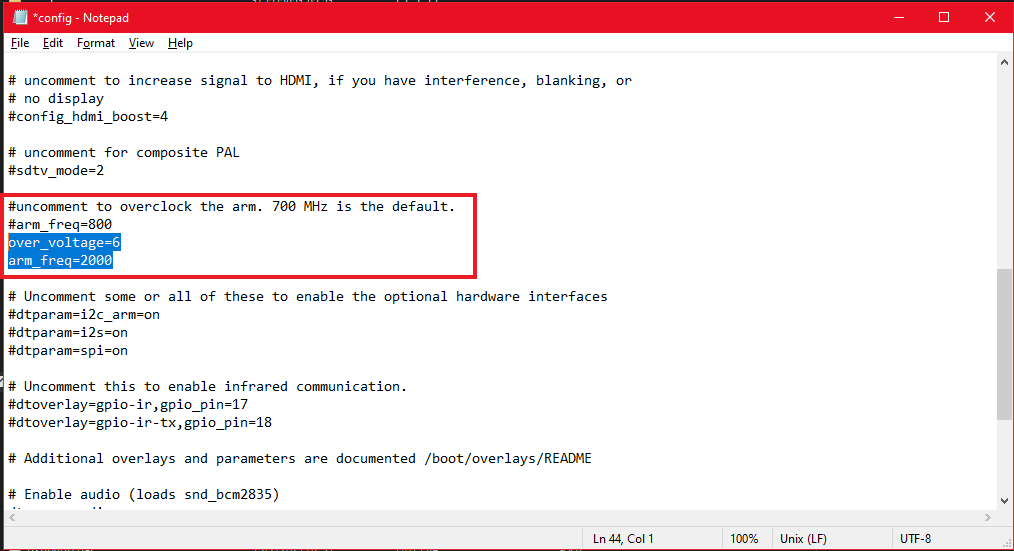
From the file, find these lines as in the picture :
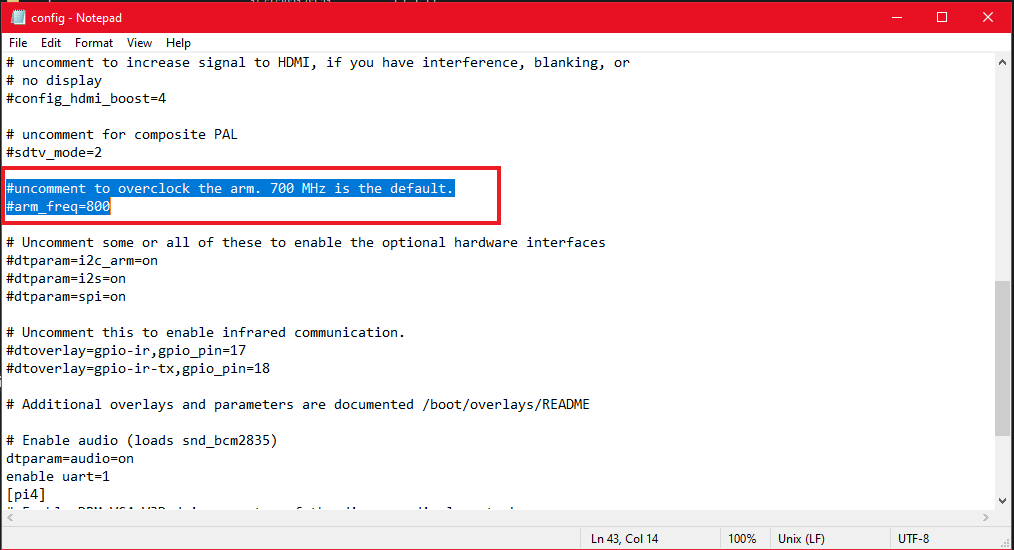
Once you found it, below those line write the overclock command in order for the system to set the clock speed of the CPU. The picture shows the command for the 2.0GHz overclocking :
Below show the commands that we can use to write for the CPU clock speed overclocking :
Overclock to 1.75GHz
over_voltage=2 arm_freq=1750Overclock to 2.0GHz
over_voltage=6 arm_freq=2000Overclock to 2.147GHz
over_voltage=6 arm_freq=2147 gpu_freq=750After done wrote the line, save it by pressing
CTRL + Sthen eject the SD card.
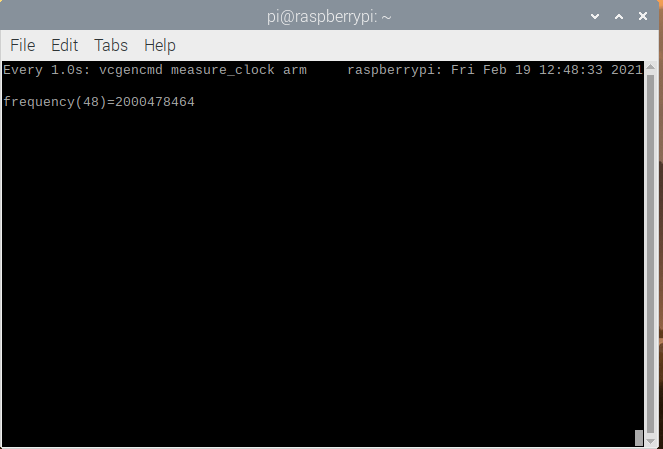
Next, in order for you to verify is the clock speed changed, insert the SD card in Pi 4 Model B then boot up it. Enter the following command to watch the CPU hover in live :
watch -n 1 vcgencmd measure_clock armYou can see the clock speed goes to maximum speed like you set it. If the speed does not hover at maximum, you can open any application or browser in order for the CPU running more. The picture below show the output :
Note: Raspberry Pi will generate more heat if it is running at a higher clock speed, as it is more powerful. So a good heat dissipation heatsink (passive cooling) or fan (active cooling) should be installed. In the case where the CPU temperature reaches 80°C, the kernel will be throttled and the CPU clock speed will be reduced automatically.
Conclusion
Congratulations! We did it. By overclocking the CPU, the Raspberry Pi should give us an extra performance. However, do check the warnings from Raspberry Pi too: https://www.raspberrypi.org/documentation/configuration/warning-icons.md
References
How To Overclock The Raspberry Pi 4, Youtube video by ETA Prime
How to overclock Raspberry Pi 4, article by Lucy Hattersley
Overclock The Raspberry Pi 4 to 2.0Ghz! All 4 Cores Safely!, Youtube video by TechFigure