 International
 Singapore
 Malaysia
 Thailand
 Vietnam
Your shopping cart is empty!

How to Display on I2C OLED with Arduino
In this tutorial, I’ll share with you on how to display on I2C OLED using Arduino. The video will cover on :
- Installing library for OLED.
- Testing the OLED with example provided.
- How to custom an image to display on the OLED.
- Display an output on the OLED.
HARDWARE PREPARATION
This tutorial use :
- Maker UNO
- Temperature Sensor (Celcius)
- OLED I2C
- Breadboard 8.5×5.5cm (400 holes)
- Acrylic Base Plate For Arduino UNO
- Jumper Wires
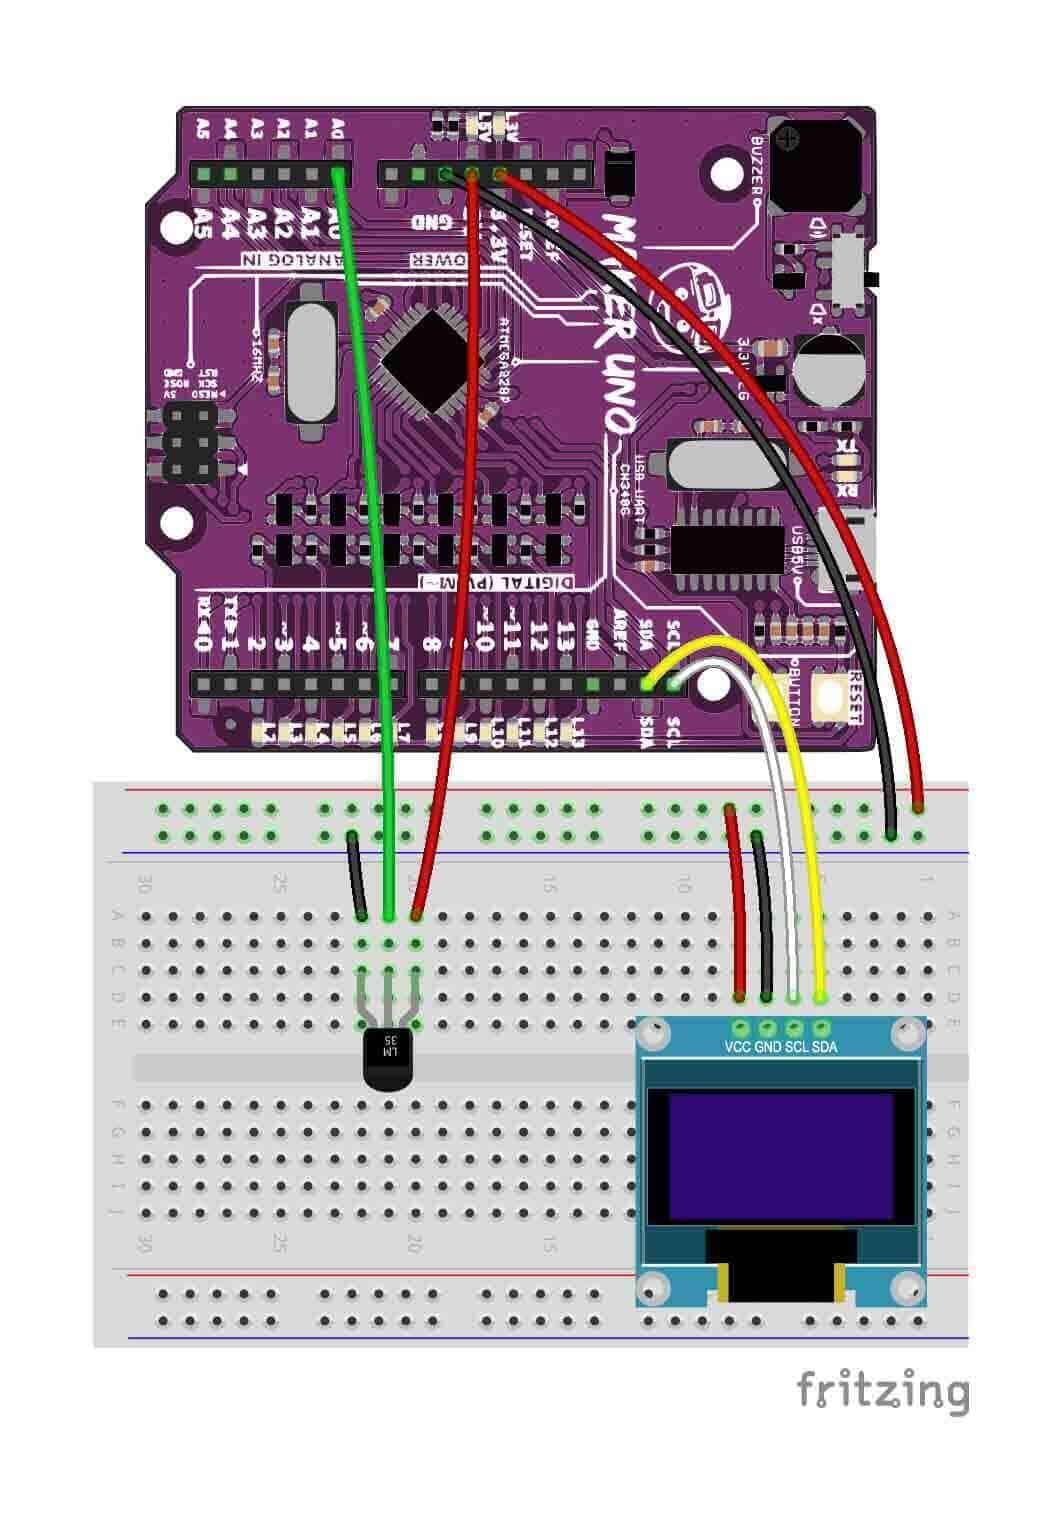
You can make the hardware connection based on the diagram and table below.
Connection | |
|---|---|
| OLED : VCC | Maker UNO: 3.3V |
| OLED : GND | Maker UNO: GND |
| OLED : SCL | Maker UNO: SCL |
| OLED : SDA | Maker UNO: SDA |
| LM35 : GND | Maker UNO: GND |
| LM35 : VOut | Maker UNO: Pin A0 |
| LM35 : VCC | Maker UNO: 5V |
Sample Code
This is the sample code used for this tutorial. Try it!
References :
Thank you
Thank you for reading this tutorial and we hope it helps your project development. If you have any technical inquiry, please post at Cytron Technical Forum.