 International
 Singapore
 Malaysia
 Thailand
 Vietnam
Your shopping cart is empty!

Line Following Robot Using Arduino and Maker Drive
In this tutorial, I’ll share with you on how to build a Line Following robot using Arduino and Maker Drive. Before this we’re using an L298N motor driver and now we’re going to change it to Maker Drive and here are the reasons why:
- Easy to troubleshoot with the push button and LED indicator.
- Support motor voltage from 2.5V to 9.5VDC
- Solid state components provide faster response time and eliminate the wear and tear of mechanical relay
- 5V Output (200mA) to power the controller with minimum input voltage of 2.5V.
HARDWARE PREPARATION
This tutorial use :
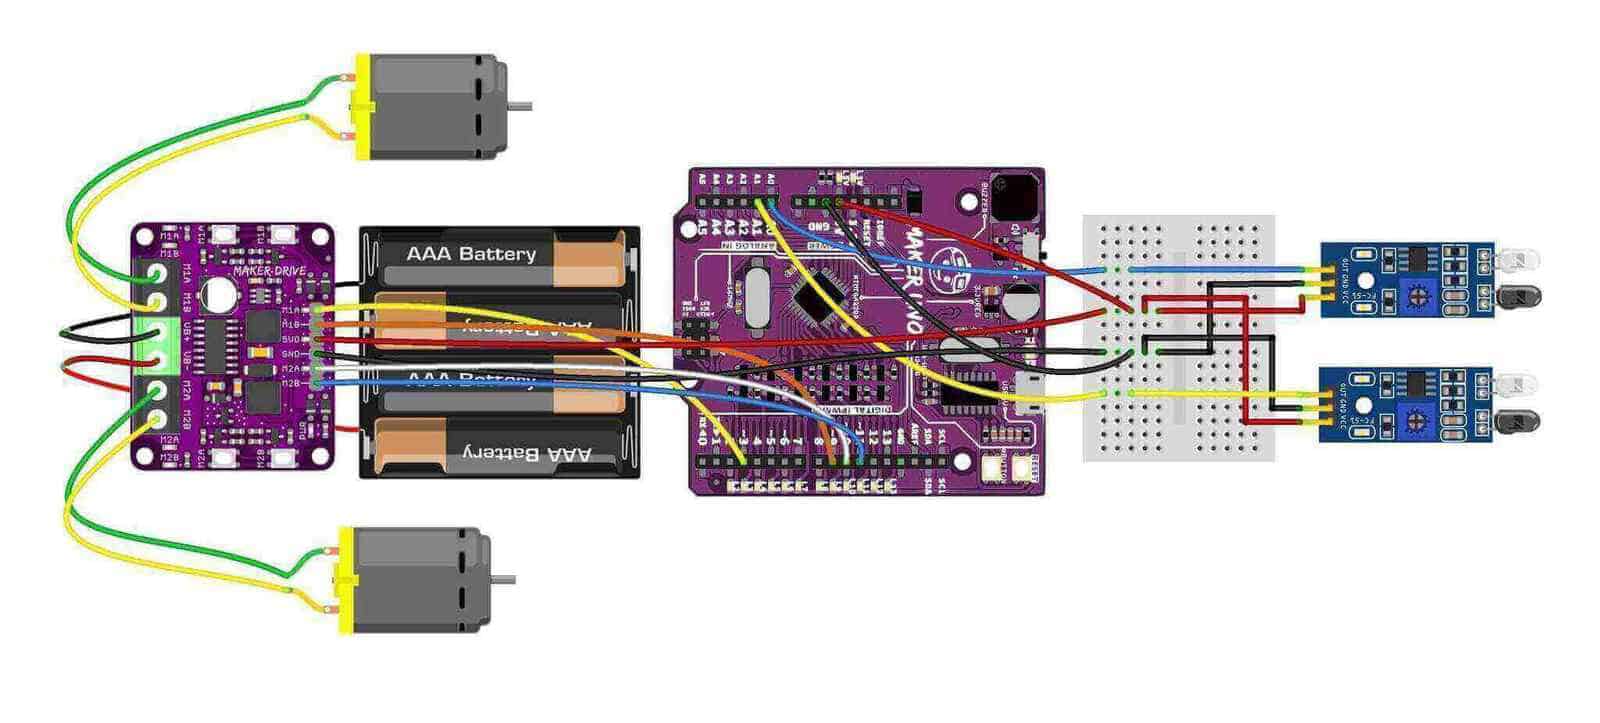
You can make the hardware connection based on the diagram and table below.
Connection | |
|---|---|
| Maker Drive : M1A | Maker UNO: Pin 3 |
| Maker Drive : M1B | Maker UNO: Pin 9 |
| Maker Drive : 5V | Maker UNO: 5V |
| Maker Drive : GND | Maker UNO: GND |
| Maker Drive : M2A | Maker UNO: 10 |
| Maker Drive : M2B | Maker UNO: 11 |
| Left Tracking Module : DO | Maker UNO: Pin A0 |
| Right IR Tracking Module : DO | Maker UNO: Pin A1 |
Reference Video
This is the reference video on how to install the library.
Sample Code
This is the sample code used for this tutorial. Try it!
Thank you
Thank you for reading this tutorial and we hope it helps your project development. If you have any technical inquiry, please post at Cytron Technical Forum.