INTRODUCTION
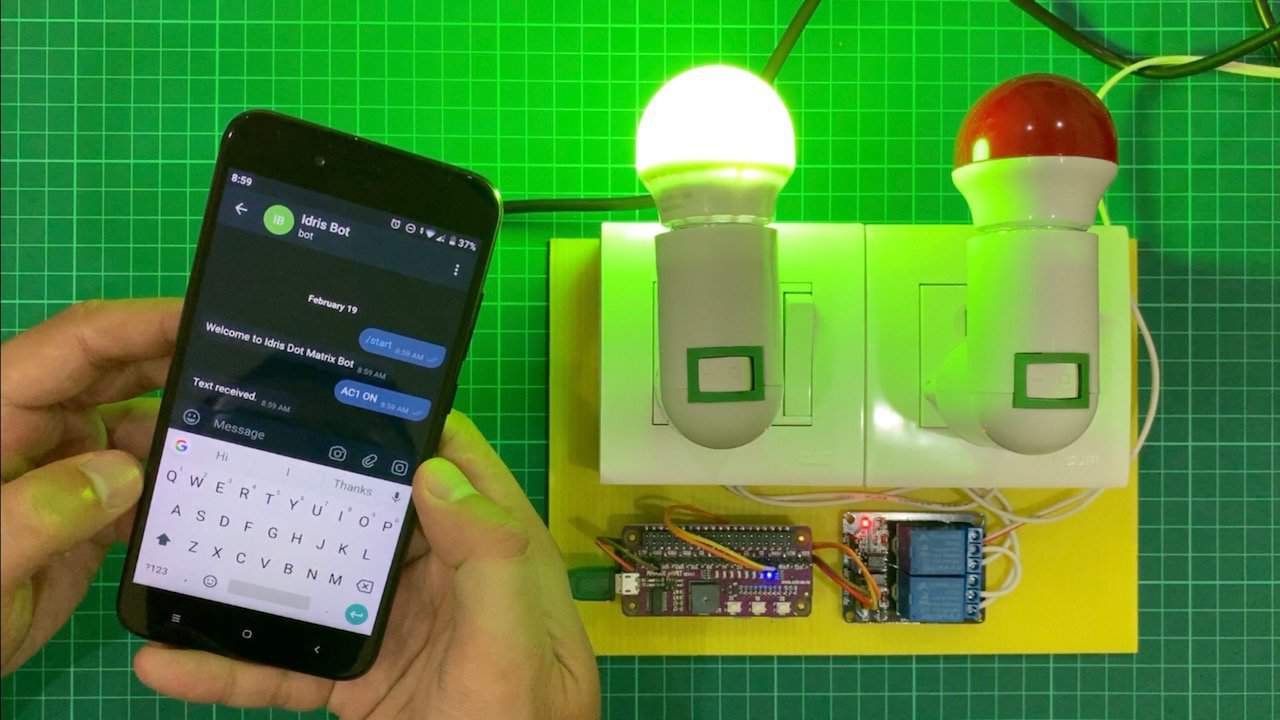
Besides using Telegram message to do display on dot matrix, we also can control things, such as relay modules, to on and off. To do that, we need to compare the message received and assign what task to do. In this video tutorial, we will share on how to control electrical appliances using Telegram messages and Raspberry Pi.
Before that, you may need to refer following tutorial first:
VIDEO
This video will show you on how to control electrical appliances through Telegram message using Raspberry Pi.
Untuk versi bahasa Melayu, sila rujuk video dibawah.
HARDWARE PREPARATION
Item used in the video.
Wiring connection table.
Maker pHAT | Relay 2 Channels | AC Socket | AC Plug |
5V | VCC | ||
GND | GND | ||
13 | IN1 | ||
19 | IN2 | ||
COM1 | Live | ||
COM2 | Live | ||
NO1 | Live1 | ||
NO2 | Live2 | ||
Neutral1 | Neutral | ||
Neutral2 | Neutral |
Sample Code
This is the sample code used in the video. Anyway it will be updated from time to time.
from gpiozero import LED, Buzzer, Button, OutputDevice | |
from time import time, sleep, strftime | |
from datetime import datetime | |
import telepot | |
led1 = LED(17) | |
led2 = LED(18) | |
led3 = LED(27) | |
led4 = LED(22) | |
led5 = LED(25) | |
led6 = LED(12) | |
sw1 = Button(21) | |
sw2 = Button(16) | |
sw3 = Button(20) | |
buzzer = Buzzer(26) | |
RELAY_IN1 = 13 | |
RELAY_IN2 = 19 | |
relay1 = OutputDevice(RELAY_IN1, active_high=False, initial_value=False) | |
relay2 = OutputDevice(RELAY_IN2, active_high=False, initial_value=False) | |
def handle(msg): | |
global telegramText | |
global chat_id | |
global telegramMessage | |
chat_id = msg['chat']['id'] | |
telegramText = msg['text'] | |
print('Message received from ' + str(chat_id)) | |
if telegramText == '/start': | |
bot.sendMessage(chat_id, 'Welcome to Idris Bot') | |
else: | |
buzzer.beep(0.1, 0.1, 2) | |
telegramMessage = True | |
def sw1Pressed(): | |
relay1.toggle() | |
def sw2Pressed(): | |
relay2.toggle() | |
bot = telepot.Bot('PUT YOUR TELEGRAM BOT TOKEN HERE') | |
bot.message_loop(handle) | |
print("Telegram bot is ready") | |
sw1.when_pressed = sw1Pressed | |
sw2.when_pressed = sw2Pressed | |
telegramMessage = False | |
count = 0 | |
acStatusText = '' | |
relay1Status = False | |
relay2Status = False | |
buzzer.beep(0.1, 0.1, 1) | |
try: | |
while True: | |
if telegramMessage == True: | |
telegramMessage = False | |
if telegramText == 'AC1 ON': | |
print("Setting relay 1: ON") | |
relay1Status = True | |
relay1.on() | |
elif telegramText == 'AC1 OFF': | |
print("Setting relay 1: OFF") | |
relay1Status = False | |
relay1.off() | |
elif telegramText == 'AC2 ON': | |
print("Setting relay 2: OFF") | |
relay2Status = True | |
relay2.on() | |
elif telegramText == 'AC2 OFF': | |
print("Setting relay 2: OFF") | |
relay2Status = False | |
relay2.off() | |
acStatusText = 'Status: ' | |
if relay1Status == True: | |
acStatusText = acStatusText + 'AC1 ON, ' | |
elif relay1Status == False: | |
acStatusText = acStatusText + 'AC1 OFF, ' | |
if relay2Status == True: | |
acStatusText = acStatusText + 'AC2 ON.' | |
elif relay2Status == False: | |
acStatusText = acStatusText + 'AC2 OFF.' | |
bot.sendMessage(chat_id, acStatusText) | |
except KeyboardInterrupt: | |
relay1.off() | |
relay2.off() | |
sys.exit(0) |
Thank You
References:
Thanks for reading this tutorial. If you have any technical inquiry, please post at Cytron Technical Forum.
3 thoughts on “Controlling Electrical Appliances Through Telegram Message Using Raspberry Pi”
I world like to make this project with my students. May I know the total cost for this project? It’s more helpful to have a proper quotation send to my email. Where should I ask for it?
Hi, thanks for your suggestion.
thank you for this tutorial,
i’m hoping in the future cytron can also make any tutorial in PDF format with picture or tutorial in summary with pdf format