 International
 Singapore
 Malaysia
 Thailand
 Vietnam
Your shopping cart is empty!

Raspberry Pi as Media Center - OSMC
INTRODUCTION

Hello Raspberian! Are you enjoying playing with Raspberry Pi? It is exciting, isn’t it?
Today, we want to share more on how you can turn your Raspberry Pi into a media center, another popular use of this SBC (Single Board Computer). You can directly play any type (almost) of media file on it and stream video from the Internet like Youtube! We will be using OSMC (Open Source Media Center) as a captain to handle Raspberry Pi. What is OSMC? It is basically a media center operating system that supports Raspberry Pi. The best thing is, the Raspberry Pi NOOBS (New Out Of Box Software) supports the installation of OSMC which is pretty helpful.
Why OSMC? Here are some of our reasons:
- The user interface is simple and easy to use
- It’s free and open source
- As a Raspberry Pi User, it is quite straightforward to install OSMC, it can be done in just a few minutes
- It gets updates and apps easily
- There are huge community using OSMC
- It can basically lay any media files from anywhere
- It looks fantastic!
On the other hand, you can also try LibreELEC, which is also supported by Raspberry Pi NOOBS.
Now, just follow these simple steps to build your own media center! Let’s start!
BASIC SETUP
You might already have a Raspberry Pi. Alternatively, you might also get our Raspberry Pi Media Kit. Anyway, we recommend the following item:
- Raspberry Pi 3 Model B+ (or other models but we recommend Pi 3 Model B+)
- 16GB Micro SD Card with NOOBS for RPI
- Raspberry PI 3 Case (Black), enclosure (Optional).
- 5V 3A Adapter w/ micro USB cable (UK type), to power the Raspberry Pi
- High-Speed HDMI Cable 1.5m
- Display devices (TV, monitor, display, screen, projector, etc.)
- USB Keyboard and Mouse, during installation and setup, and during navigation.
- High-Speed Internet, WiFi, or LAN, to download the OSMC for installation and also to view media streaming.
CONNECT THINGS UP
We do not need any wiring or jumper wires in this project. Just connect all the devices as follow:

We are using a VGA monitor which does not come with a speaker, therefore an additional USB speaker is connected. If you are using HDMI to TV or monitor, an additional USB speaker is NOT necessary. Do make sure you connect at least one keyboard during installation and setup. Once power up (from the adapter) and make sure your monitor is powered up too, you should see some text appears on the monitor.
HOW TO INSTALL OSMC ON YOUR RASPBERRY PI
Assuming you are getting the Media Kit, the microSD card should have been pre-loaded with NOOBS. Your Raspberry pi will boot up, you will see the NOOBS interface at the beginning. Choose the Wi-Fi Network tab then choose your Wi-Fi to connect to the internet. Check all connections, and switch on the adapter (the 5V 3A adapter comes with a push-on/push-off switch on the cable).
Yet, in case you did not see the NOOBS windows asking for a Network connection and the Raspbian desktop appears, do not panic. That is the new NOOBS The NOOBS released in April 2018 will install Raspbian by default, and the OS selection windows will not appear by default. Just restart the Raspberry Pi (Go to the menu and choose shutdown -> Reboot). Press the “SHIFT” key on the keyboard when Raspberry Pi boots up (When the text appears on the monitor). Then the OS selection table will appear.
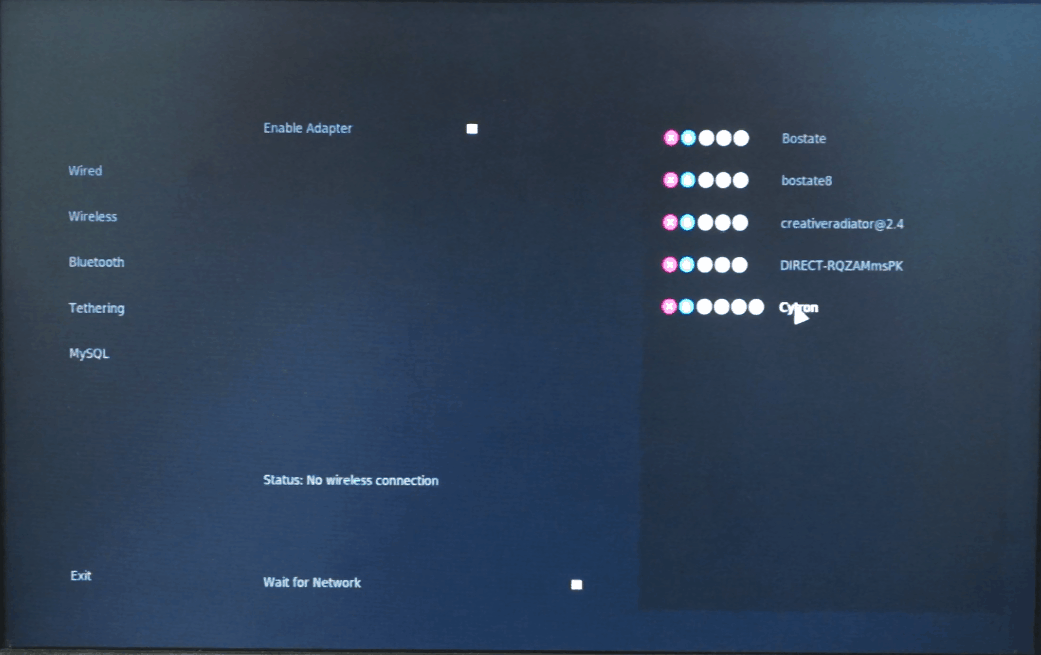
You will need to configure the network connection. If you are using Ethernet/RJ45/LAN, no configuration is needed. Most of the people will choose a WiFi connection because it is more flexible and everyone has WiFi, right? Choose your WiFi SSID and key in the password.
Next, you will see the list of the OS(Operating System) available to be downloaded and you should choose OSMC_Pi2. Make sure the box on left is ticked, and click the install icon at the top left corner of the windows. It will take several minutes to download the files for installation, of course, it depends a lot on your Internet speed.

Well, be patient and wait for the download to complete, the installation of OSMC will start automatically after the download is complete.
You will get a message of the installation is completed once it is done. Welcome to OSMC!
SETUP OSMC FOR THE FIRST TIME
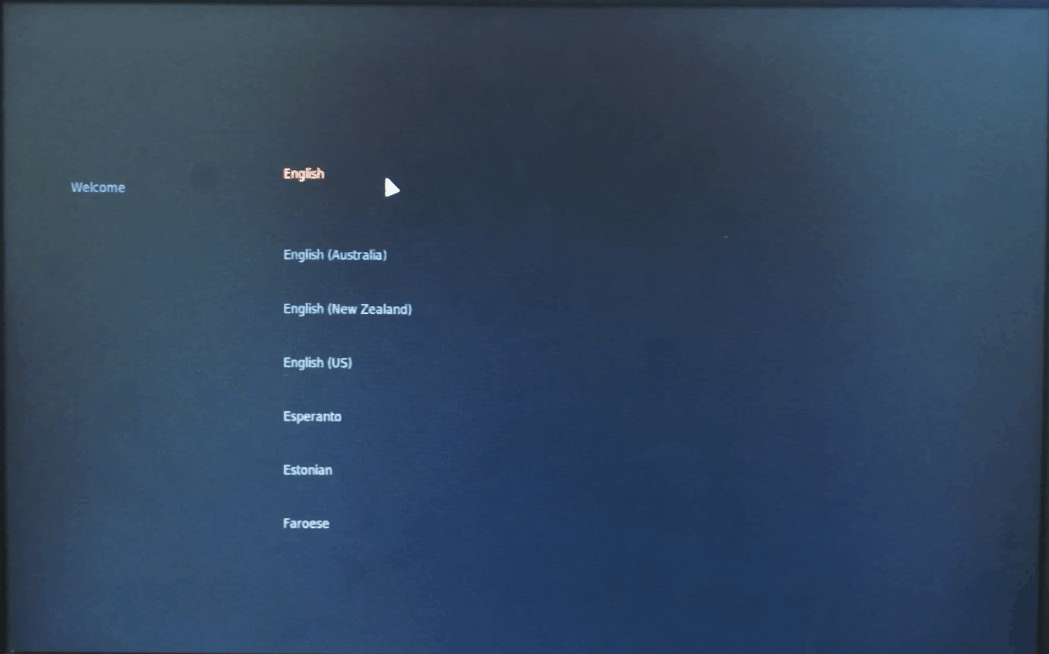
Right after the installation is completed, you need to set up the language.
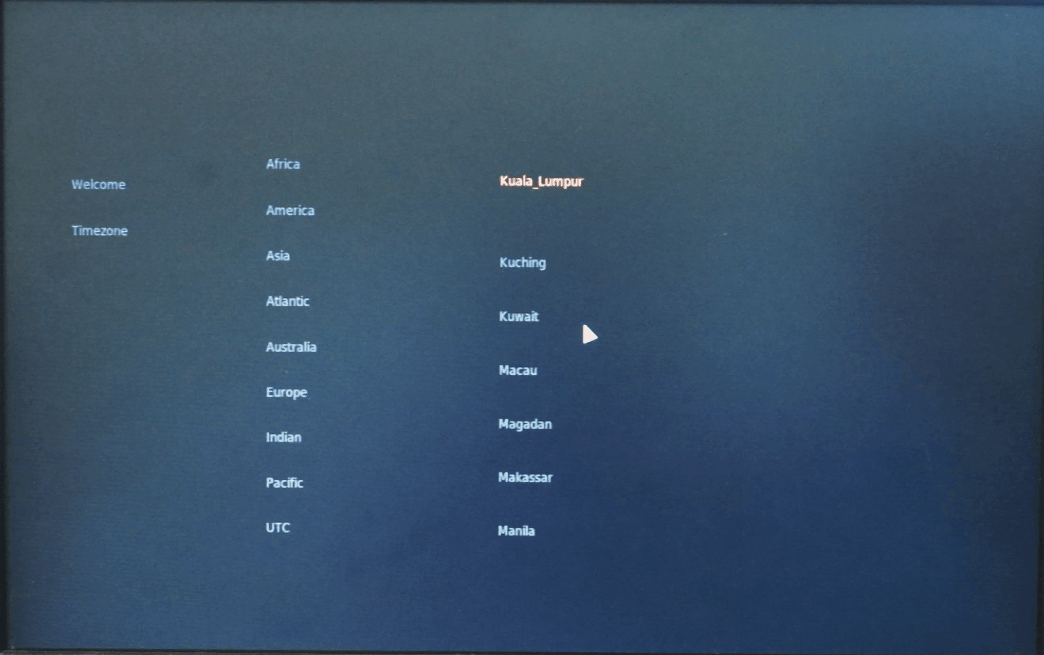
Secondly, choose your current time zone.
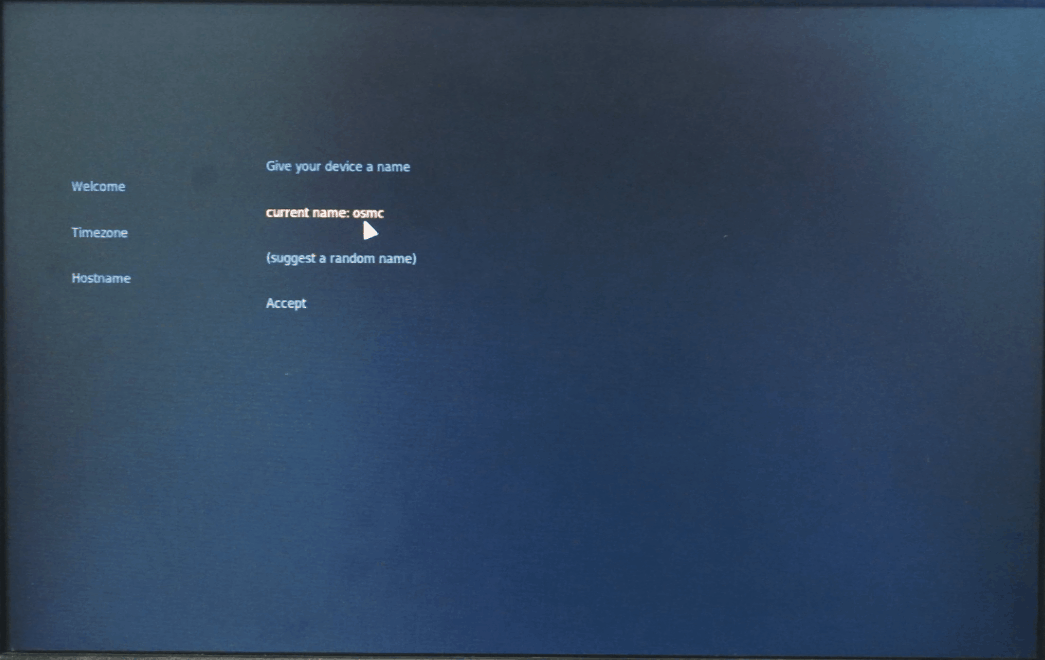
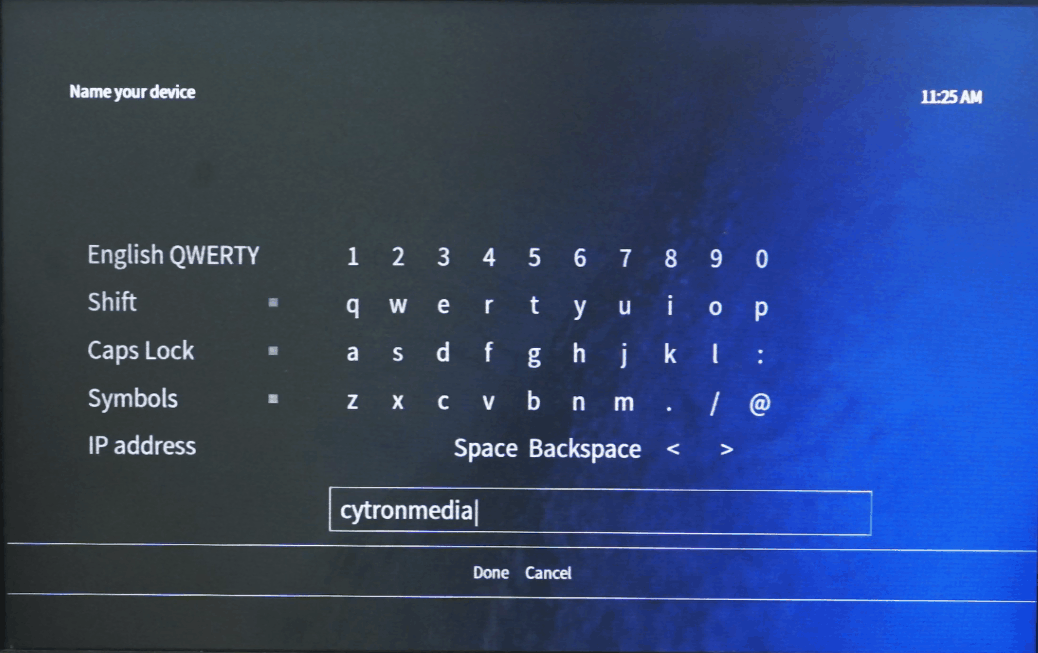
Then, you need to set a hostname for this media center.
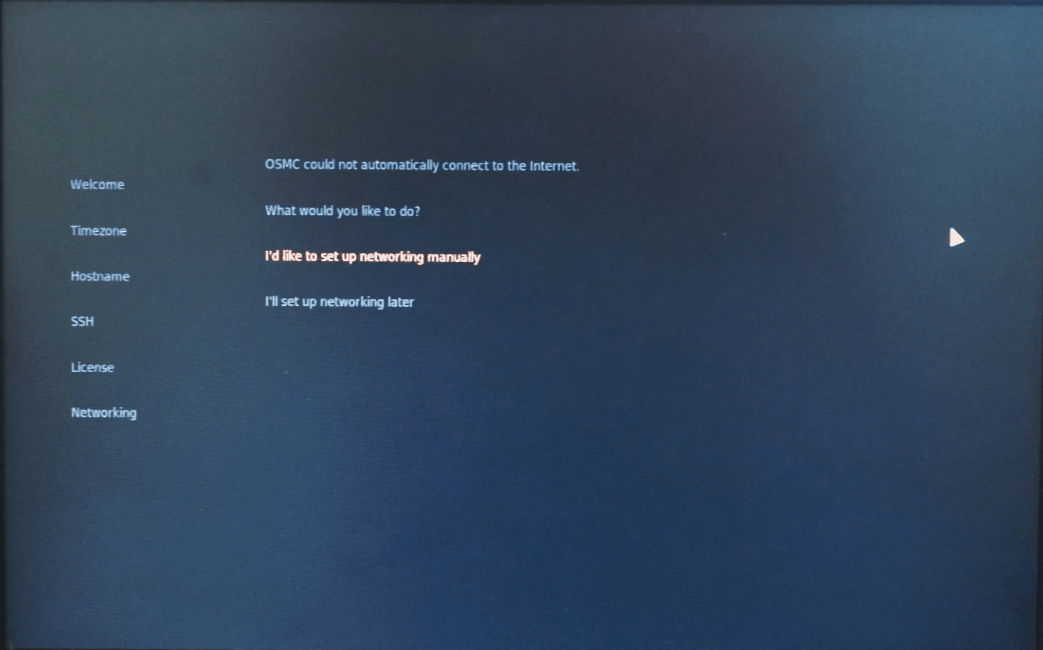
Next, you need to set up your network.

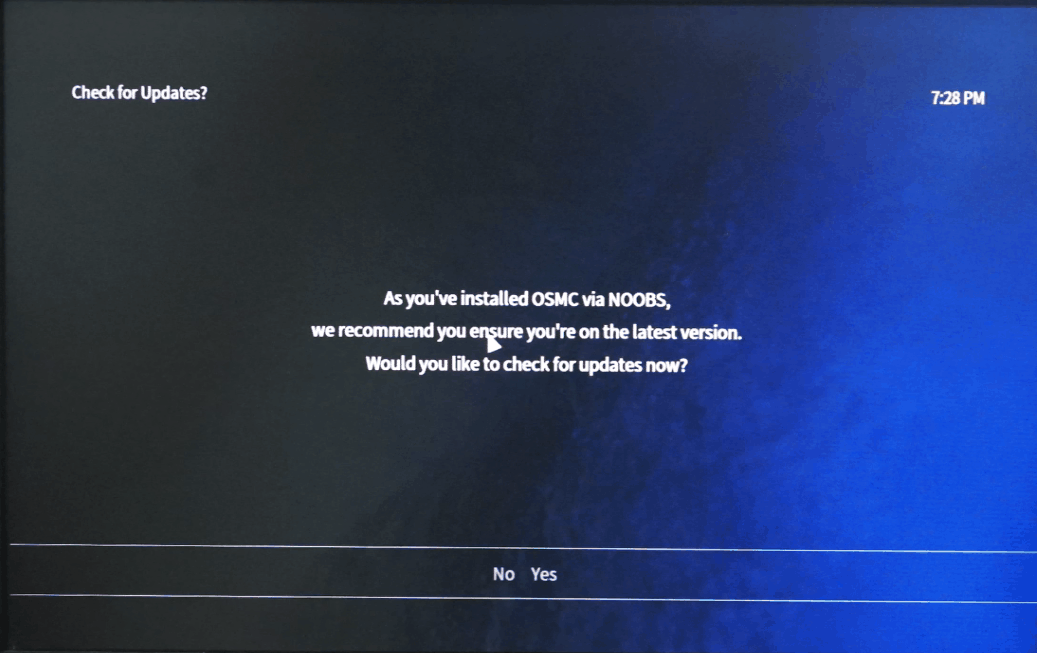
After the setup finishes, you will get a notification to update the system.

Your Media Center is complete! You’re ready to be entertained!
ADDING ANOTHER BROWSER, LIKE YOUTUBE
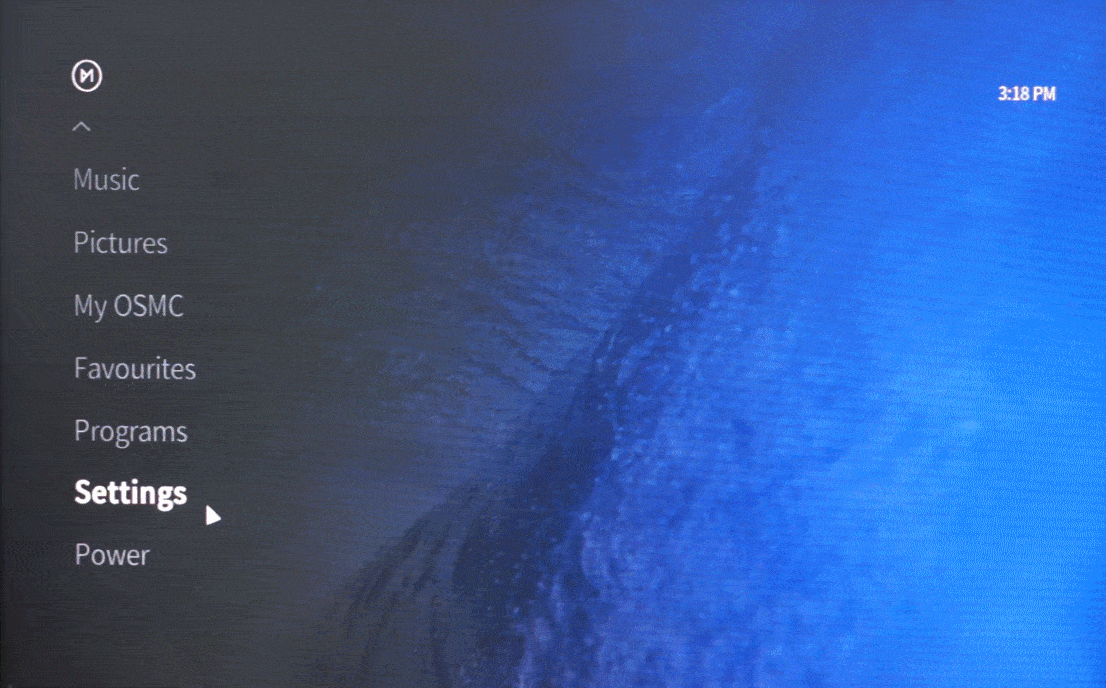
From the home screen, go to Settings → Add-on browser → Install from repository → Video add-ons → then choose whatever video channel you want to install, and click install. Wait for it to finish the installation.
TO WATCH YOUR VIDEO CHANNEL, GO BACK TO THE HOME SCREEN, GO TO VIDEOS → VIDEO ADD-ONS → THEN CHOOSE WHATEVER VIDEO CHANNEL YOU WATCH AND FOLLOW THE DIRECTORY. I NORMALLY CHOOSE YOUTUBE AND THE MOST POPULAR TO RANDOMLY WATCH MOVIES. SO ENJOY YOUR MEDIA BOX. YOU BUILD IT!
To properly shut down the OSMC, from the home screen, go all the way down under Settings, the Power, click it, and choose Power off system to shut it down.
BETTER QUALITY AUDIO?
If you need better quality audio for your media center, you can check out JustBoom because it is designed to improve the audio and to experience the true clarity of high-definition music. You can refer here to the steps to set it up.

Note: For further inquiry, please visit our technical forum as we seldom check the comment here. ?
REFERENCES:
- https://howtoraspberrypi.com/media-center-osmc-raspberry-pi/
- https://osmc.tv/wiki/
- https://www.justboom.co/