INTRODUCTION
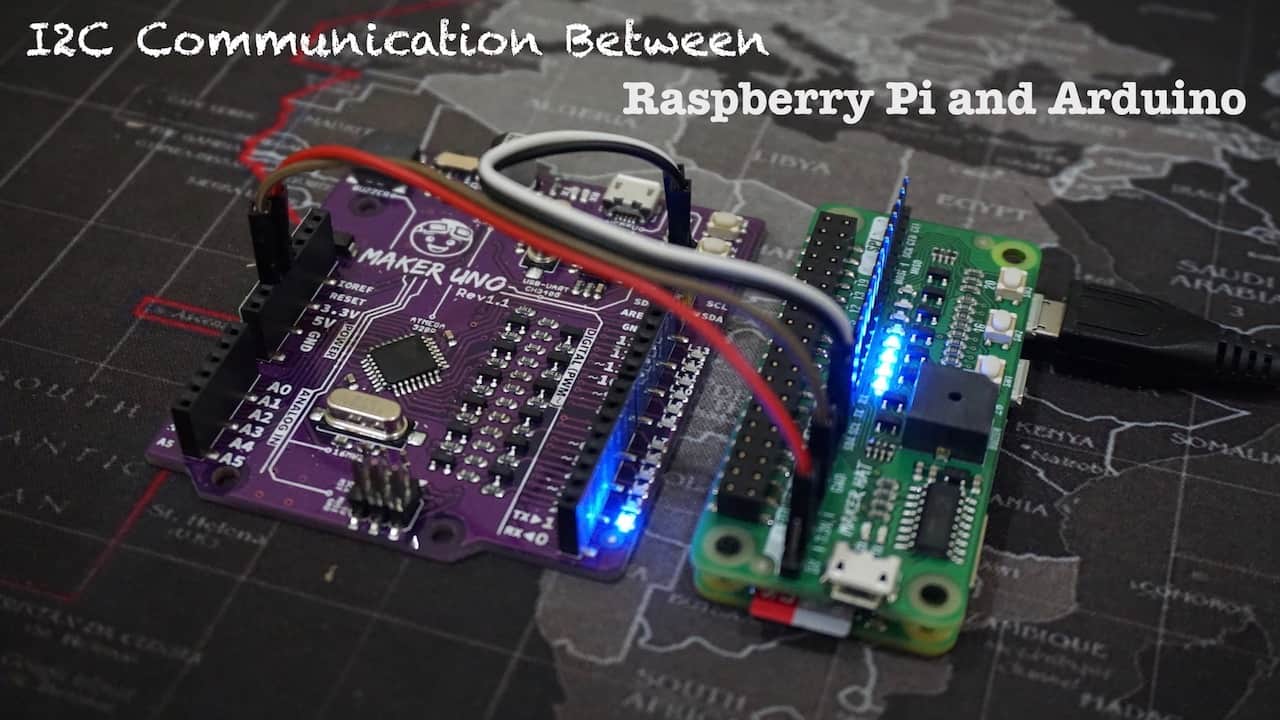
Besides controlling I2C modules, like display and sensors, I2C communication also can be implemented between 2 controllers. For example between Raspberry Pi and Arduino. The different compare to I2C module is, we need to create our own data protocol. So this tutorial will show you how to communicate between Raspberry Pi and Arduino Using I2C.
You may need to refer following tutorial first:
VIDEO
This video will show you how to communicate between Rasapberry Pi and Arduino Using I2C.
ITEM USED IN THE VIDEO
Sample Code
This is the sample code for Arduino and Raspberry Pi used in the video.
#include <Wire.h> | |
#define SLAVE_ADD 0x08 // Set Arduino I2C address | |
#define NOTE_C5 523 | |
#define NOTE_E5 659 | |
#define NOTE_G5 784 | |
#define BUTTON 2 | |
#define BUZZER 8 | |
int pin; | |
int ledArrayHigh; | |
int ledArrayLow; | |
volatile int mode = 0; | |
int prevMode = 0; | |
boolean buttonPressed = false; | |
void setup() | |
{ | |
pinMode(BUTTON, INPUT_PULLUP); | |
for (pin = 3; pin < 14; pin++) { | |
pinMode(pin, OUTPUT); | |
} | |
Wire.begin(SLAVE_ADD); | |
Wire.onReceive(receiveEvent); | |
Wire.onRequest(requestEvent); | |
} | |
// Where the Magic Happens | |
void loop() | |
{ | |
if (digitalRead(BUTTON) == LOW && | |
buttonPressed == false) { | |
buttonPressed = true; | |
} | |
else if (digitalRead(BUTTON) == HIGH && | |
buttonPressed == true) { | |
buttonPressed = false; | |
} | |
if (mode != prevMode) { | |
prevMode = mode; | |
pin = 0; | |
if (mode == 1) { | |
tone(BUZZER, NOTE_C5, 100); | |
delay(100); | |
tone(BUZZER, NOTE_G5, 100); | |
delay(100); | |
noTone(BUZZER); | |
} | |
else if (mode == 2) { | |
tone(BUZZER, NOTE_G5, 100); | |
delay(100); | |
tone(BUZZER, NOTE_C5, 100); | |
delay(100); | |
noTone(BUZZER); | |
} | |
} | |
for (pin = 0; pin < 5; pin++) { | |
if (mode == 1) { | |
ledArrayHigh = 13 - pin; | |
ledArrayLow = 7 - pin; | |
} | |
else if (mode == 2) { | |
ledArrayHigh = 9 + pin; | |
ledArrayLow = 3 + pin; | |
} | |
else if (mode == 3) { | |
digitalWrite(ledArrayHigh, LOW); | |
digitalWrite(ledArrayLow, LOW); | |
continue; | |
} | |
digitalWrite(ledArrayHigh, HIGH); | |
digitalWrite(ledArrayLow, HIGH); | |
delay(100); | |
digitalWrite(ledArrayHigh, LOW); | |
digitalWrite(ledArrayLow, LOW); | |
if (pin == 4) delay(100); | |
} | |
} | |
// function that executes whenever data is received from master | |
// this function is registered as an event, see setup() | |
void receiveEvent(int howMany) | |
{ | |
int inData = Wire.read(); // receive byte as an integer | |
Serial.println(inData); // print the integer | |
mode = inData; | |
} | |
// function that executes whenever data is requested by master | |
// this function is registered as an event, see setup() | |
void requestEvent() | |
{ | |
if (buttonPressed) { | |
Wire.write(4); | |
} | |
else { | |
Wire.write(5); | |
} | |
} |
from gpiozero import LED, Button, Buzzer | |
import smbus | |
from time import sleep | |
LED1 = LED(17) | |
LED2 = LED(18) | |
LED3 = LED(27) | |
LED4 = LED(22) | |
LED5 = LED(5) | |
LED6 = LED(12) | |
LED7 = LED(13) | |
LED8 = LED(19) | |
SW1 = Button(21) | |
SW2 = Button(16) | |
SW3 = Button(20) | |
BUZZER = Buzzer(26) | |
i2c = smbus.SMBus(1) | |
I2C_ADD = 0x08 # Arduino I2C address | |
def beep(times, delay): | |
for x in range(times): | |
BUZZER.on() | |
sleep(delay) | |
BUZZER.off() | |
sleep(delay) | |
def writeI2C(data): | |
i2c.write_byte(I2C_ADD, data) | |
def readI2C(): | |
inData = i2c.read_byte(I2C_ADD) | |
return inData | |
prevI2CData = 0 | |
beep(2, 0.07) | |
try: | |
while True: | |
if SW1.is_pressed: | |
writeI2C(1) | |
SW1.wait_for_release() | |
elif SW2.is_pressed: | |
writeI2C(2) | |
SW2.wait_for_release() | |
elif SW3.is_pressed: | |
writeI2C(3) | |
SW3.wait_for_release() | |
I2Cdata = readI2C() | |
if I2Cdata != prevI2CData: | |
prevI2CData = I2Cdata | |
if I2Cdata == 4: | |
LED1.off() | |
LED2.off() | |
LED3.off() | |
LED4.off() | |
LED5.on() | |
LED6.on() | |
LED7.on() | |
LED8.on() | |
beep(1, 0.07) | |
elif I2Cdata == 5: | |
LED1.on() | |
LED2.on() | |
LED3.on() | |
LED4.on() | |
LED5.off() | |
LED6.off() | |
LED7.off() | |
LED8.off() | |
sleep(0.1) | |
except KeyboardInterrupt: | |
GPIO.cleanup() |
Thank You
References
- Controlling an Arduino from a Pi3 using I2C
- i2c python documentation
- Raspberry Pi SPI and I2C Tutorial
- Master Writer/Slave Receiver
Thanks for reading this tutorial. If you have any technical inquiry, please post at Cytron Technical Forum.