INTRODUCTION
I have a nephew age 10 years old. I tried to make electronic looks easy and fun to him. Since he really like to play a music instrument, I made this small piano for him so that he can learn piano and electronics at the same time. I share this with the hope that you can also enjoy this with your loved one <3
HARDWARE PREPARATION
This tutorial use :
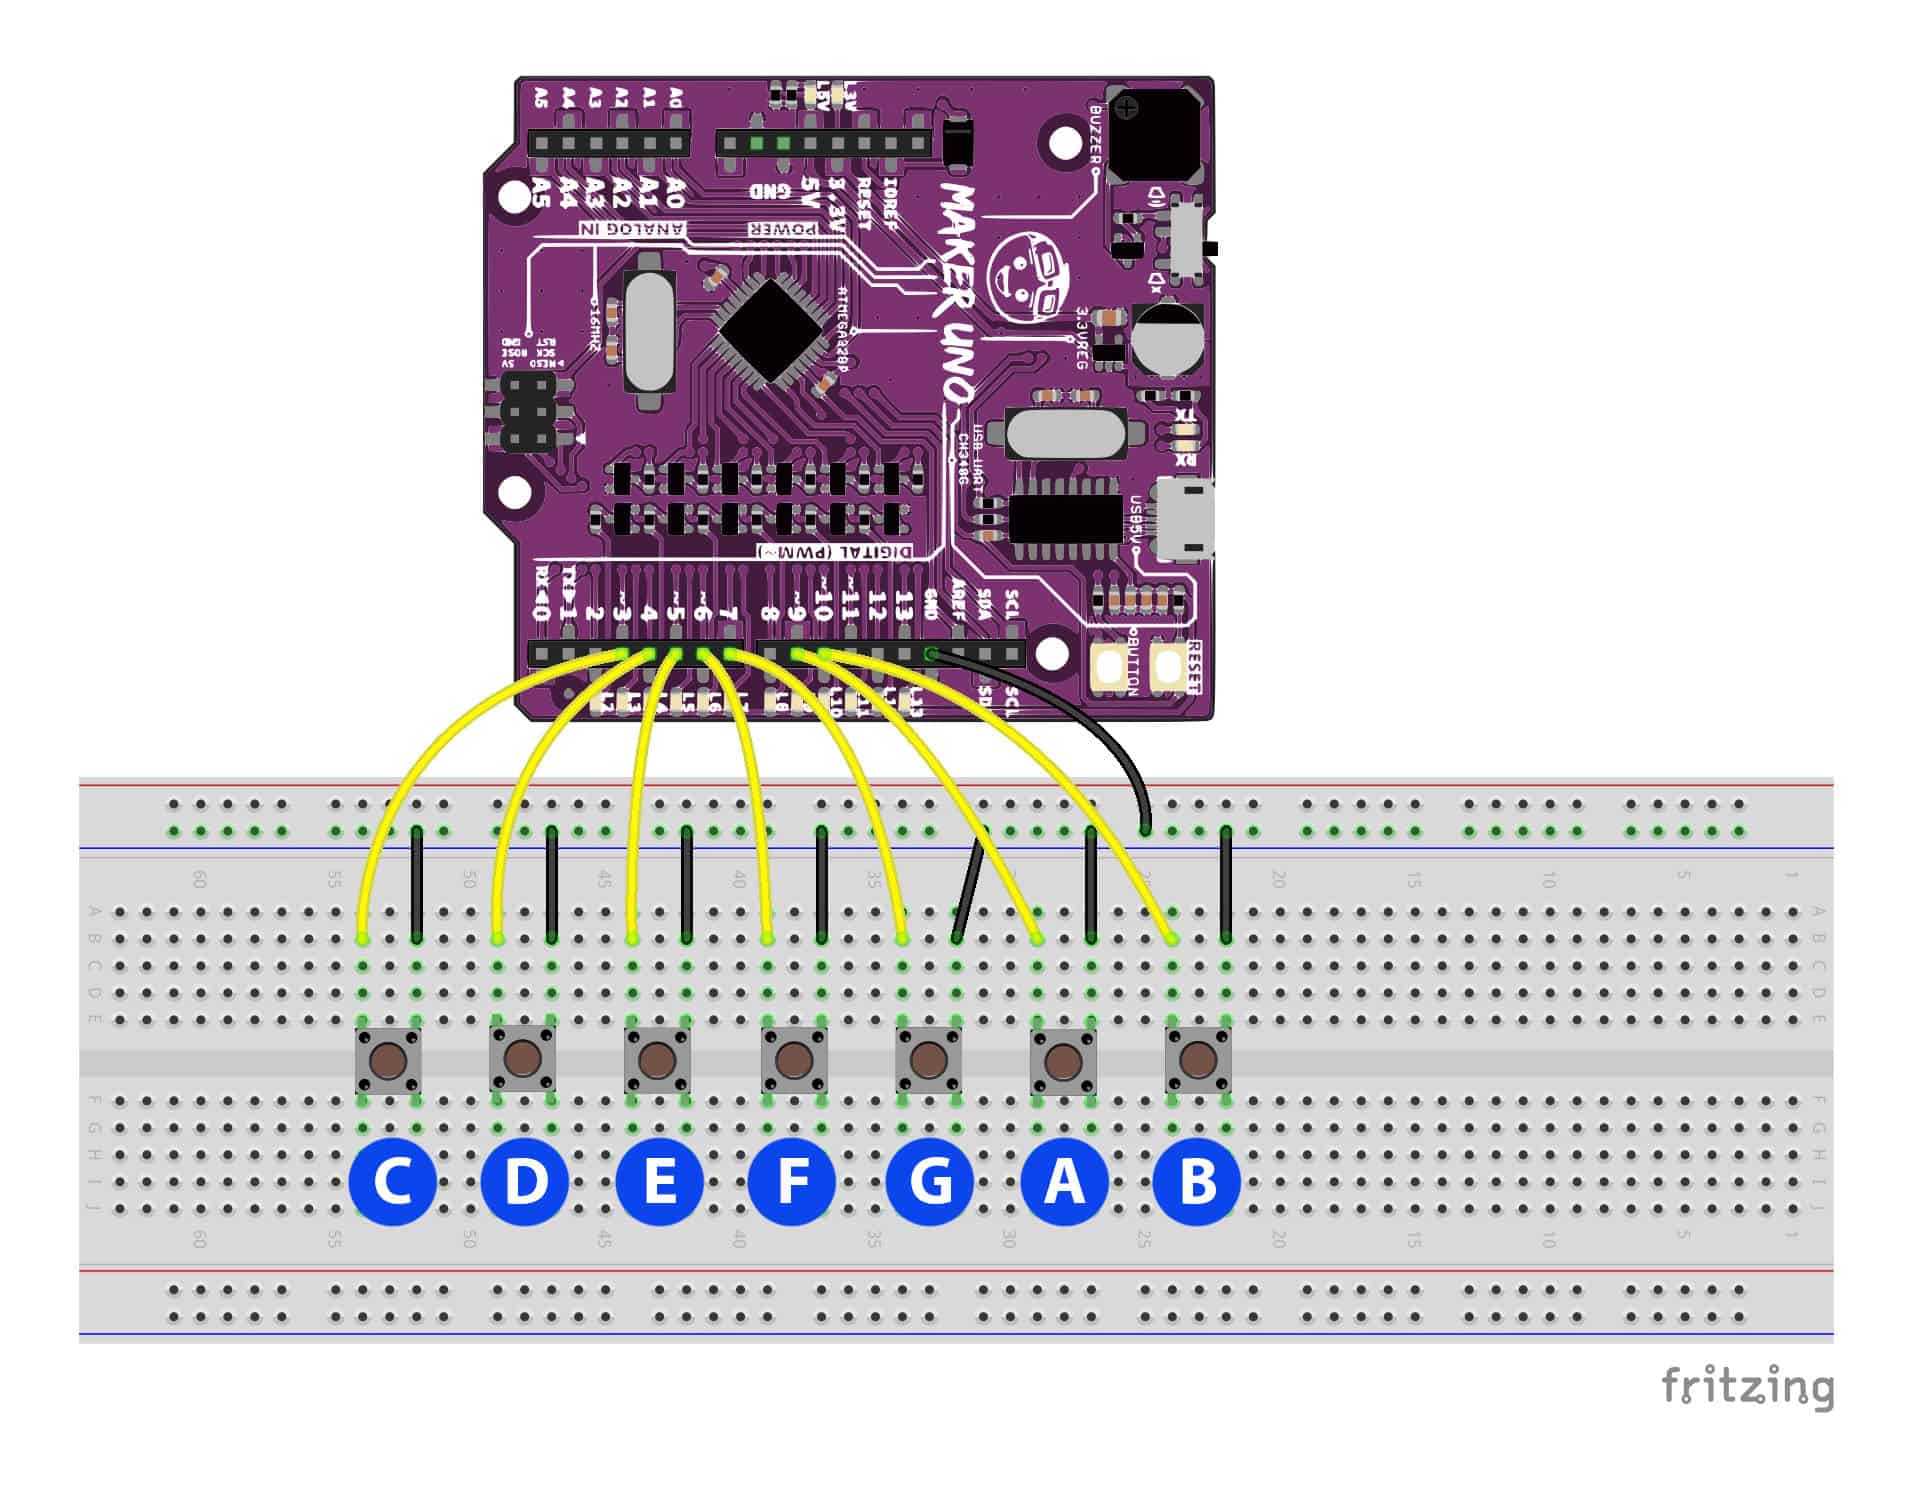
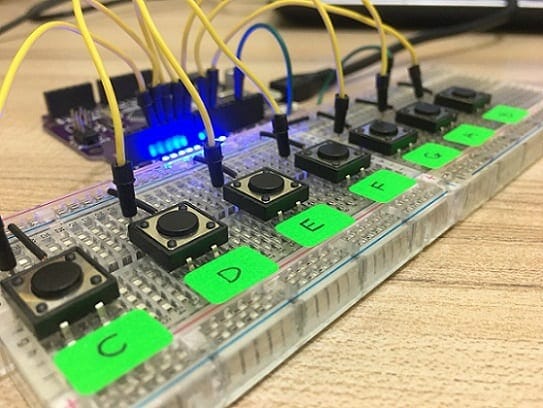
You can make the hardware connection based on the diagram and table below.
CONNECTION | |
---|---|
Maker UNO : GND | Breadboard GND |
Maker UNO : Pin 3 | Push Button : 1 (C) |
Maker UNO : Pin 4 | Push Button : 2 (D) |
Maker UNO : Pin 5 | Push Button : 3 (E) |
Maker UNO : Pin 6 | Push Button : 4 (F) |
Maker UNO : Pin 7 | Push Button : 5 (G) |
Maker UNO : Pin 9 | Push Button : 6 (A) |
Maker UNO : Pin 10 | Push Button : 7 (B) |
*Another leg of the Push Button is connected to the GND of Breadboard
SAMPLE CODE
This is the sample code used for this tutorial. Try it!
/* | |
This example code is for Piano(Basic)'s Tutorial. | |
Product page: | |
Maker UNO: https://www.cytron.io/p-maker-uno | |
Created by: | |
08/08/18 Suad Anwar, Cytron Technologies | |
*/ | |
#include "pitches.h" | |
#define C 3 | |
#define D 4 | |
#define E 5 | |
#define F 6 | |
#define G 7 | |
#define A 9 | |
#define B 10 | |
#define Buzzer 8 | |
void setup() | |
{ | |
pinMode(C, INPUT_PULLUP); | |
pinMode(D, INPUT_PULLUP); | |
pinMode(E, INPUT_PULLUP); | |
pinMode(F, INPUT_PULLUP); | |
pinMode(G, INPUT_PULLUP); | |
pinMode(A, INPUT_PULLUP); | |
pinMode(B, INPUT_PULLUP); | |
} | |
void loop() | |
{ | |
while (digitalRead(C) == LOW) | |
{ | |
tone(8, NOTE_C4); | |
} | |
while (digitalRead(D) == LOW) | |
{ | |
tone(8, NOTE_D4); | |
} | |
while (digitalRead(E) == LOW) | |
{ | |
tone(8, NOTE_E4); | |
} | |
while (digitalRead(F) == LOW) | |
{ | |
tone(8, NOTE_F4); | |
} | |
while (digitalRead(G) == LOW) | |
{ | |
tone(8, NOTE_G4); | |
} | |
while (digitalRead(A) == LOW) | |
{ | |
tone(8, NOTE_A4); | |
} | |
while (digitalRead(B) == LOW) | |
{ | |
tone(8, NOTE_B4); | |
} | |
noTone(8); | |
} |
Thank you
Thank you for reading this tutorial and we hope it helps your project development. If you have any technical inquiry, please post at Cytron Technical Forum.
6 thoughts on “Piano with Maker UNO”
Hi, saya nak tanya, breadboard jumper wire kit yang saya tengok dlm website Cytron Marketplace macam tak ade wire warna Hitam.Kenapa eh? Ke gmbr die mmng macamtu?
Hi, kenapa bila saya siap buat semua litar piano dan dah upload sample kod yang diberikan tapi bila nak tekan external push button kat bredboard tu dia berbunyi dekat satu push button je, yang lain tak bunyi, kenapa?
Hi, may I ask u something. During compiling the sketches why there is an error at #include “pitches.h” it stated that there is no such file or directory. I hope u can help me out.
Hi, may I ask u something. During compiling the sketches why there is an error at #include “pitches.h” it stated that there is no such file or directory. I hope u can help me out. Thank you.