Your shopping cart is empty!

Controlling Arduino Using Voice
INTRODUCTION
Controlling a Maker UNO using voice seems difficult and impossible. But no worries, now we can control the Maker UNO using our voice with the help of Arduino Voice Control Apps and Bluetooth HC-06. This apps is free and available in playstore. Now let’s have a look on how to do it!
HARDWARE PREPARATION
This tutorial use :
- Maker UNO
- Bluetooth HC-06
- Red LED
- Green LED
- Yellow LED
- 220 ohm Resistor x 3
- Male to Male Jumper Wire
- Breadboard
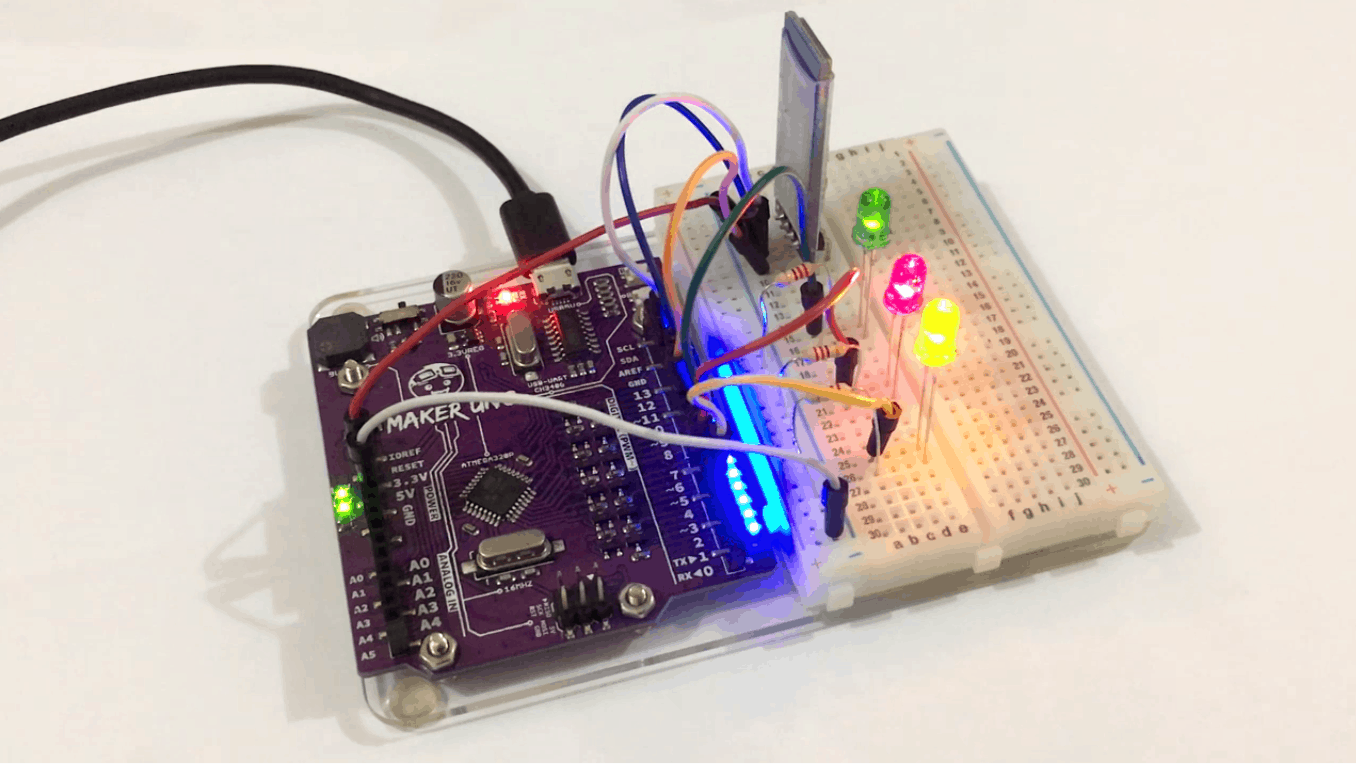
You can make the hardware connection based on the diagram and table below.
| CONNECTION | |
|---|---|
| HC-06 : VCC | Maker UNO: 5V |
| HC-06 : GND | Maker UNO: GND |
| HC-06 : RX | Maker UNO: pin 10 |
| HC-06 : TX | Maker UNO: pin 11 |
| Yellow LED (+) | Maker UNO: pin 4 |
| Red LED (+) | Maker UNO: pin 5 |
| Green LED (+) | Maker UNO: pin 6 |
| Yellow LED (-) | Maker UNO: GND with Resistor |
| Red LED (-) | Maker UNO: GND with Resistor |
| Greed LED (-) | Maker UNO: GND with Resistor |

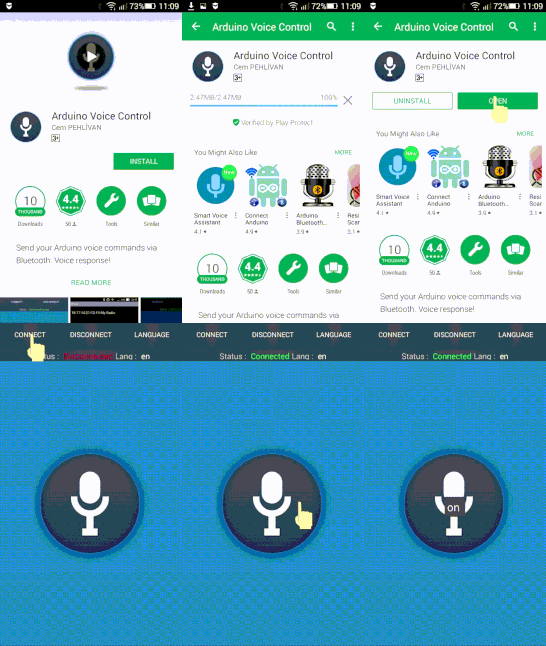
ARDUINO VOICE CONTROL
This is step by step on how to use the apps. Check it out!

CONTROL THE ARDUINO USING VOICE
These are the output of the Arduino based on the voice input through the apps.
| VOICE INPUT | OUTPUT |
| on | All LED turn on |
| off | All LED turn off |
| yellow on | Yellow LED turn on |
| yellow off | Yellow LED turn off |
| red on | Red LED turn on |
| red off | Red LED turn off |
| green on | Green LED turn on |
| green off | Green LED turn off |
SAMPLE CODE
This is the sample code used for this tutorial. Try it!
Thank you
Thank you for reading this tutorial and we hope it helps your project development. If you have any technical inquiry, please post at Cytron Technical Forum.
 International
 Singapore
 Malaysia
 Thailand
 Vietnam