 International
 Singapore
 Malaysia
 Thailand
 Vietnam
Your shopping cart is empty!

XBee S2C Replacement of XBee Series 2
The famous XBee is actually from Digi International. I wrote a few articles about XBee (Is XBee ZigBee? Using XBee module, Recovering Your XBee, XBee Series 2 point to point communication) to introduce the product and as you might have known, there are many wireless modules that mimic XBee, tapping to the ecosystem. An example is GPS with XBee form factor, Bluetooth with XBee form factor, GSM, etc. To make your module XBee compatible, the module must fit in the XBee 20-pin (2mm pitch to pitch) form factor and the module must be able to be powered with 3.3V and UART communication. That’s some of the requirements.
Anyway, this article is not meant to talk about the XBee ecosystem, is more to announce that Digi has come out with a new model of XBee module and they name it XBee S2C, Cytron has carried this new replacement since the end of last year (2017) and all our stock since Jan 2018 are XBee S2C.
What are the differences between XBee S2 vs XBee S2C?
- XBee S2C comes with a bigger program memory and a bigger Flash size. It can be loaded with ALL Series 2 firmware/modes which in S2, you cannot do. There is only enough program space (Flash) on XBee S2 for one mode at a time. So you always have to come back to the computer to change the mode using X-CTU like we always did P/S: What are the modes on XBee S2? Here is it:
- Coordinator AT mode
- Coordinator API mode
- Router AT mode
- Router API mode
- End device AT mode
- End device API mode
- Another best part, XBee S2C can communicate with XBee Series 1 module, of course with the correct firmware
- I think I better illustrate the comparison through a table:
| No | Parameters | XBee S2 (ZB) | XBee S2C |
| 1 | Indoor/Urban Range | up to 133 ft (40 m) | Up to 200ft (60 m) |
| 2 | Outdoor, Line of Sight Range | Up to 400 ft(120 m) | Up to 4000ft (1200m) |
| 3 | Transmit Power Output | 2mW (+3 dBm) Boost mode, 1.25mW (+1 dBm) Normal mode | 6.3mW(+8 dBm) Boost mode, 3.1mW(+5 dBm) Normal mode, Channel 26 max power is +3 dBm |
| 4 | Receiver Sensitivity | -96 dBm Boost mode, -95 dBm Normal mode | -102 dBm Boost mode, -100 dBm Normal mode |
| 5 | Operating Current (Transmit) | 40mA (@3.3V) Boost mode, 35mA (@3.3V), Normal mode | 45mA (+8 dBm) Boost mode, 33mA(+5 dBm) Normal mode |
| 6 | Operating Current (Receive) | 40mA (@3.3V) Boost mode, 38mA (@3.3V) Normal mode | 31mA Boost mode, 28mA Normal mode. |
| 7 | SPI | Not supported | 5Mbps maximum (burst) |
| 8 | Number of End Devices | 12 | 20+ |
And of course, the most important question is, is the price affected? No, it is still the same price. So get the latest XBee S2C here.
For full migration, please check the migration notes from Digi International.
XBee S2 communicates with XBee S2C?
And I know most of you wanted to know how to utilize the existing XBee S2 to link up with this new XBee S2C, right? Here you are:
The hardware needed:
- 2 x SKXBee(w/0 XBee) with USB cable
- 1 x XBee S2 module
- 1 x XBee S2C module
I will be showing the communication via a laptop using X-CTU, please download and install the X-CTU accordingly.
Assuming you have been using SKXBee before(User’s manual if you have not), the USB driver is installed, and the XBee module is plug-in properly and correctly on SKXBee.
Connect both the SKXBee with XBee modules to a USB port of your computer/laptop, both the SKXBee. If you do not have enough USB ports, do it one by one. But when it comes to verifying the communication, you will still need to power both the SXBee simultaneously. Maybe just use your friend's laptop.
Open up X-CTU on your computer/laptop.
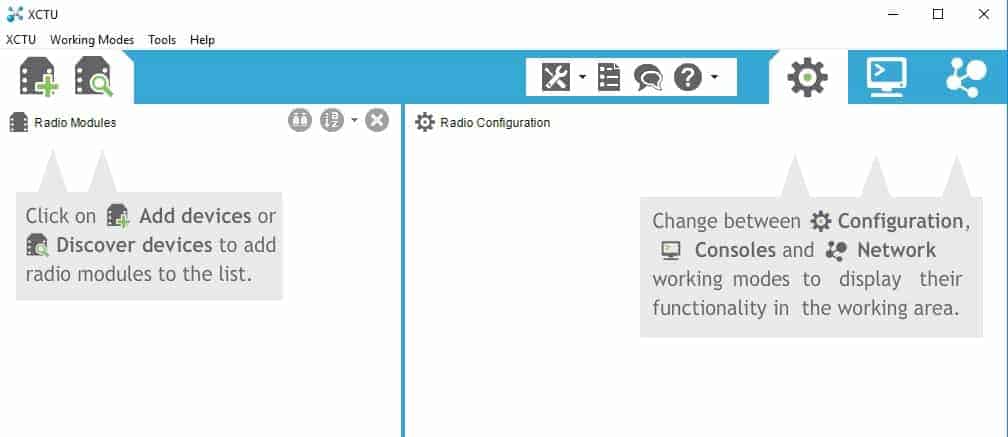
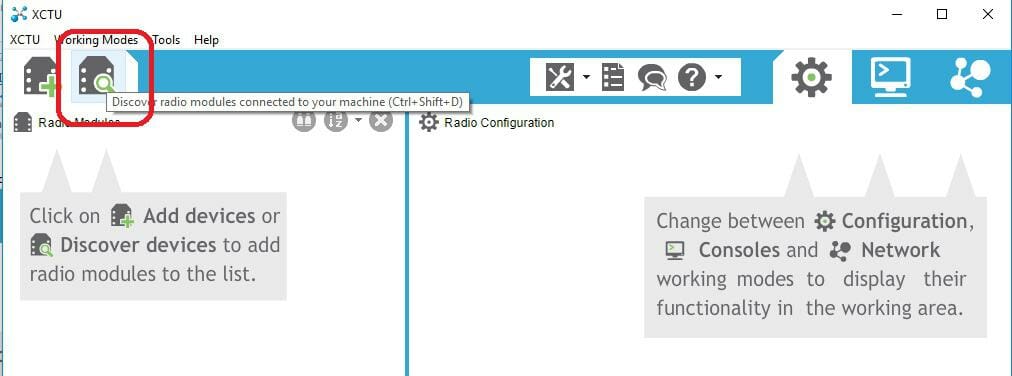
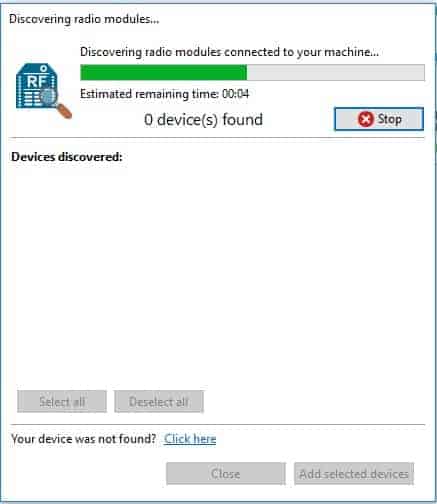
Click on the Discover Radio modules. Make sure both the XBee module is connected to the laptop with SKXBee and of course the USB cable.
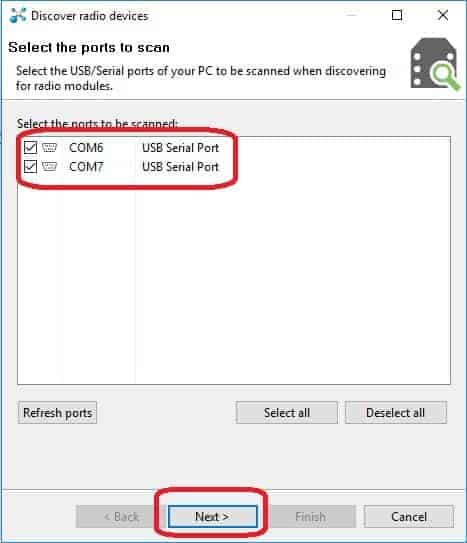
Select both the COM ports or all the COM ports if you are not sure which port. Click Next to proceed.
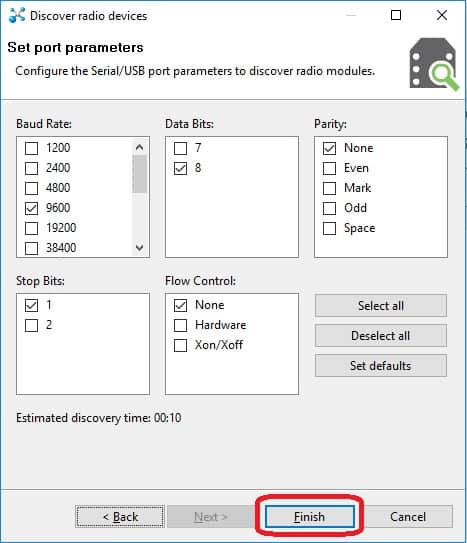
It will need you to set the port parameters such as baud rate, and data bits, just leave it as default. Click Finish to proceed.
X-CTU will further communicate with the modules via the COM ports selected earlier, all the selected ports
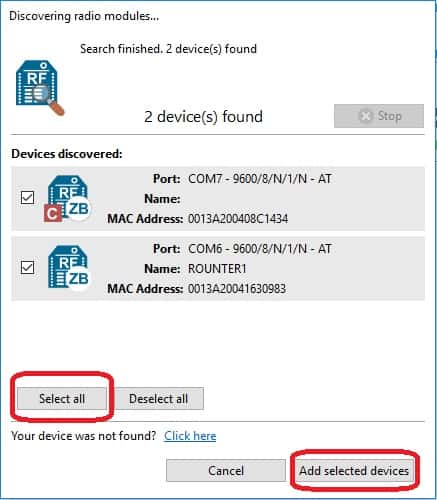
And display the results: Click on “Select all” and “Add selected devices” to continue.
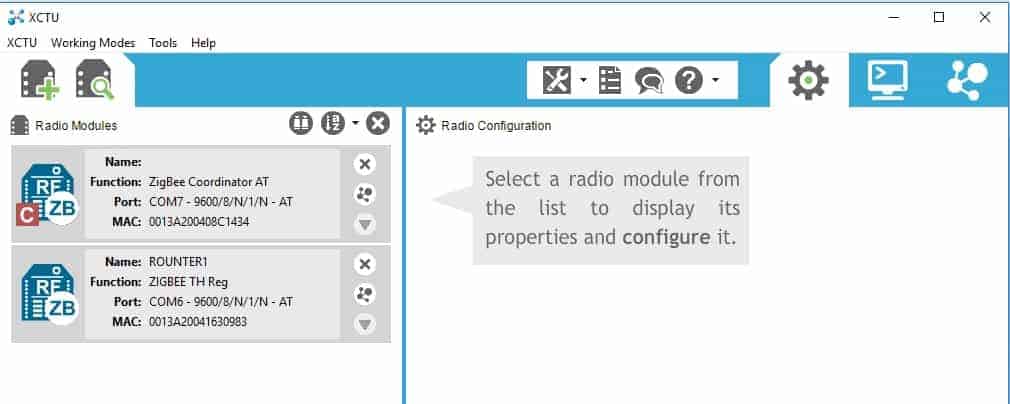
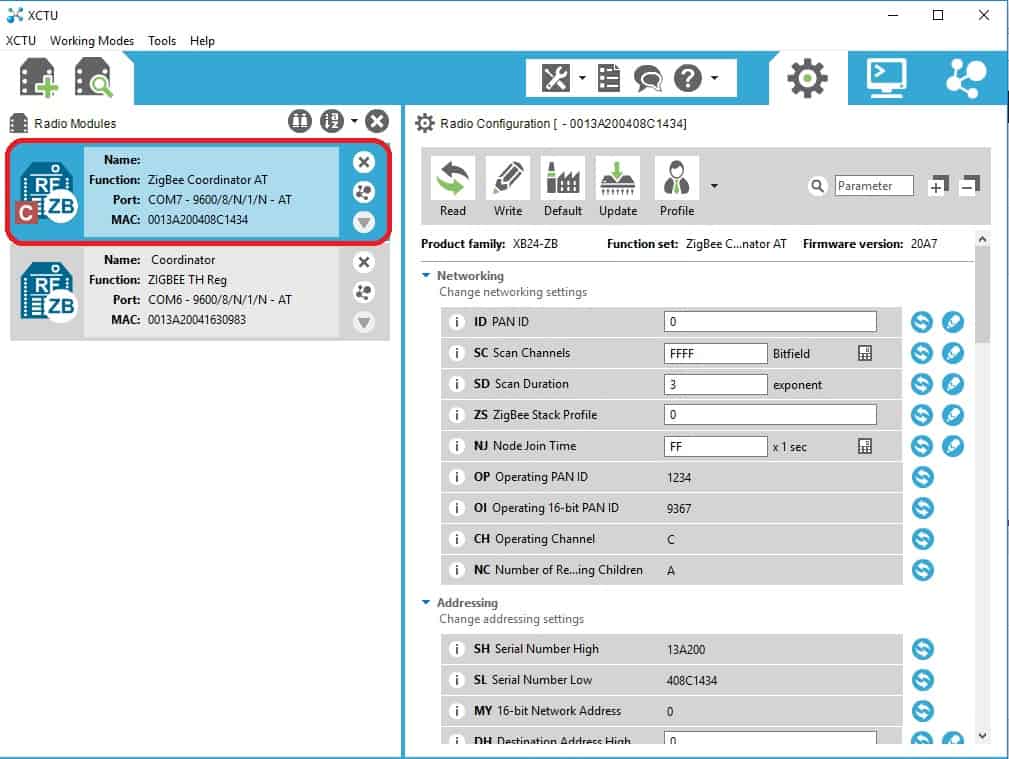
Now both XBee modules are added to X-CTU main window. I will factory reset my XBee module to default settings for the sack of tutorial, making it similar to yours.
Select one of the modules, I will choose ZIGBEE TH Reg first, it is XBee S2C X-CTU will communicate with the XBee module and read the parameters.
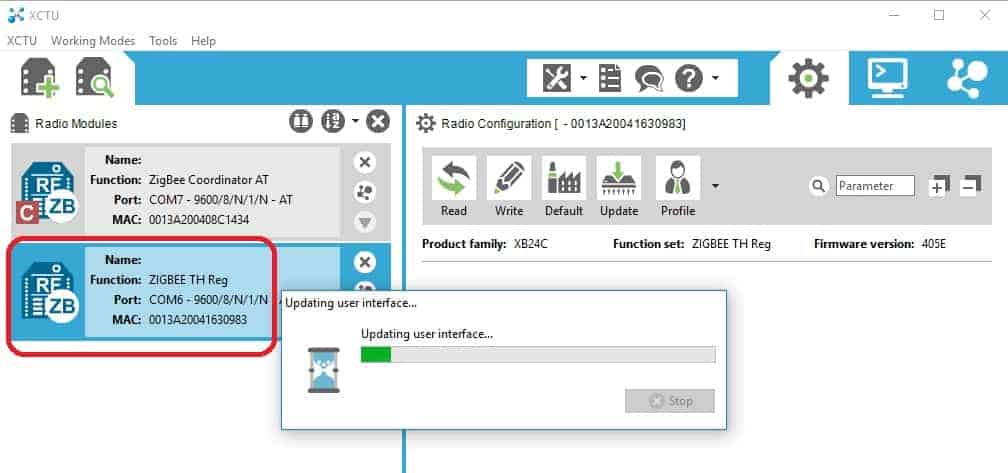
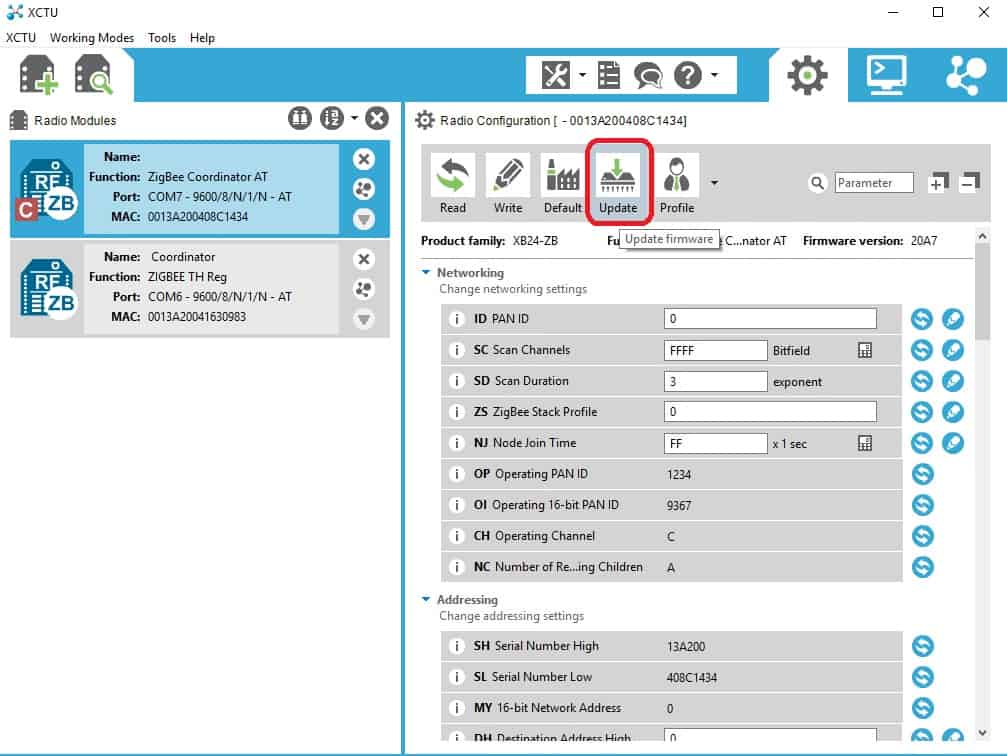
And you will get the updated parameters on the right side of X-CTU. Click on the “Update” icon, we want to check the firmware version of the current module and I can show you the available firmware image for this latest powerful radio module.
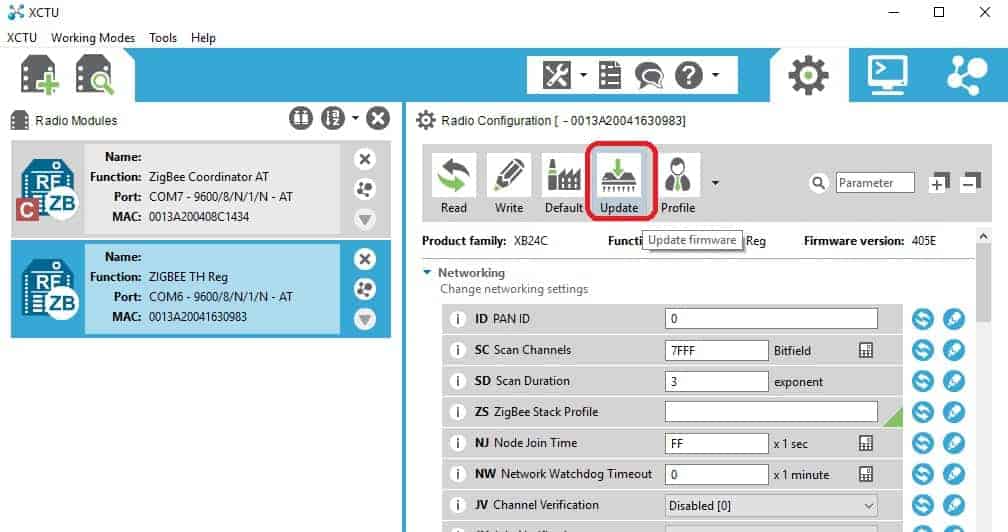
If you notice, I have restored my module to default firmware that shows ZIGBEE TH Reg (Through Hole Regular) and if you go to Update (Firmware), it will list the available options for the firmware images:
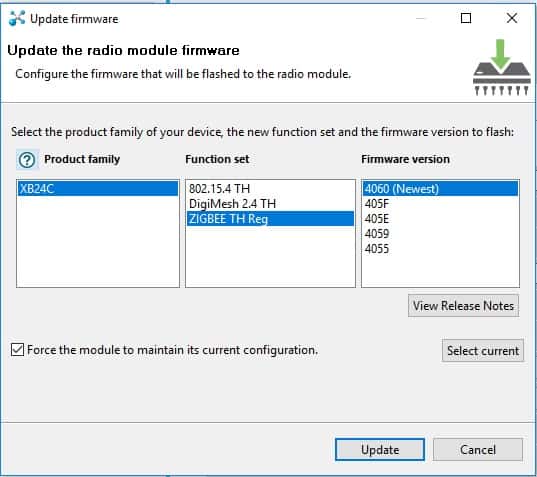
Product Family:
- XB24C
Function Set:
- 802.15.4 TH (This is actually the firmware for XBee Series 1)
- DigiMesh 2.4 TH
- ZIGBEE TH Reg (This is XBee Series 2)
Firmware Version:
- 4060 (Latest at the time I write this)
- 405F
- 405E
- 4059
- 4055
Click the “Update” to update your module to the latest firmware. It will take some time, around 1 minute or so. When it is done, just click “OK”. I will go back to the parameters window which will show all the settings parameters.
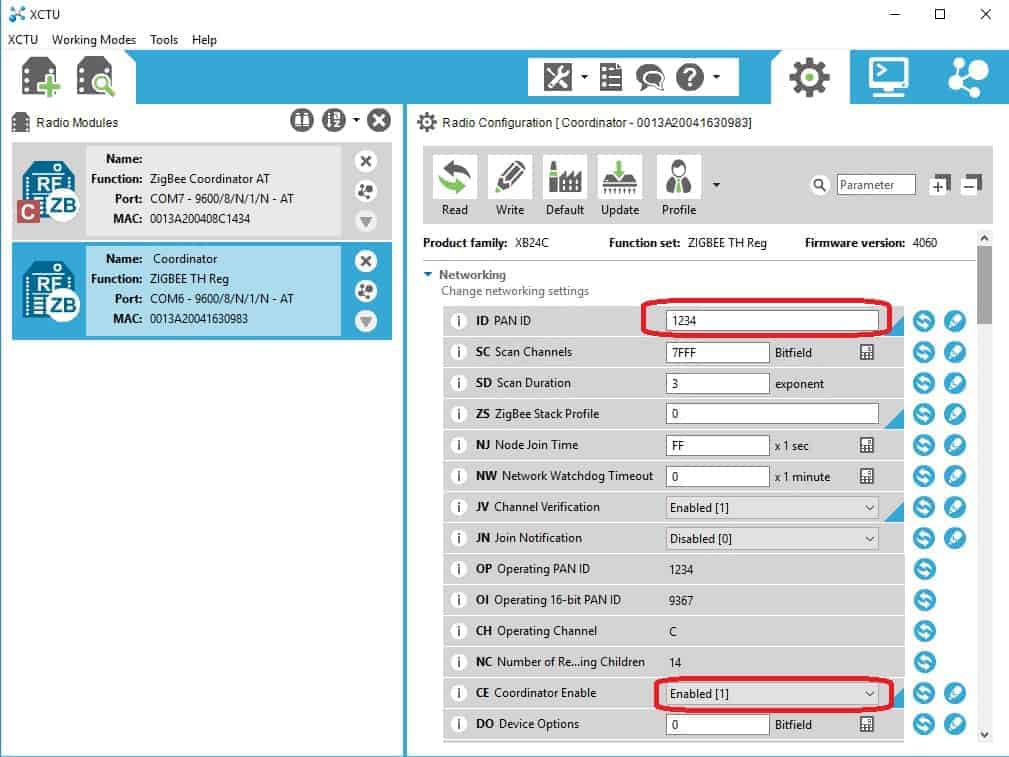
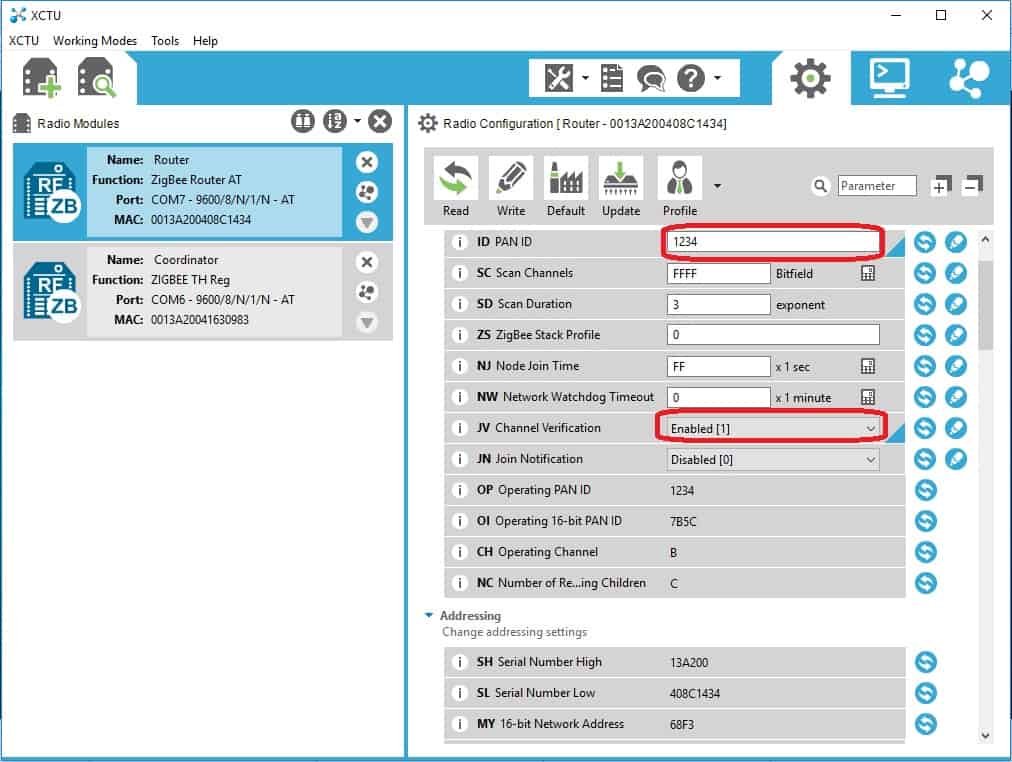
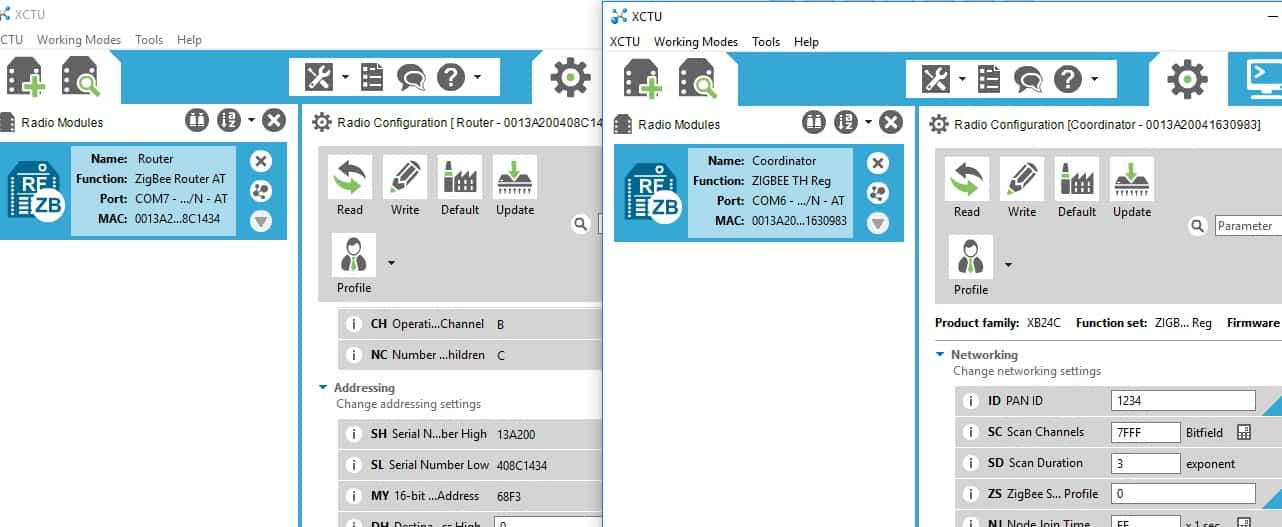
Now, let’s configure the parameters for this module to become a coordinator in the network:
- ID PAN ID = 1234, same PAN ID for the other XBee module too.
- CE Coordinator Enable = Enabled [1], make sure it is enabled as coordinator.
- DL Destination Address LOW = FFFF which makes the Radio to BROADCAST mode.
- NI = Coordinator, is Node Identifier which you can name to whatever you want
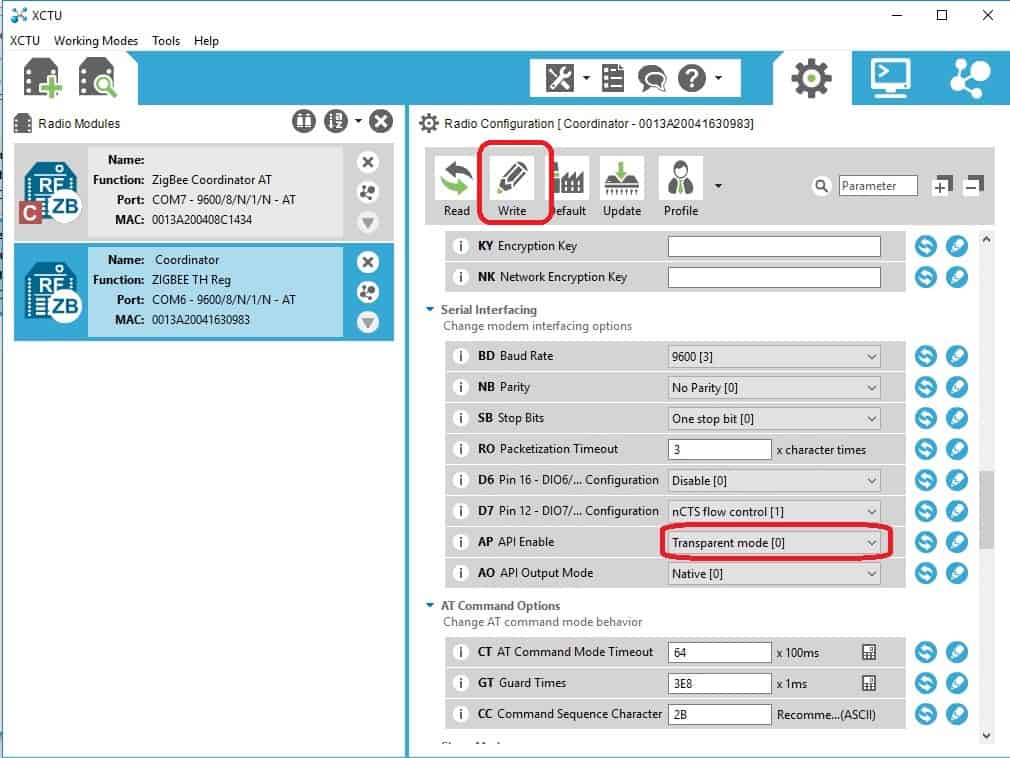
- AP API Enable = TRANSPARENT mode[0] which is AT mode.

As you are done with the changes, please click the “Pencil” icon on the X-CTU window to write those parameters into the XBee S2C module.
Once it is done, we need to move on to configure another XBee module.
Now Click on the other XBee module (XBee S2), and X-CTU will load the parameters of the module.
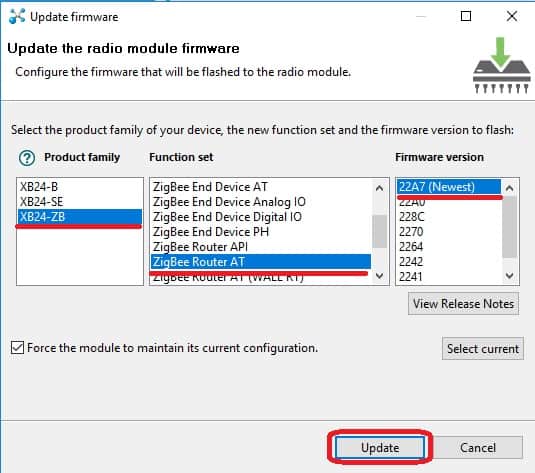
Now click on the settings & click on the UPGRADE FIRMWARE button.
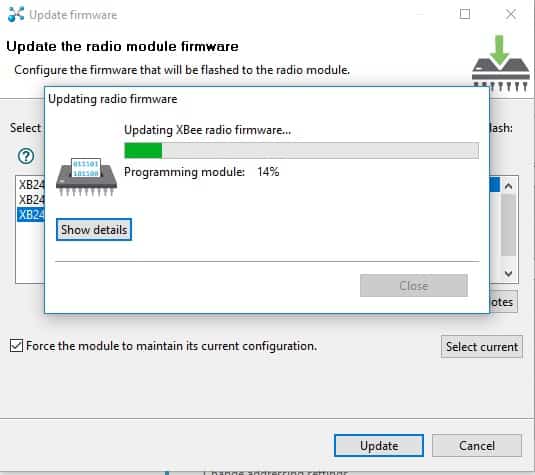
Select the product family as XB24-ZB & the Function set as ZIGBEE ROUTER AT, firmware just choose the latest. Update the module with the latest firmware.
Wait for the firmware update/upgrade process.
Now, let’s configure the module to:
- ID PAN ID = 1234, same as PAN ID of Coordinator (XBee S2C).
- JV Channel Verification = Enabled [1], enable the XBee module to join Coordinator on power on.
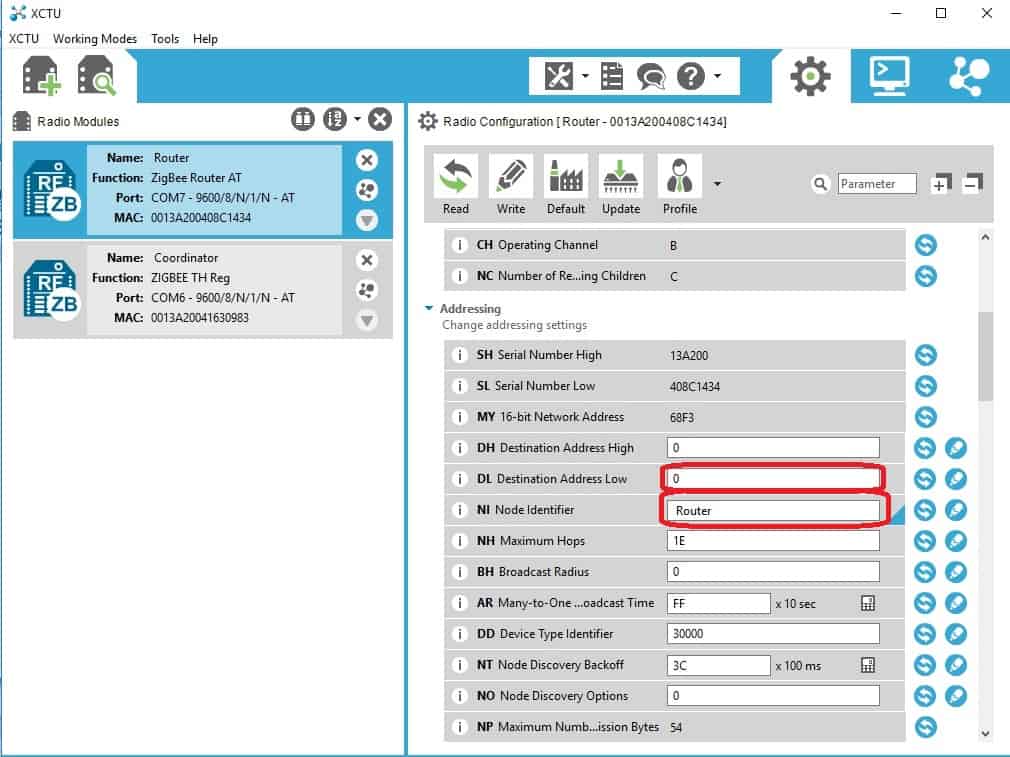
- DL Destination Address LOW = 0 which is the default address for the coordinator.
- NI = Router, is Node Identifier which you can name to whatever you want.
Again, click the “Pencil” icon on X-CTU to write the parameters that we changed into XBee S2. After it is complete, we have:
- An XBee S2C module is configured as Coordinator with the Pan ID of 1234, transmitting in the broadcast.
- An XBee S2 module is configured as a Router with a Pan ID of 1234, which will join the coordinator of 0 address (default).
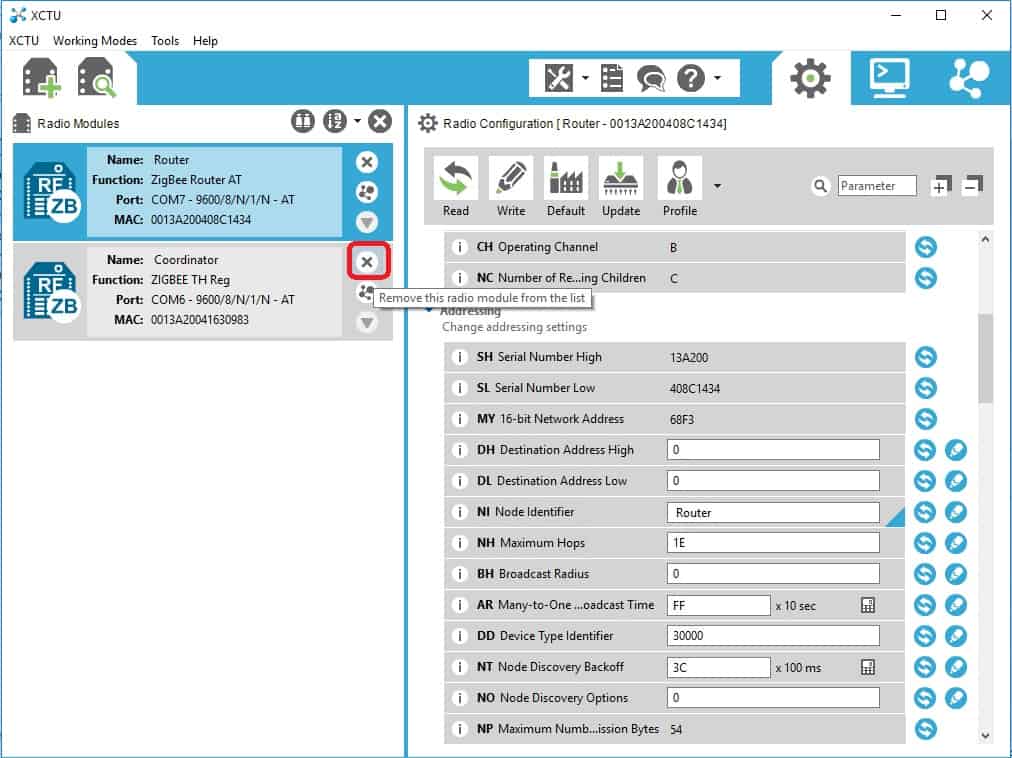
Assuming you connect both the XBee module via SKXBee to the same computer/laptop, leave the XBee S2 (Router) module on the XCTU & close the XBee S2C (Coordinator) module. For the sack of tutorial, I am showing the wireless communication on the same laptop, but you can always separate the XBee modules into two different laptops.
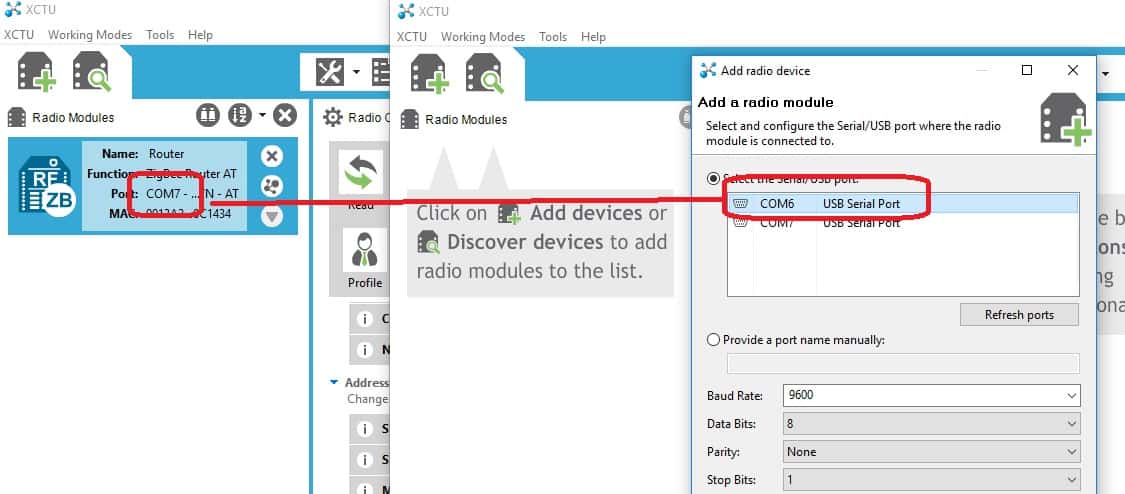
Start another instance of the X-CTU window & search for the COM port, and add the XBee S2C (Coordinator) module into the new X-CTU window (Right).
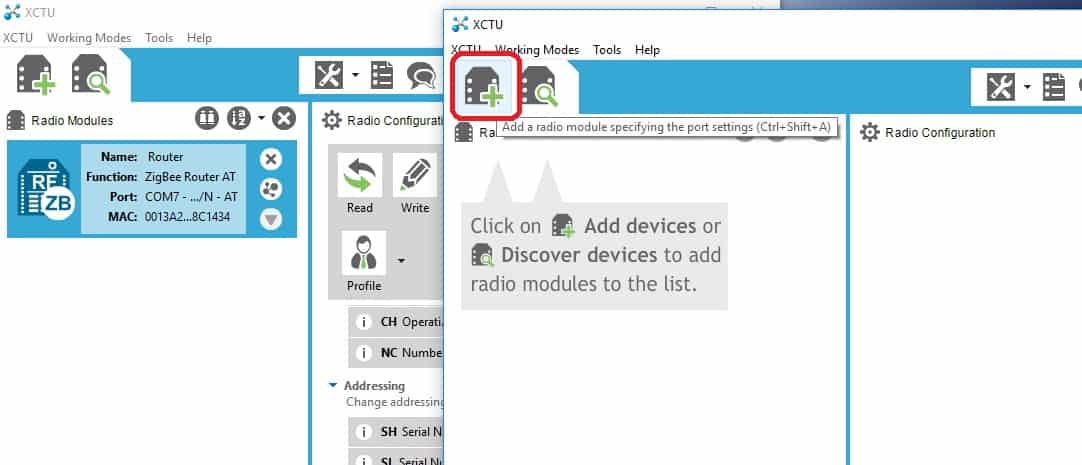
As you add the XBee S2C on the new X-CTU window, just the COM port, should be different from the existing COM port on the older X-CTU window, just to make your life easier
Place the X-CTU windows side by side. Router to the Left & Coordinator to the Right.
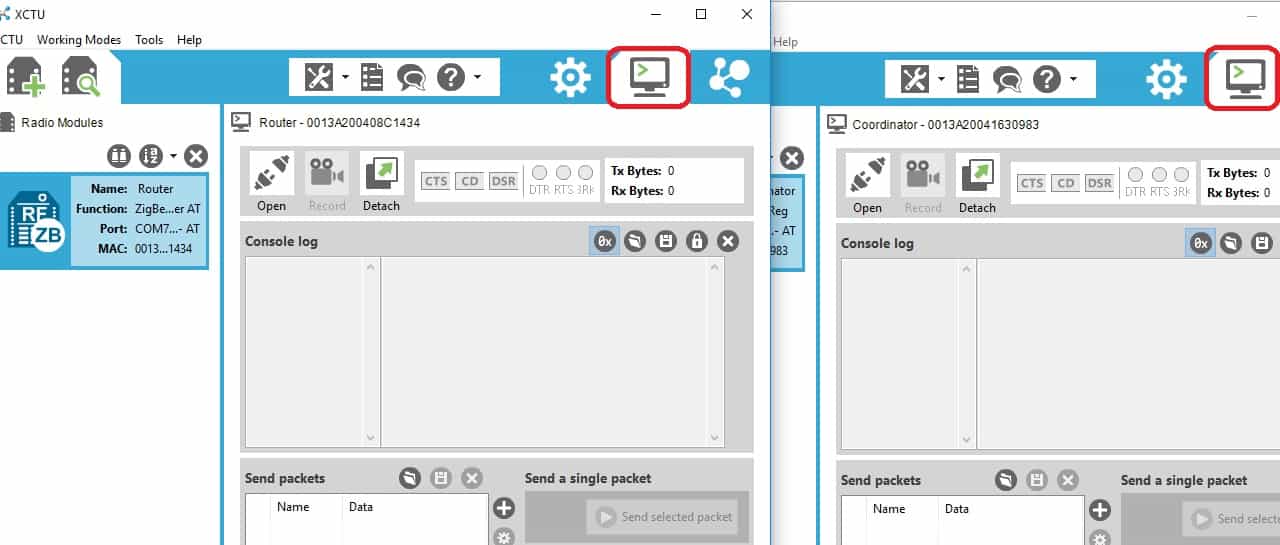
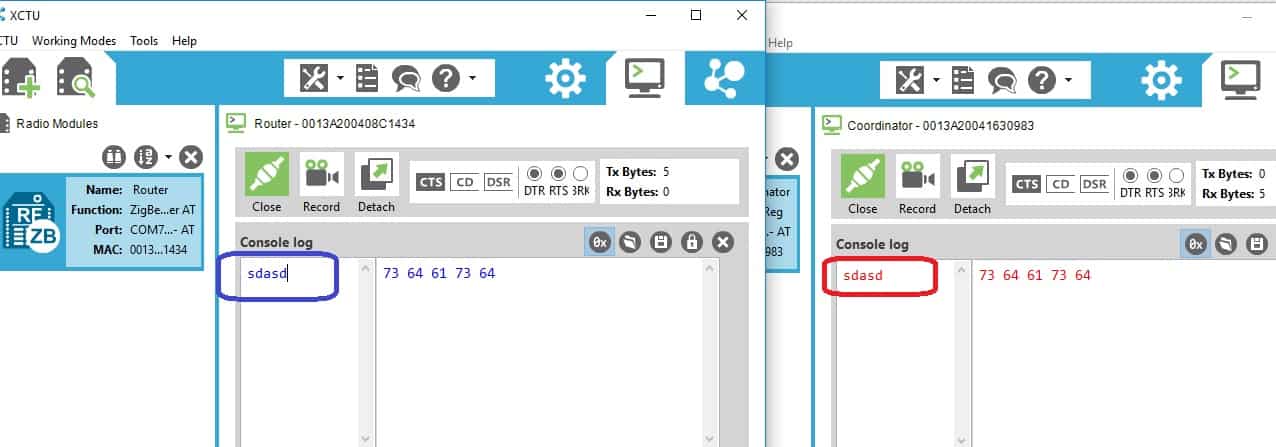
Click the terminal icon on each X-CTU window.
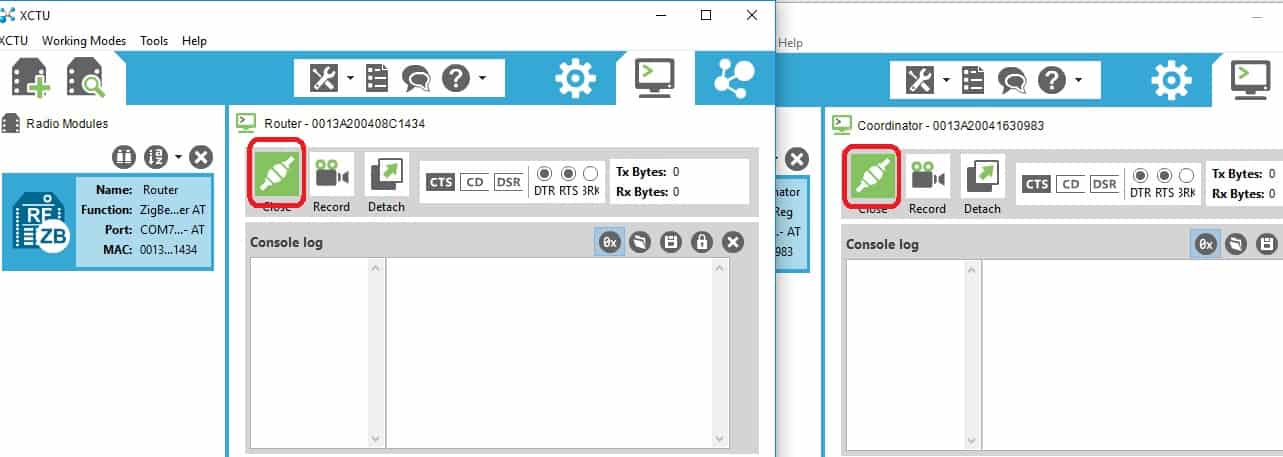
Now click on the “plug” icon to close the COM port (basically to connect the COM port).
Type any character on the left small window (At the Router X-CTU window), shown here. The Blue color text is typed and transmitted out from the laptop to XBee S2C, and wireless is transmitted over the air and received by the XBee S2 module on another SKXBee and transmitted back to another X-CTU window on the right (At the Coordinator X-CTU window) and appears as Red color text.
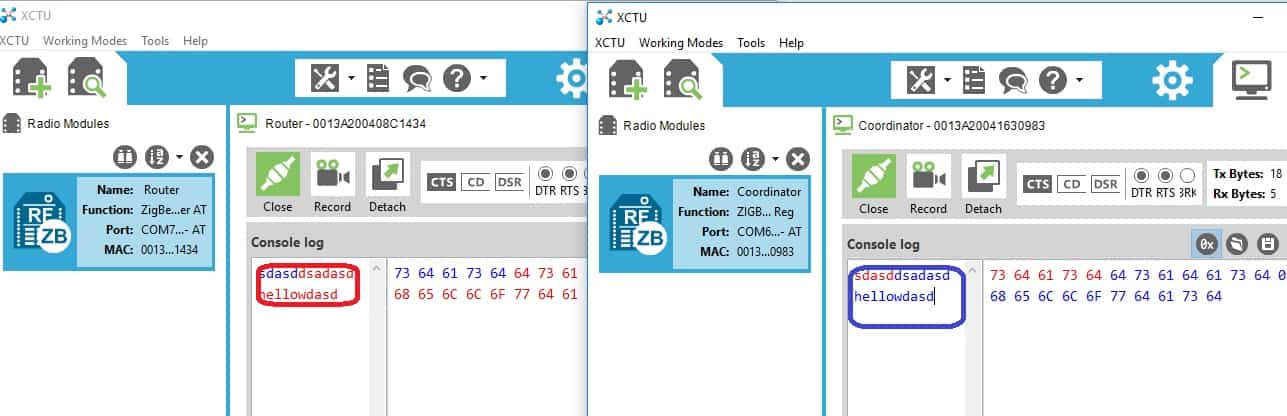
Now change to another X-CTU window, the Coordinator window, type some text… you will notice it will appear as red color text on the other window…. Two ways communication is done!
Hope this article help you, there might be some update from Digi International from time to time, please do feedback to us at the technical forum.
If you like to know how to enable XBee S2C to communicate with XBee S1, please email us at support@cytron.io