Introduction
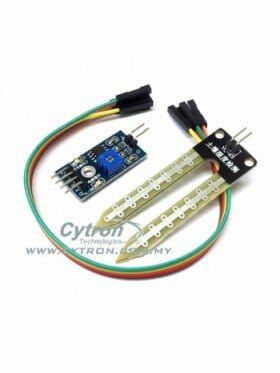
The Moisture sensor module (Product code: SN-MOISTURE-MOD) can be used to measure the moisture of the soil in order to control actuator, example a valve that control watering system. The moisture sensor module consist of two parts, that is the sensor probe and the module board. If you are interested with the specification of the sensor module, you can download the getting started guide of this moisture sensor module here.
In this tutorial, I am going to show you how to make a simple auto gardening system using the moisture sensor module.
Hardware required
Software required
Working Concept
The working principle of the system is very simple. The moisture sensor is use to measure the moisture of the soil and gives the result to Arduino (Analog Input). Then, Arduino is programmed to activate the watering system when the moisture of the soil become less than a certain level (value programmed by yourself). Activating the watering system is quite straight forward. Arduino will gives a HIGH signal to turn on solenoid through transistor. When the transistor closed, the solenoid will be activated and water starts to pour out :)
In normal condition, the solenoid will block water from flowing through it. When 12V is apply to it, the water will be able to flow through the solenoid. Thus, the moisture of the soil will increase, and when the moisture of the soil reaches certain level, Arduino will turn off the solenoid valve by changing the output pin to LOW. The cycle starts again when the moisture of the soil decrease to certain level.
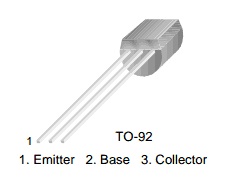
Do take note that Arduino pin does not have sufficient current and voltage to drive the solenoid valve and therefore a transistor is needed in between the solenoid and Arduino. Direct connection might also damage the Arduino pin due to over current. However, there are many ways to turn on the solenoid such as using MOSFET or relay. But in this tutorial, I will just use transistor.
Connection
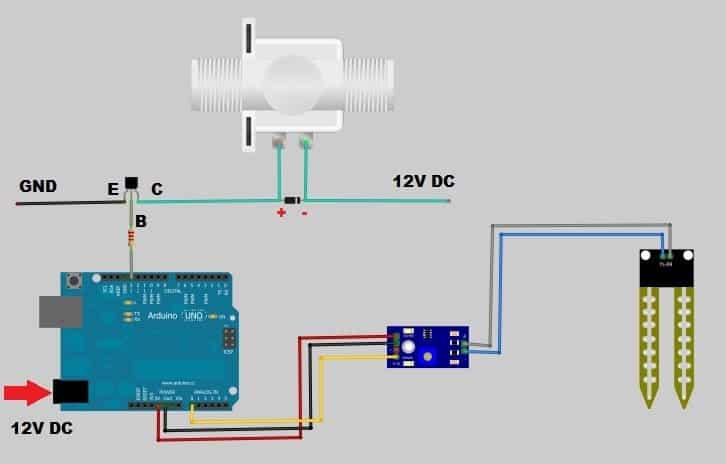
Basically, the connection is looks like this.
Program
[sourcecode language=”cpp” wraplines=”true”]
int sensorpin=A0; //setting the sensor pin
int outputpin=13; //setting the output pin
int moisture; //the variable to control

void setup(){
Serial.begin(9600); //must begin to use serial monitor
pinMode(sensorpin,INPUT); //setting sensor pin to be input
pinMode(outputpin,OUTPUT); //setting output pin to be output
}

void loop(){
moisture=analogRead(sensorpin); //read the value from sensor pin
Serial.println(moisture); //show the value receive in serial monitor

if(moisture<=600){ //the critical value to trigger the solenoid
digitalWrite(outputpin,LOW); //you can alternate it depends on yourself
}
else{
digitalWrite(outputpin,HIGH);
}

}[/sourcecode]
Precaution
- The Ground of 12V DC must be common with the Arduino’s ground.
- The polarity of the transistor, E to ground, C to solenoid.
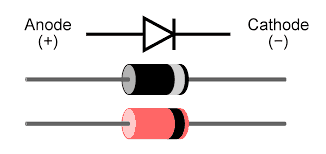
- The Cathode (negative) of the 1N4007 diode connect to the 12V DC and Anode (positive) to the transistor’s collector.
- The solenoid valve carried by Cytron is standard 3/4 Inches PVC type junction, they are not common GHT (garden hose thread). However, you can either get your own 12V DC solenoid valve with GHT or you can also get the adapter for the junction at the plumbing store.
[youtube https://www.youtube.com/watch?v=ntOz5rNB7I4]
BTW, do check out the video that explain how moisture sensor module works:
[youtube https://www.youtube.com/watch?v=O6W_dbIkkmE]
Attachment
 International
 Singapore
 Malaysia
 Thailand
 Vietnam