 International
 Singapore
 Malaysia
 Thailand
 Vietnam
Your shopping cart is empty!

Yes, XBee now comes with another model that supports WiFi connection, which is the new XBee-WiFi module. We are carrying it now. You can get it under the Wireless Devices -> WiFi category.
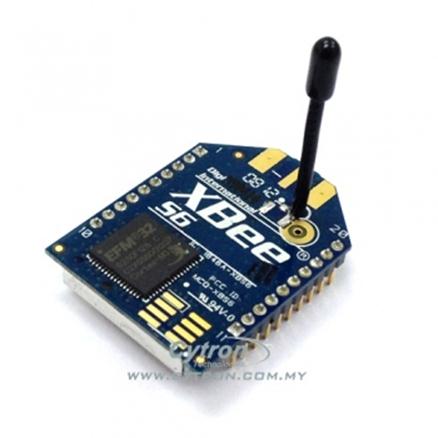
What is the purpose you get this module? Basically is to enable your microcontroller or system to be able to connect to a WiFi router for wireless communication. I am not yet studying the TCP/IP of this module, but basic communication via UART is possible. Do read the Product Manual before you decide to get one :)
The next question you will ask is, how can I interface with it? Let’s say you want to connect to a computer for configuration, fast test, and so forth. XBee Series 1(802.15.4) and Series 2(ZigBee), you can use our SKXBee. The XBee-WiFi module, you can also use, but little modification is needed.
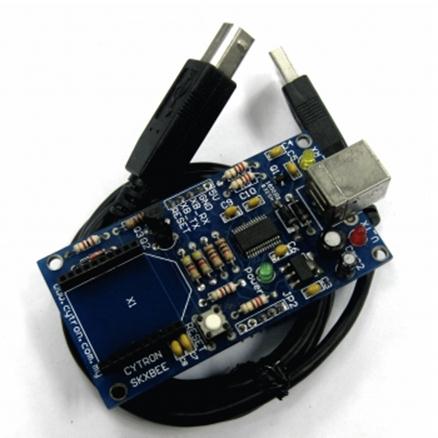
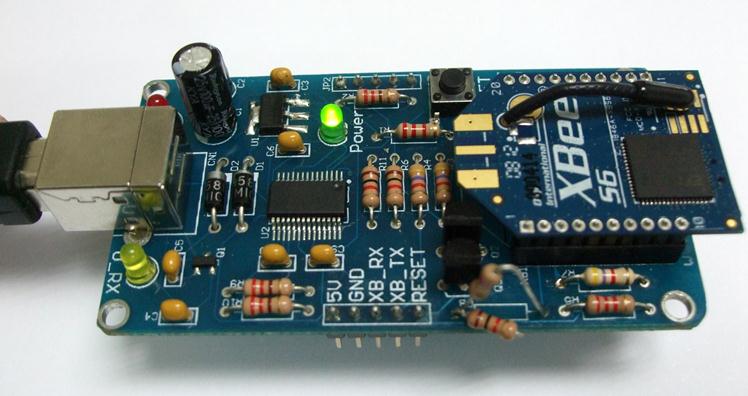
So let’s say you get SKXBee without module + XBee-WiFi module, and you want to connect it to a computer for fast testing and configuration. BTW, if you get the XBee-WiFi from Cytron Technologies, it is packaged with the XBee breakout board, please do not get yourself another Breakout Board.
You plug in the XBee-WiFi module onto SKXBee and connect it to the computer USB port.
And you cannot wait to test and configure it by referring to the Getting Started Manual from Digi International. You open X-CTU. Hey, I assume you have installed the SKXBee USB driver properly, OK? If not, please refer to the SKXBee User’s Manual.
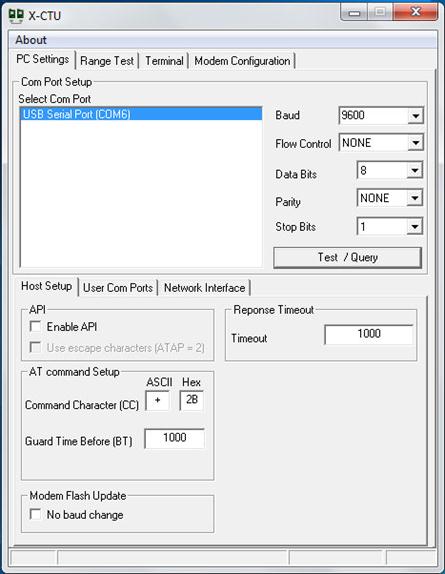
Make sure you select the correct USB Serial Port, I have only one :). Also please check the parameters:
- Baud: 9600
- Flow Control: NONE
- Data Bits: 8
- Parity: NONE
- Stop Bits: 1
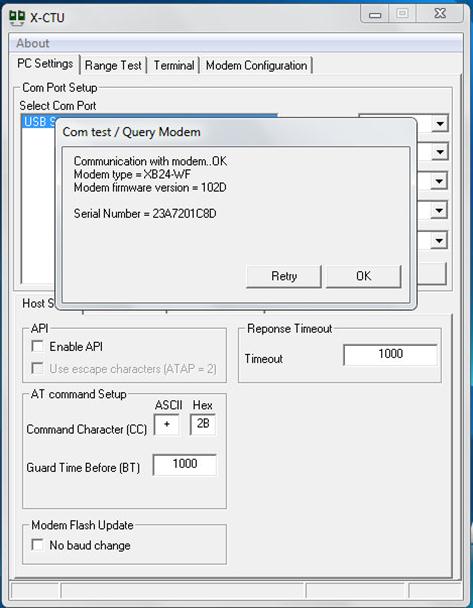
Click on the Test/Query button and you should get this:
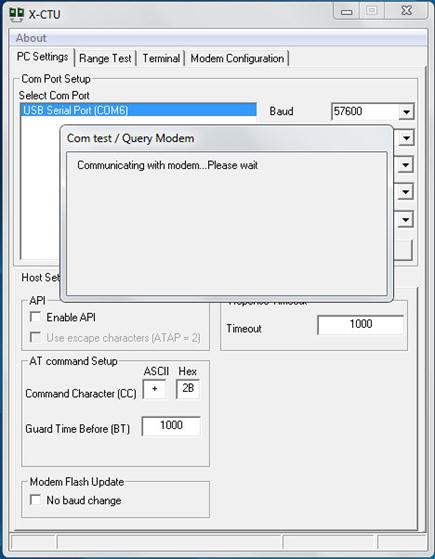
Yes, the X-CTU is communicating with the XBee-WiFi module on SKXBee, it will take a few seconds, up to 10 seconds. Finally, you get a message stating the Query is failed because there is no response from the XBee-WiFi.

Yup, that means the communication failed with the XBee-WiFi module. So what to do? Somehow, the XBee-WiFi module is designed to be pin-to-pin compatible with XBee series 1 and series 2. Not all pins, but the UART pins and power pins are compatible. Still, let’s check what differences I notice that might affect the communication on SKXBee.
- XBee-WiFi requires quite a high current during start-up, up to 760mA, but is a very short burst. So the filtering capacitor needs to be huge enough, or else it will be unstable. SKXBee comes with 100uF of E cap. That should be sufficient. Of course, you can always increase it by adding an extra capacitor.
- The XBee-WiFi can communicate with the host via 2 standard interfaces, UART and SPI. SKXBee uses UART which is the same as a serial PORT (COM), the problem is XBee series 1 and series 2 do not have these features. That affects the communication on SKXBee, at least this revision of SKXBee.
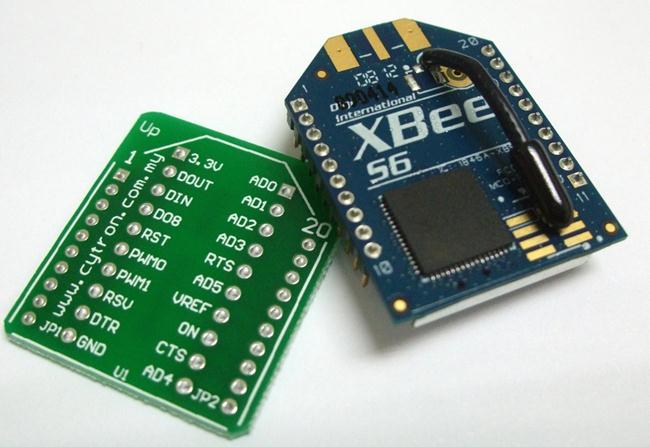
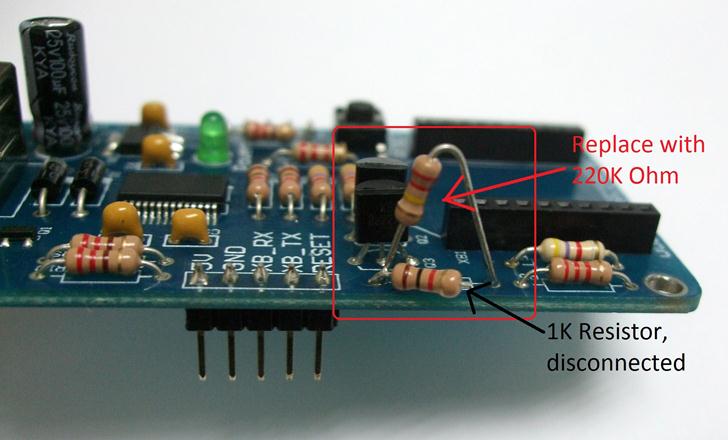
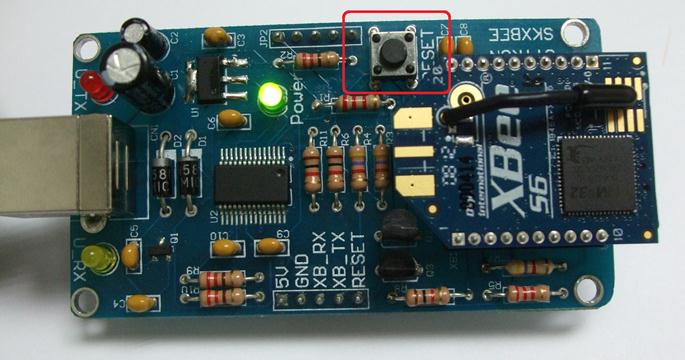
To overcome this problem, you need to change the R8 (resistor designator) on SKXBee. SKXBee comes with a 1K Ohm resistor at R8, you need to replace it with a 220K Ohm or higher (500K) resistor. Where the hell is this resistor?
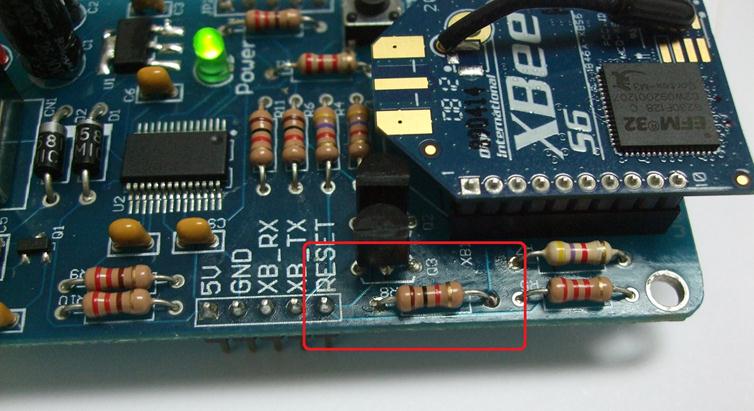
There, the R8 :), is between the RESET pin and the R5 resistor. You need to replace it with a 220K Ohm resistor. Easy way? Cut one of the leads to disconnect it, and solder a 220K Ohm resistor to replace it, just like this:
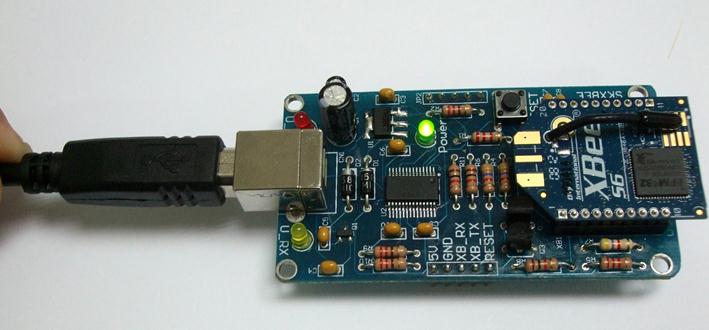
Now, plug back the XBee-WiFi into the modified SKXBee, please mind the polarity and pins, do not simply plug, it cost a lot.
Connect it to the computer USB port as you did earlier, open X-CTU, and click on Test/Query. This time, you should get results.
OK, let’s say you get a fail message again, check the baud rate and other parameters and press the reset button on SKXBee while everything is connected, and Test/Query again, you should be able to get it. We have verified that with 3 units of XBee-WiFi module and 5 units of SKXBee.
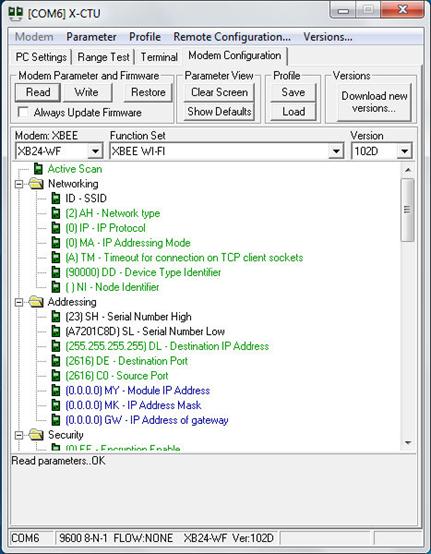
Once you get the Query result, you can proceed to configure it. Goto Modem Configuration Tab of X-CTU.
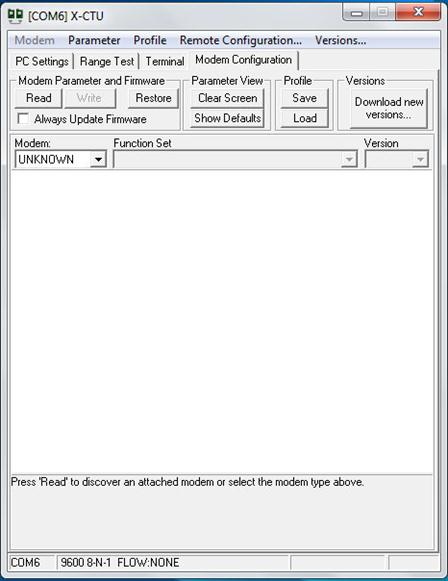
Click on the Read button. It will take a while (2 to 5 seconds) as X-CTU is reading the parameters from the XBee-WiFi module. It will display the parameters once it is done.
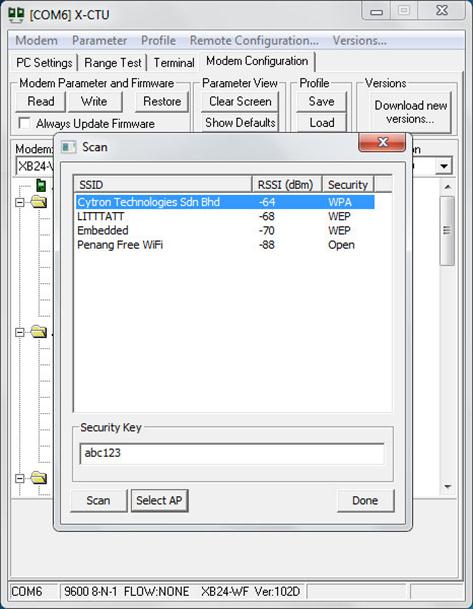
Click on Active Scan, you will see a “Scan” button beside it. Click it and a scan window will appears showing the available wireless network around the XBee-WiFi module. Click on the network you like to connect to and key in the password at the button. I will show the Cytron Technologies connection.
Then click on Select AP. The XBee-WiFi module will try to create a connection with the router with the password you give. If everything is correct, you will get an info window. While the XBee-WiFi module creates a connection, the LED (U-RX and U_TX) on SKXBee will always blink (fast) because the X-CTU is constantly requesting the progress from XBee-WiFi, so don’t be surprised.
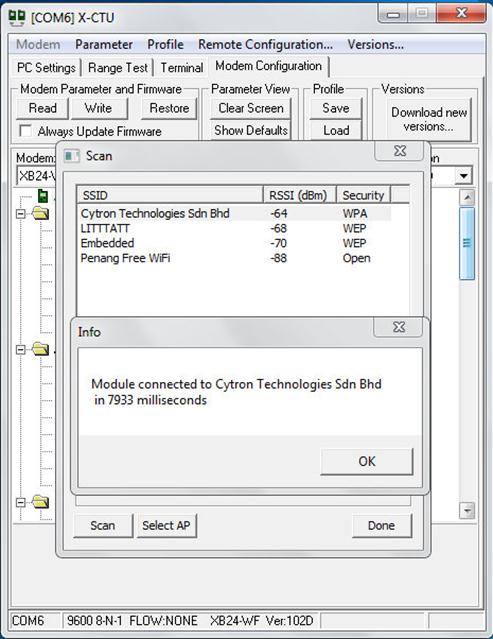
If the wireless connection to the router is successful, you will get an info window stating Module connected to Cytron Technologies Sdn Bhd in 7933 milliseconds. So my example takes around 8 seconds to set up the wireless connection, great! Now, click OK and Done. At the Modem Configuration window, click the Read button again and you should get this info:
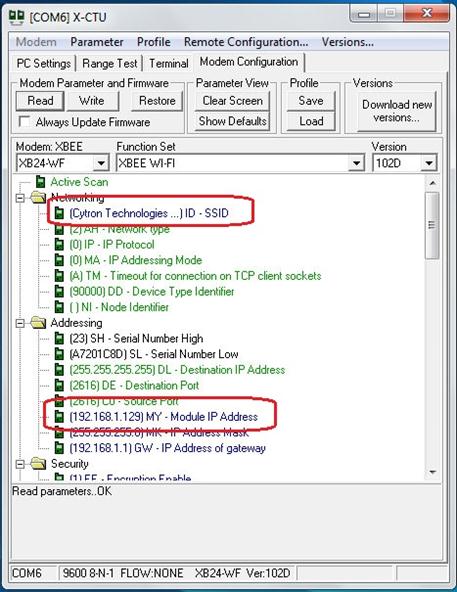
If you notice, your XBee-WiFi module is now connected to Cytron Technologies (or your preferred network) and the IP address is 192.168.1.129. This IP address is being assigned by the router.
I have yet to try any further applications and examples, but if you have 2 XBee-WiFi modules, you can do wireless communication as shown by the Getting Started Manual from Digi International. If you have a problem, please come to our technical forum for discussion, we seldom check the comment section on the tutorial site, sorry.
If you are using SKXBee Rev2.0 (Yet to launch by the time I write this), no modification is needed :) You might need to press the reset button a few times, that’s all. Also, FYI, there is LED for ASSOC, it will ON if the XBee-WiFi module is powered, when the WiFi network is established, the ASSO LED will blink to indicate the network has successfully joined.

Hope this tutorial helps you