Your shopping cart is empty!

CIKU + LCD Keypad Shield
- Idris Zainal Abidin
- 26 Aug 2014
- 413

HARDWARE
1. CIKU board (link).
2. USB MiniB Cable (2.0) (link).
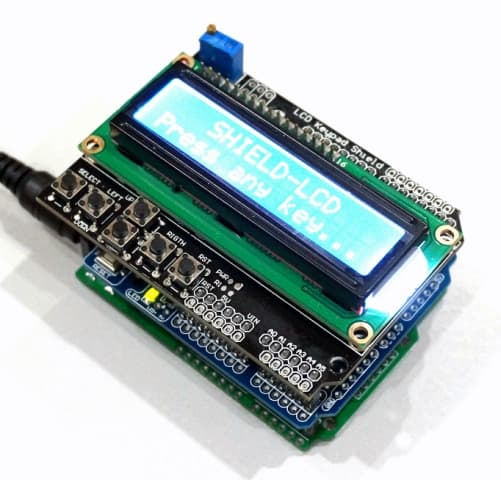
3. LCD Keypad Shield (link).
SOFTWARE
Please refer to “Getting Started with CIKU” tutorial.
CIKU LCD LIBRARY FUNCTION
Below is a list for basic LCD function that you can used with CIKU. You also can refer to the LiquidCrystal.h (under CIKU.X folder) for more lcd function.
void lcd_4bit(UINT8 rs, UINT8 enable,
UINT8 d0, UINT8 d1, UINT8 d2, UINT8 d3);

void lcd_8bit(UINT8 rs, UINT8 enable,
UINT8 d0, UINT8 d1, UINT8 d2, UINT8 d3,
UINT8 d4, UINT8 d5, UINT8 d6, UINT8 d7);

void lcd_begin(UINT8 cols, UINT lines);

void lcd_clear(void);

void lcd_home(void);

void lcd_setCursor(UINT8 col, UINT row);

void lcd_write(UINT8 value);

void lcd_printString(const char *s);

void lcd_printNumber(long n, UINT8 base);

void lcd_printFloat(double number, UINT8 point);
For more library reference, you can refer here.
USER CODE
This example code shows related function that you can used with LCD Keypad Shield. You also can see this code on User-ControlPanel.c file (under CIKU.X folder).
#include “Arduino.h”
#include “LiquidCrystal.h”

int key;
char flag = 1;
unsigned long previousMillis = 0;
int interval = 1000;

void setup()
{
pinMode(LED, OUTPUT); // LED on CIKU board
pinMode(A0, INPUT); // Button on LCD Keypad Shield

lcd_4bit(8, 9, 4, 5, 6, 7); // RS, E, D4, D5, D6, D7 and backlight is connected to pin 10
lcd_begin(16, 2);
lcd_printString(”   SHIELD-LCD   “);
lcd_setCursor(0, 2);
lcd_printString(“Press any key…”);

while(analogRead(A0) > 1000); // Wait until any button is pressed
lcd_setCursor(0, 2);
lcd_printString(“Button:         “);
}

void loop()
{
key = analogRead(A0);
if(key < 1000 && flag == 1)
{
flag = 0;
lcd_setCursor(7, 2);
if(key < 60) lcd_printString(“RIGHT    “); // If RIGHT button is pressed, display “RIGHT”
else if(key < 220) lcd_printString(“UP       “); // If UP button is pressed, display “UP”
else if(key < 390) lcd_printString(“DOWN     “); // If DOWN button is pressed, display “DOWN”
else if(key < 600) lcd_printString(“LEFT     “); // If LEFT button is pressed, display “LEFT”
else if(key < 870) lcd_printString(“SELECT   “); // If SELECT button is pressed, display “SELECT”   }   else if(key > 1000 && flag == 0) // If no button is being pressed, display blank
{
flag = 1;
lcd_setCursor(0, 2);
lcd_printString(“Button:         “);
}

unsigned long currentMillis = millis();
if(currentMillis – previousMillis > interval)
{
previousMillis = currentMillis;
digitalToggle(LED); // LED on CIKU board blink with 1 second interval
}
}
NOTE
If you want to compile the User-ControlPanel.c, under MPLAB X IDE, first please remove the User-Template.c (CIKU – Source Files – user). Right click on User-Template.c and select Remove From Project. Then, right click on user folder (CIKU – Source Files), choose Add Existing Item…, open User-ControlPanel.c, and proceed with Build Project.
 International
 Singapore
 Malaysia
 Thailand
 Vietnam