Your shopping cart is empty!

CuteDuino USB Tutorial
- Idris Zainal Abidin
- 15 May 2014
- 2504
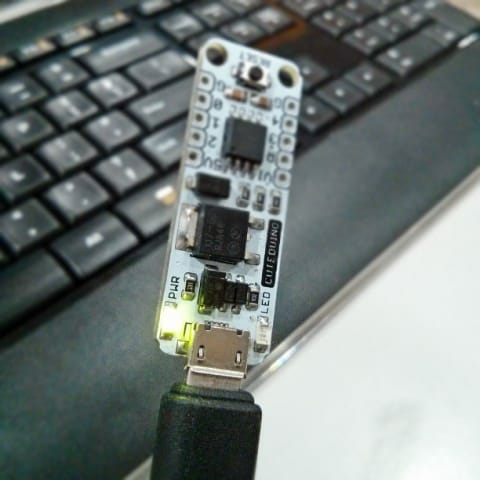
Recently Cytron have launch a new product called CuteDuino (RM25 only!). If you are new to this product, please read the CuteDuino User’s Manual first. For quick start guide video, please refer to this link. Since CuteDuino don’t have serial COM port (like Arduino Uno) or virtual COM port (like Arduino Leonardo) to act as monitor, this tutorial will guide you how to use USB as a monitor and control.

HARDWARE
1. CuteDuino (link).
2. USB Micro B Cable (link).
SOFTWARE
Modified Arduino IDE (by Digispark) and DigiUSB Programs.
USB DRIVER INSTALLATION
Before we proceed to USB driver installation, we need to program the CuteDuino with USB function.
*All this step have been record on the video
1. Connect USB Micro B cable to CuteDuino.
2. Open Arduino IDE and type this example code to the new sketch. Upload to the CuteDuino.
#include <DigiUSB.h>

#define led 1 // LED on CuteDuino connected to pin1

char inByte = 0;

void setup()
{
  pinMode(led, OUTPUT); // Set LED on CuteDuino as output
  DigiUSB.begin(); // USB begin
  DigiUSB.println(“USB ready”); // USB print
}

void loop()
{
  if (DigiUSB.available()) { // Incoming data from USB
    inByte = DigiUSB.read(); // Read incoming data from USB
    if(inByte == ‘0’) { // If data equal to ‘0’
      digitalWrite(led, LOW); // Turn OFF LED
      DigiUSB.println(“LED OFF”); // Print status to USB
    }
    else if (inByte == ‘1’) { // If data equal to ‘1’
      digitalWrite(led, HIGH); // Turn ON LED
      DigiUSB.println(“LED ON”); // Print status to USB
    }
  }
  DigiUSB.delay(10); // Refresh the usb port for 10ms
}
3. Go to DigiUSB Programs – DigiUSB Windows Driver and install “InstallDriver.exe“. Done Installation
4. Open Device Manager, and look for libusb-win32 Usb Devices – DigiUSB. USB driver installation is succeed.
5. Go to DigiUSB Programs and open digiusb.exe.
6. Type 1 (followed by enter) to turn ON the LED and Type 0 (followed by enter) to turn OFF the LED.
* If you are having problem with program loading, please check pin 3 and pin 4. Try avoid using it during program loading as it is shared with the USB pins.
 International
 Singapore
 Malaysia
 Thailand
 Vietnam